Team
To manage your work team, go to the section: Settings > General > Team.
The Team section is only visible to users with appropriate administrator permissions. Contact Customer Service for more details about this role.
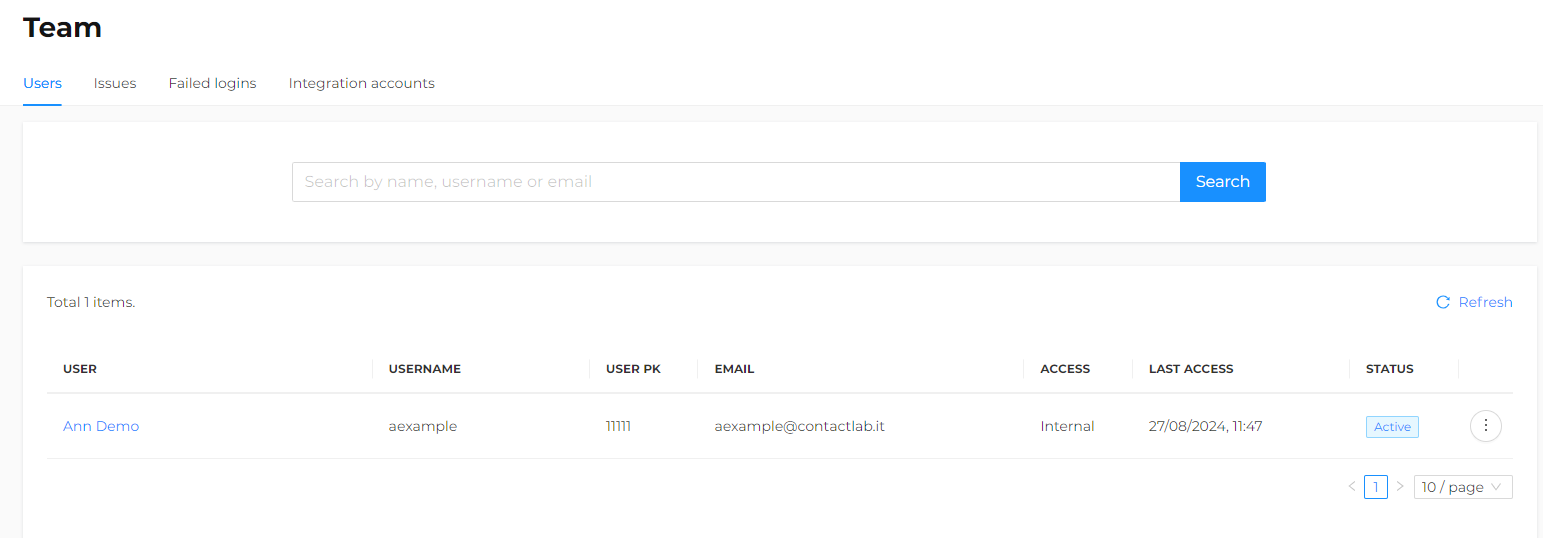
Upon entering the Team section, the Users page is automatically displayed.
The Team section shows:
- User details for the selected company.
- Information on any security issues related to the user.
- Failed login attempts.
- Any configured integration accounts.
- Reports available for download on users and permissions.
Users

In this section, a table listing all team members is available. The list includes all users who have access to the selected environment.
If a user is created under company X, they cannot be modified under company Y, even if they have access to both.
The Users page allows you to:
- Search for a user by name, email address, or username.
- Add a new user along with their permissions and roles.
- Check the Status of a user account.
- Edit certain user details.
- Reset a user’s PIN and password.
- Suspend a user.
You cannot reset your own PIN or password, only the PIN or password of a user created within the company for which you have administrator permissions.
An administrator can always view the details of any user in the list.
Create a new user
To create a new user, click the Create button and fill in the mandatory fields:
- Username: the user’s login name. It should not contain spaces or special characters.
- First name
- Last name
- Gender
- Language
Then proceed to the Permissions section and define the level of permissions to be assigned to the user for each module of the platform: Segments/Plans, Customers, Automations, Send.
Assign only the permissions for the active modules that the user needs to access.
Below is a brief explanation for each set of permissions.
SEGMENTS/PLANS
- ADMIN: full permissions;
- POWER USER: can only modify plans they have created, limited access to Settings they do not have access to all Settings, but only to some (e.g., fields setting, local settings, DND policy);
- USER: can only modify elements they have created (segments and plans), no access to Settings;
- GUEST: read-only access.
CUSTOMERS
- ADMIN: full permissions;
- USER: the user must be associated with a node, otherwise, they cannot access it. Read and write access depends on the permission level at the node, no access to Settings;
- GUEST: the user must be associated with a node, otherwise, they cannot access it. They will only see the following sections: Client Summary, Event Summary, Event KPIs, Data Monitoring, but not the Client List.
AUTOMATIONS
- ADMIN: full permissions;
- USER: can only modify elements they have created;
- GUEST: read-only access.
SEND
- DEFAULT: full permissions;
- NO COMMUNICATION: Communicate area is disabled;
- STATS ONLY: access only to the Monitor area and statistics.
Edit user details
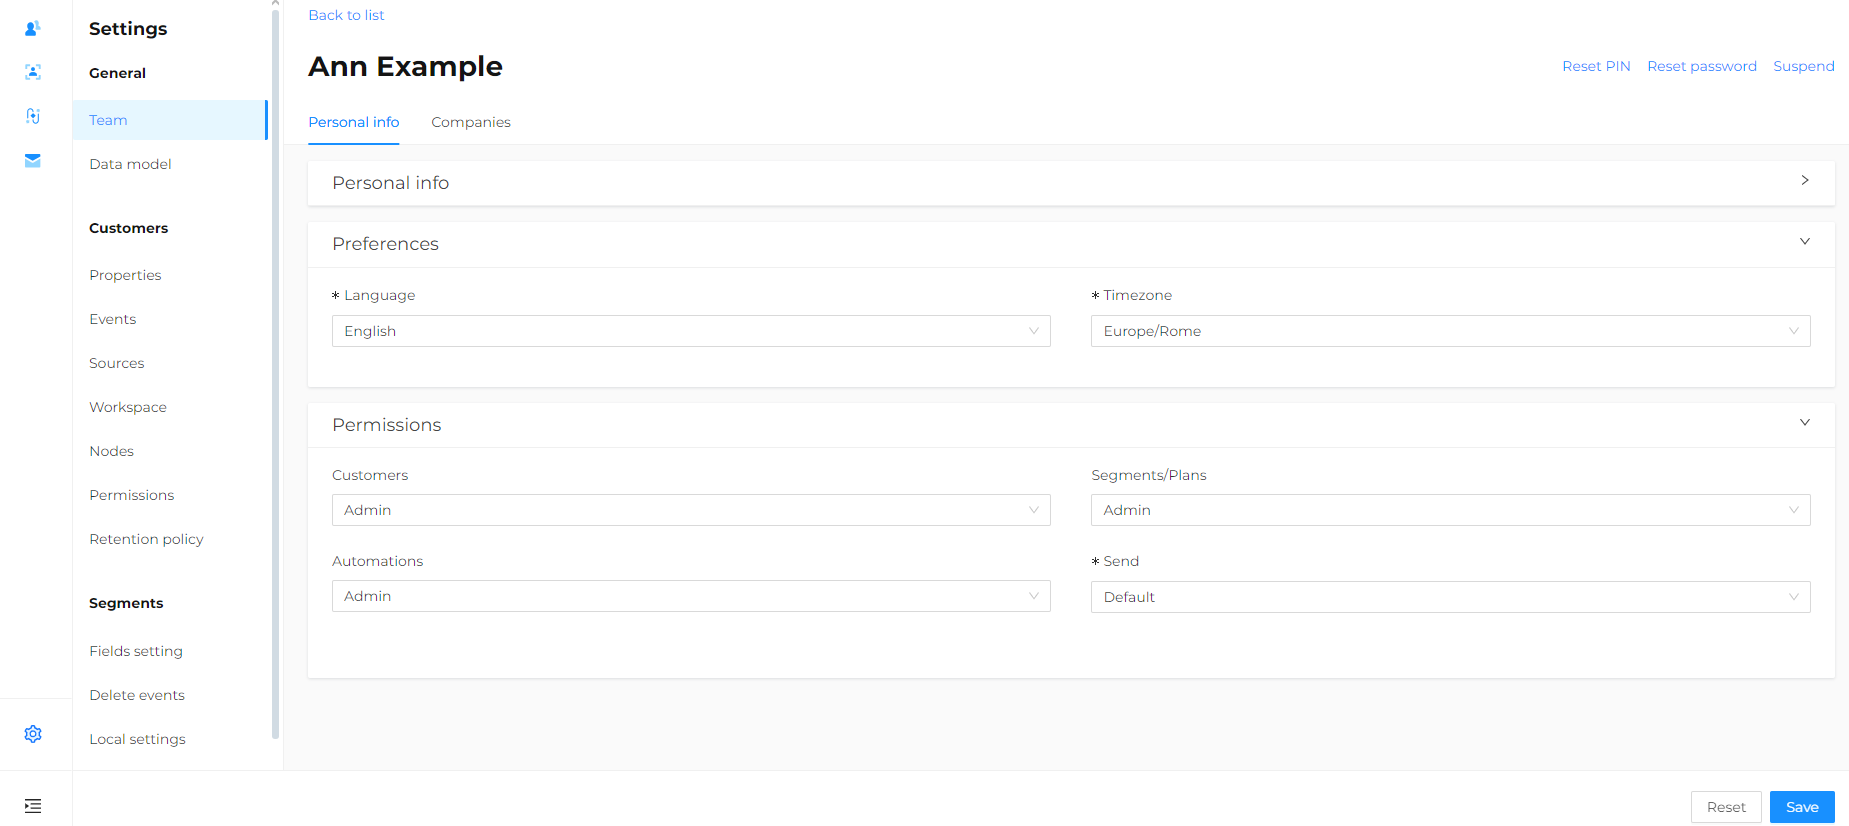
Once you’ve found the user you want to modify, hover over the three dots icon on the right and click Edit.

In the Personal info tab, you can modify:
- Some personal information such as name, birth date, mobile, etc.
However, you cannot change the username and/or email address. - Preferences such as language and time zone.
- Permissions, which are the level of authorization the user should have for the platform’s different functionalities.
In the Companies tab, you can:
- View the companies associated with the user.
- Add new companies that already exist on the platform to the selected user.
Remember to click Apply to save the changes. - Remove the user from a specific company by clicking Delete.
Reset a user’s PIN
To reset the PIN in the Team > Users section, proceed as follows:
- Find the user you are interested in, click the three dots icon on the right, and then click Reset PIN.
- The current PIN will be invalidated, and a new PIN will be generated and sent to the user via email.
Alternatively, find the user, select Edit > Reset PIN.
Reset a user’s Password
To reset a user’s password, follow these steps:
- Find the user you are interested in, click the three dots icon on the right, and then click Reset Password.
- The current password will be invalidated, and a temporary new password will be generated and sent to the user via email. The user will then need to enter a new password upon their next login.
Alternatively, find the user, select Edit > Reset Password.
Suspend a user
To suspend a user, follow these steps:
- Find the user you are interested in, click the three dots icon on the right, and then click Suspend.
- Confirm the action.
The user will not be permanently deleted; to reactivate them, simply click the three dots icon again and then click Reactivate.
Alternatively, find the user, select Edit > Suspend. Follow the same procedure for reactivation if needed.
Issues
The Issues page displays a read-only list of security problems related to all team users. There are three categories of issues:
- Not Active: user accounts with an inactive PIN.
- Blocked: user accounts with an expired password.
- Suspended: inactive user accounts that can potentially be reactivated by the platform administrator.
Failed Logins
The Failed Logins page lists all unsuccessful login attempts by each user, along with details such as time, operating system, browser, etc.
Application Accounts
This page shows any configured application accounts.
These are typically used for integrations via API and other purposes.
Here, you can retrieve the reference username and UID.
Reports
While navigating the section, the buttons to download reports in *.CSV format remain available in the top right corner. These reports include a list of active user accounts for the company or a first-level child company at the time of generation:
- Users Report: a list of active users with access to the platform.
- Permissions Report: details of permissions for active users with access to the platform.
