Configuration
To use custom audiences or lead ads, you need to connect at least one Facebook Ads Account to the Contactsend platform; you can configure and connect up to 10 different Facebook Ads Accounts. The configuration section is accessible via Configure > Integrations > Facebook.

The configuration must be done for each individual Facebook Ads Account, and it won't be necessary to repeat it when uploading users to the custom audiences.
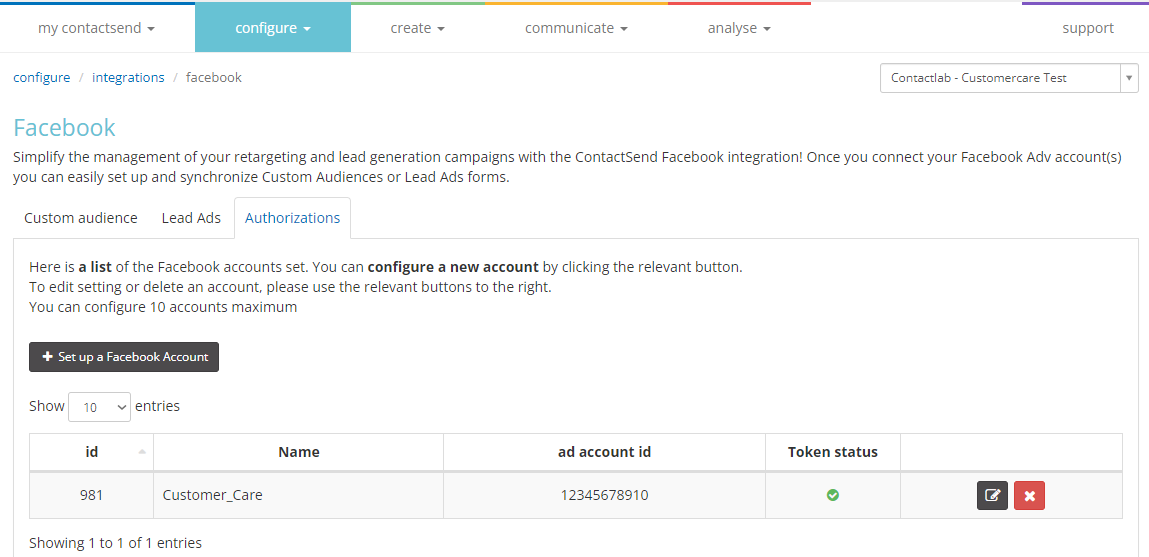
Once you are on the Facebook integration screen, click on the Permissions tab. You will see the list of already configured Facebook Ads Accounts; for the first activation, this list will be empty.
To proceed with the configuration of a new account, click the + Set up a Facebook Account button.

The required data for the configuration are:
- Name: a descriptive name for the Facebook Ads Account
- Ads Account ID: the numeric ID of the Facebook Ads account
After entering this information, you can request the access token, which will be automatically retrieved, by clicking Continue with Facebook.

By requesting the access token, Facebook will ask the user to grant Contactsend privileges to access the Ads account: this privilege is necessary to create and upload users to custom audiences.
The access token will be linked to the Facebook account used. You must log in with a Business Tools Administrator Facebook account that has access to the Facebook Business Manager and full control over the ad account and relevant pages where contact acquisition and/or custom audience campaigns will be activated. Do not log in with a personal Facebook account.
Once the access token is obtained, click the save button. The configured account will be visible on the main Facebook integration screen, where it will be possible to modify, delete, or view information related to that Ads Account.
After connecting to your Facebook ad account, you will be able to integrate Contactsend with features such as custom audiences and lead ads.
Custom Audience
You can use a database in Contactsend or part of it (filter) to create a new custom audience on Facebook or to feed an existing one. This can also be done within the database management panel (area Configure > User DB) under custom audience.
In the area Configure > Integrations > Facebook > Custom Audience, the existing synchronizations between Contactsend and Facebook custom audiences will be visible.
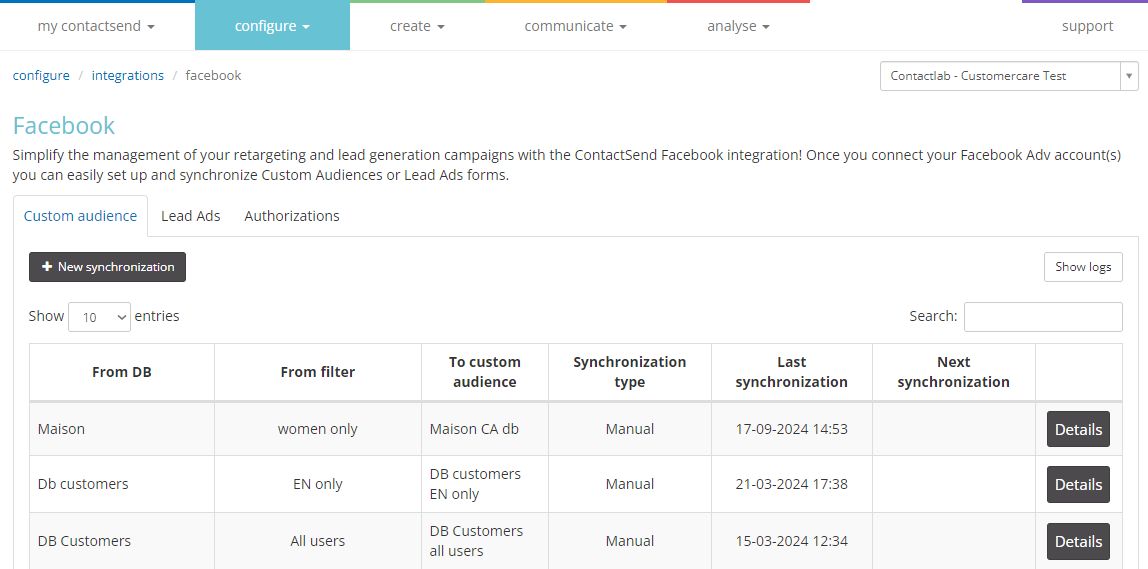
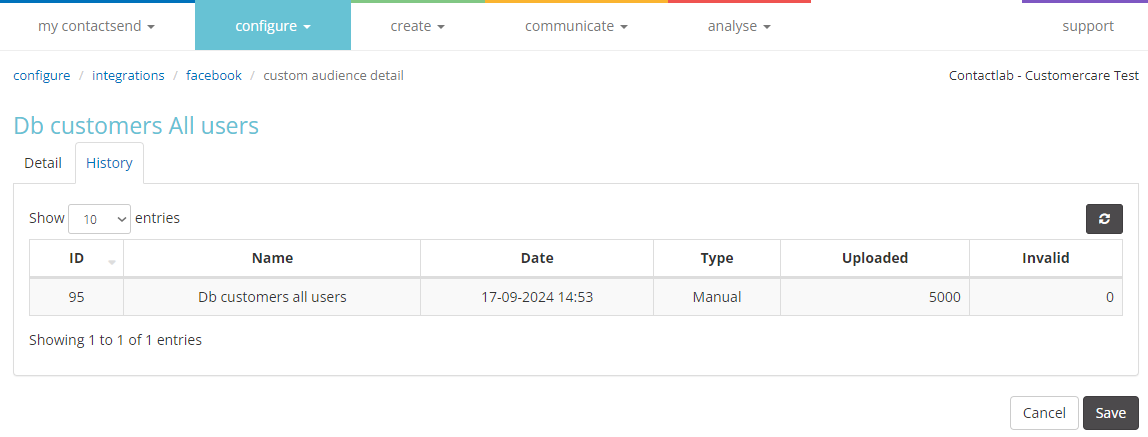
By clicking on Details, you will be able to see the history of synchronizations, including the date and the number of uploaded users.
To create a new custom audience, click + new synchronization, search for the desired database, select it, and click next.
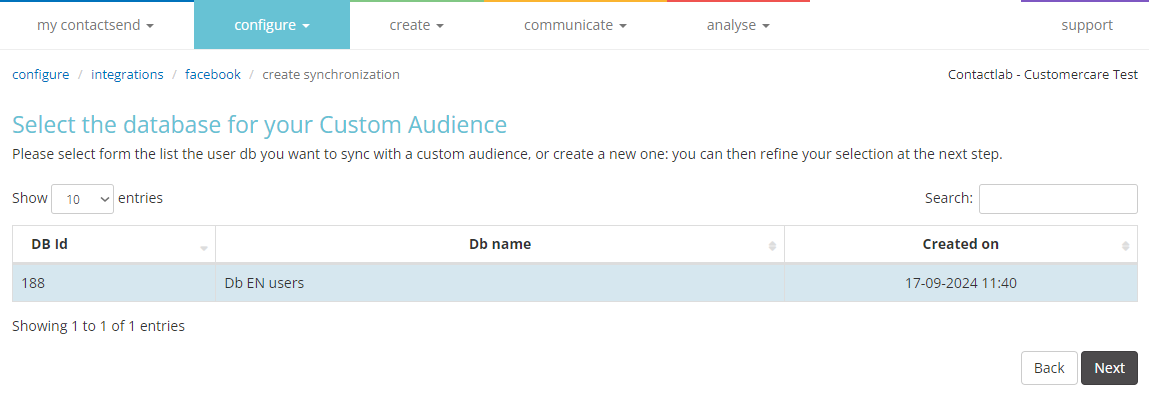
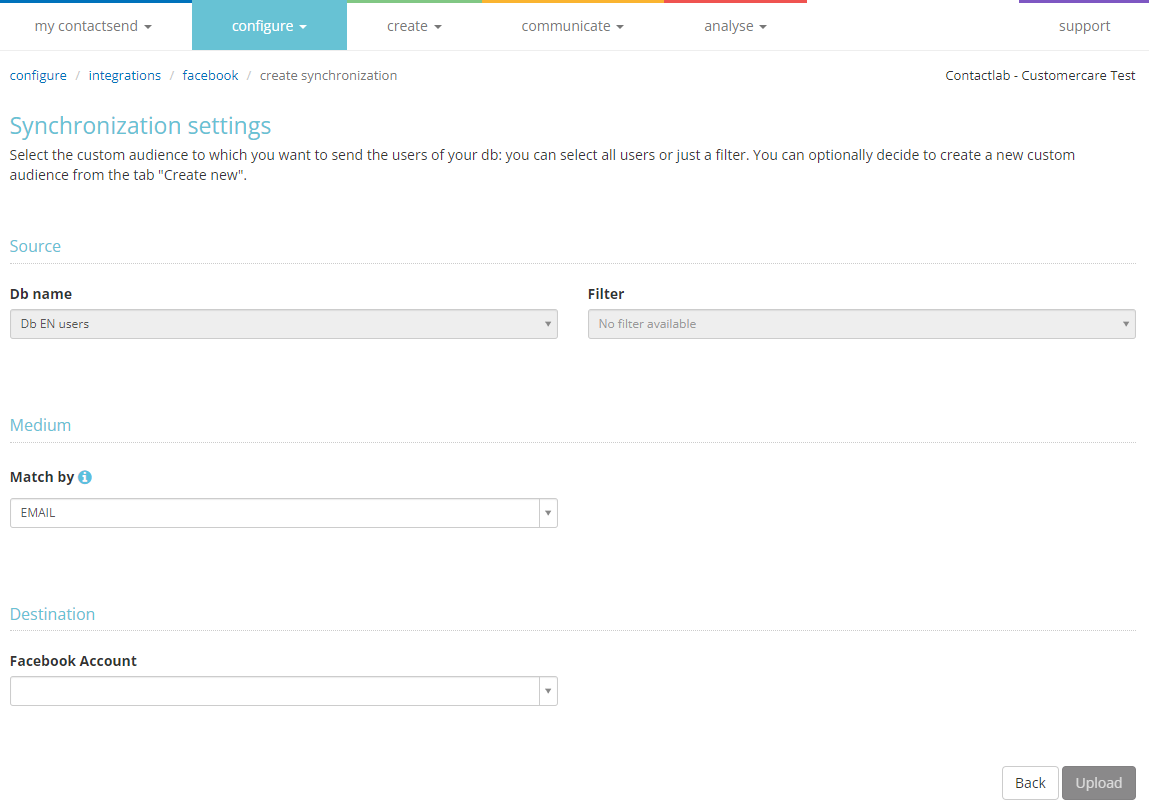
Define:
- Source: name of the database (previously selected) and any filter or All users.
- Medium: whether to match by email or phone number.
- Destination: select the previously configured Facebook account.
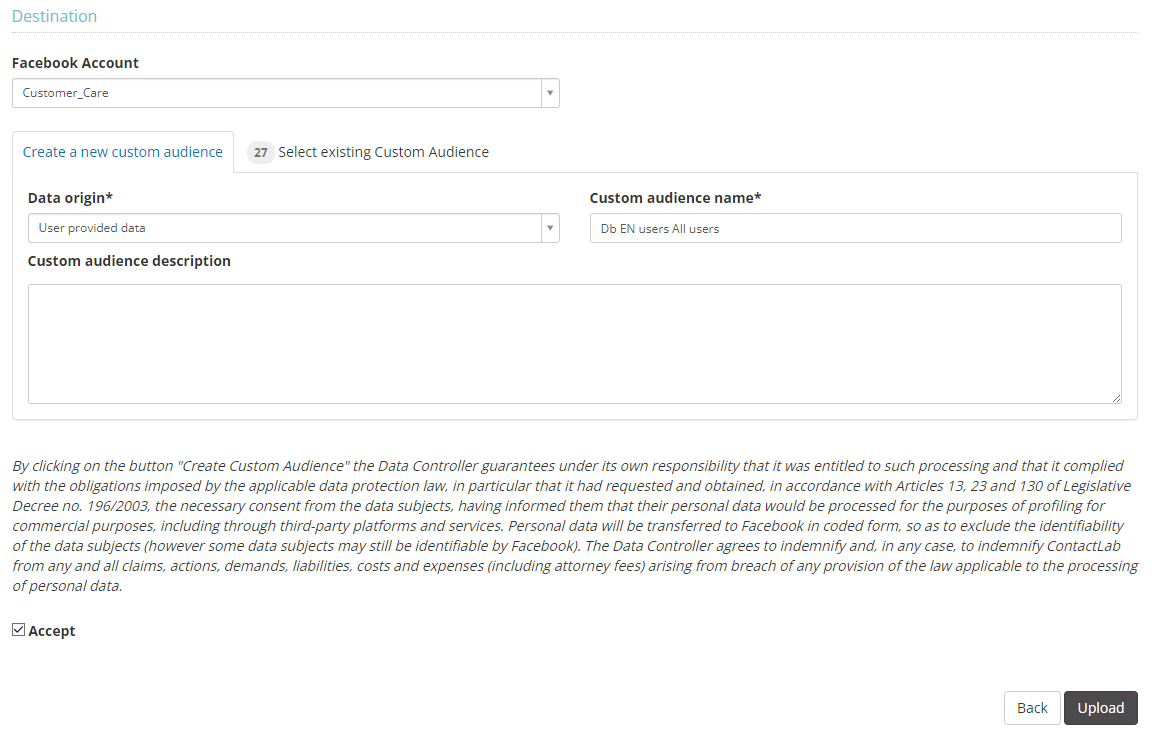
Then create a new Custom Audience (alternatively, you can select an existing one from the second tab) and specify the data source (e.g., Data provided directly by users), enter a description, accept the conditions, and click Upload.
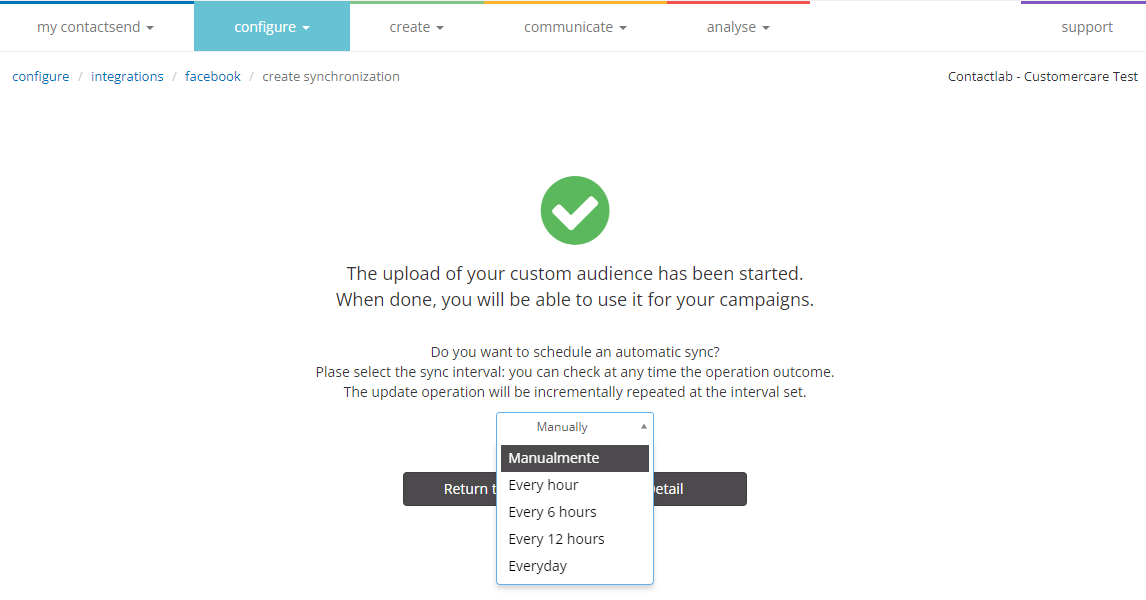
Optionally, you can schedule an automatic update with incremental uploads.
Check directly on Facebook Business Suite Ads Manager for the correct upload of the data.
Lead Ads
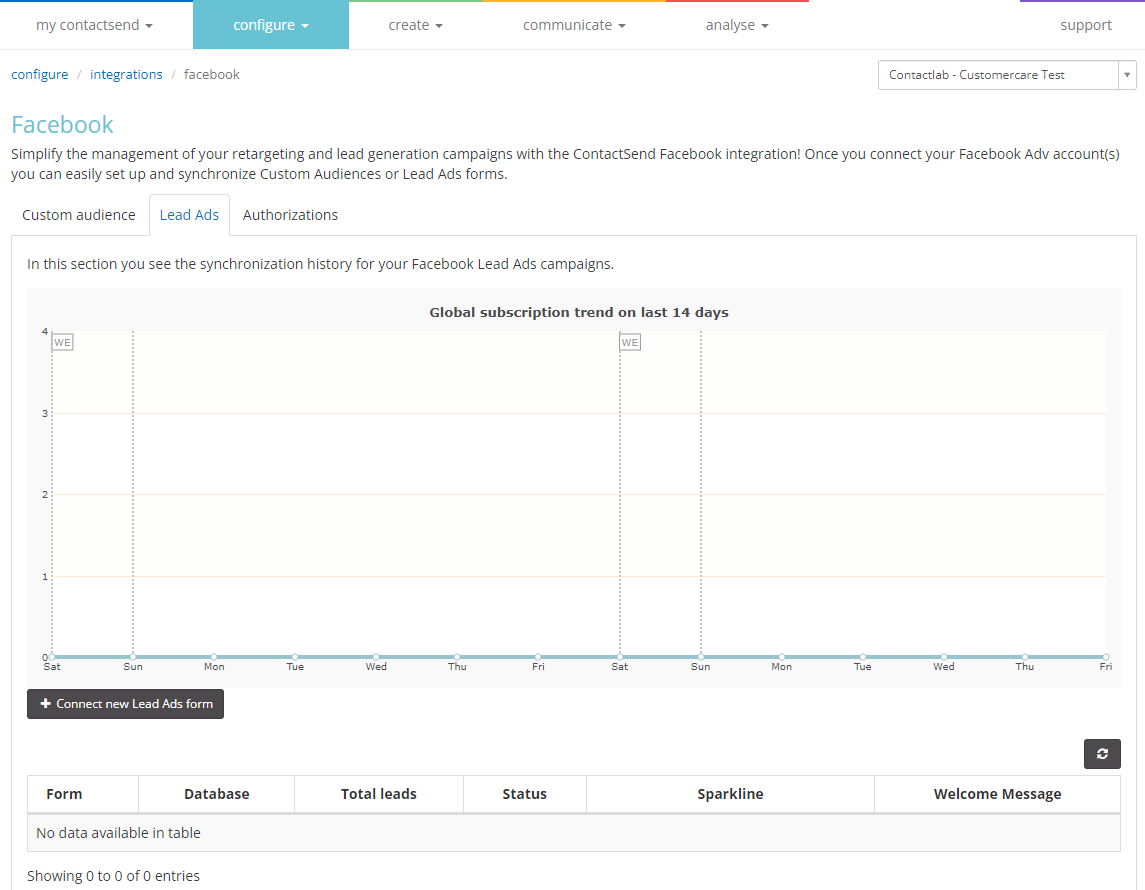
Contactsend integrates with Facebook Lead Ads for contact acquisition. The integration can be configured in the section Configure > Integrations > Facebook > Lead Ads.
The forms must already be created using Facebook tools.
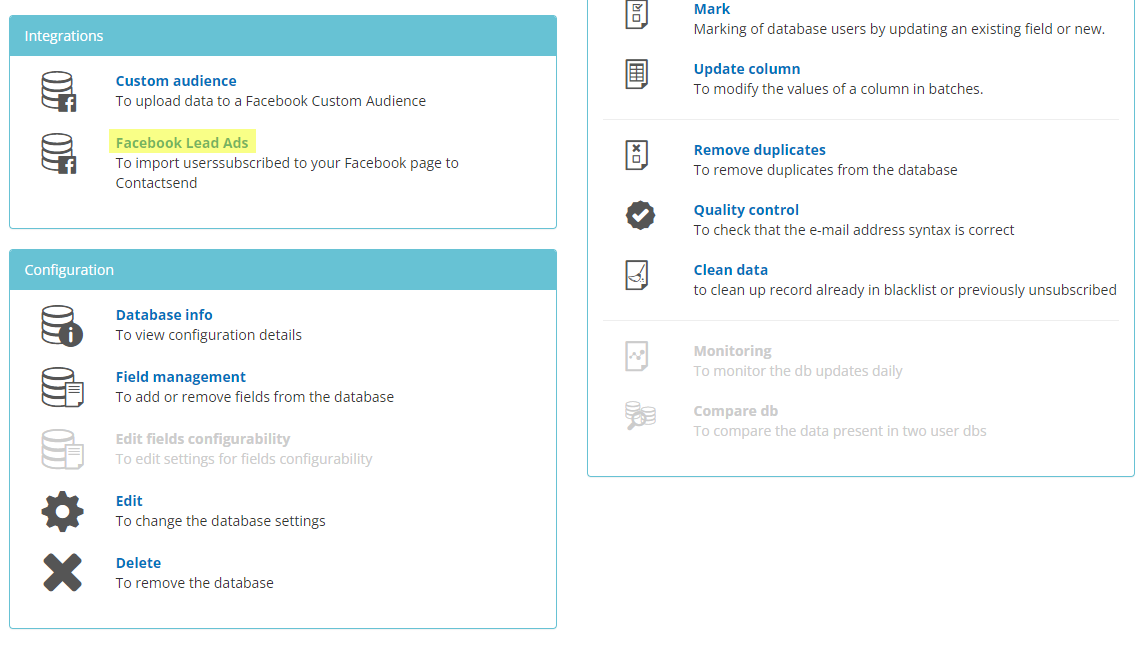
To link a new form to an existing database, go to Configure > User DB, and click Facebook Lead Ads.
Click + Connect new Lead Ads form.
In the next step, fill out all the required fields:
- Facebook Integration: select the configured Facebook integration from the drop-down menu.
- Facebook Pages: select the Facebook page to integrate from the drop-down menu.
- Form: click on the form you want to use.
- Fields: associate the Facebook form fields you want to include with the user database fields and the optional metadata (adgroup_id, ad_id, created_time, leadgen_id, page_id, form_id).
- Source Identifier: to mark each registration coming from a specific form with a constant value that will be inserted into a dedicated field in the database (Tag). By default, the form ID is used.
- Any configured subscription system in Contactlab.
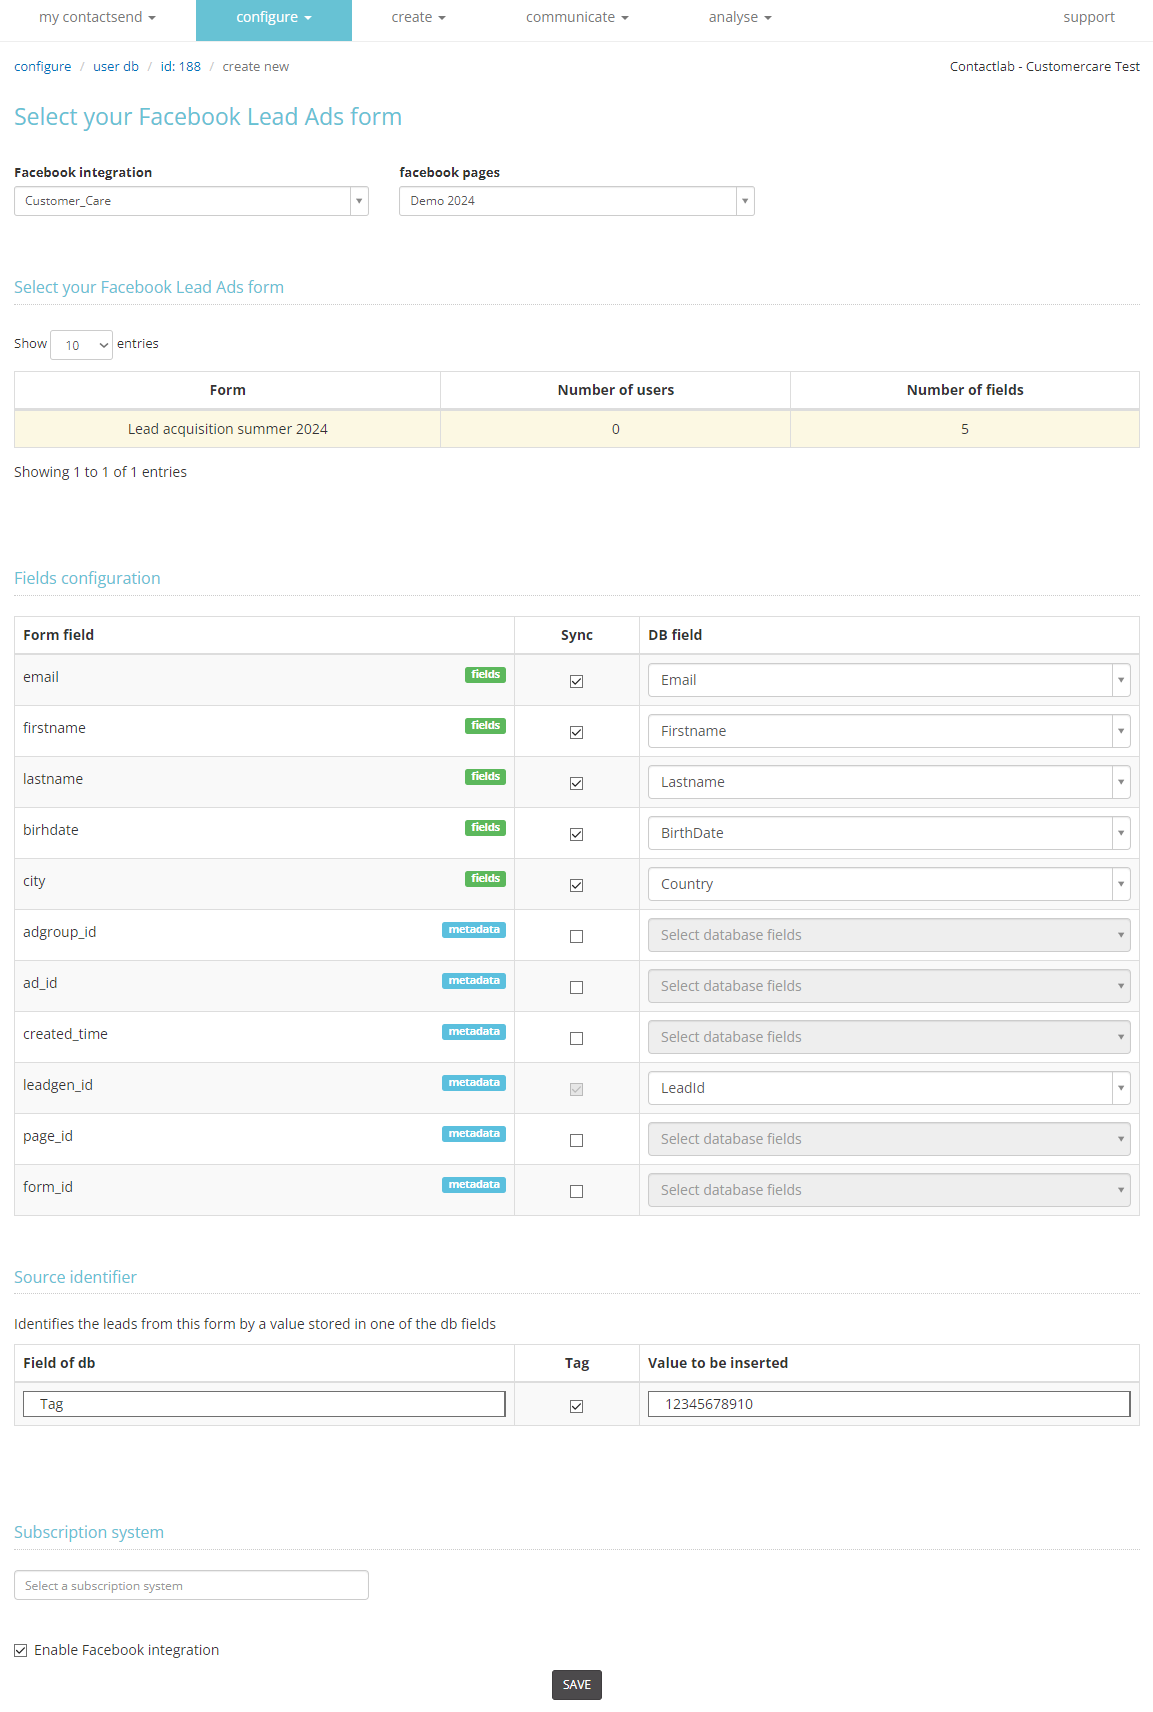
Among the various fields is leadgen_id. This is a mandatory field that cannot be deselected. It is therefore necessary to provide a column in the database where the system can write this value.
Finally, select Enable Facebook integration and save the changes.
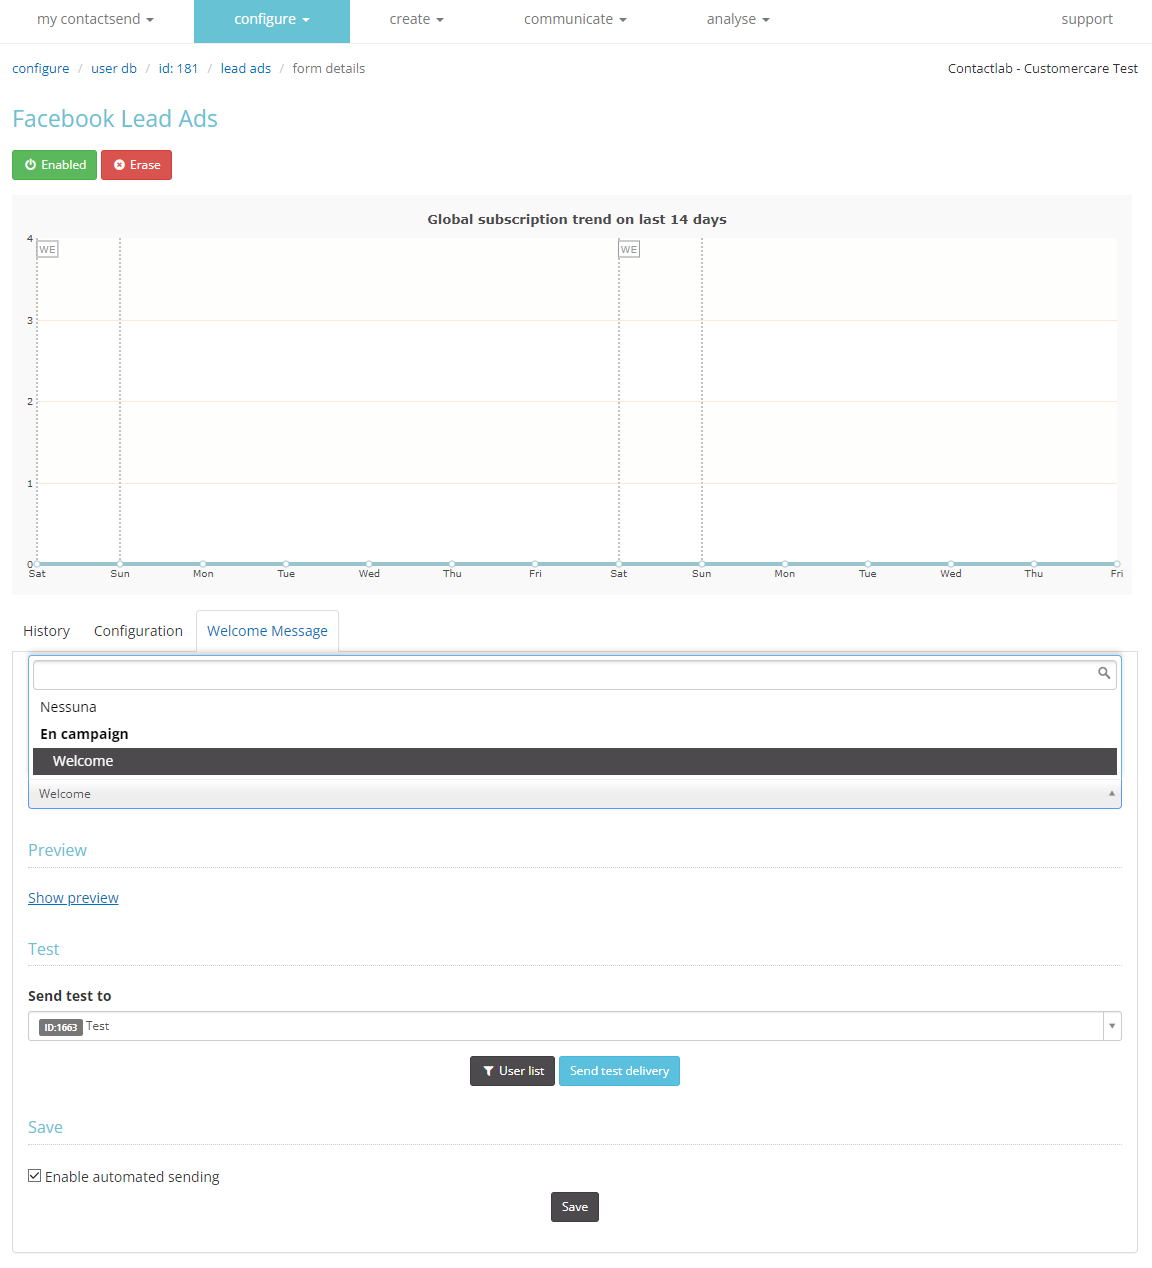
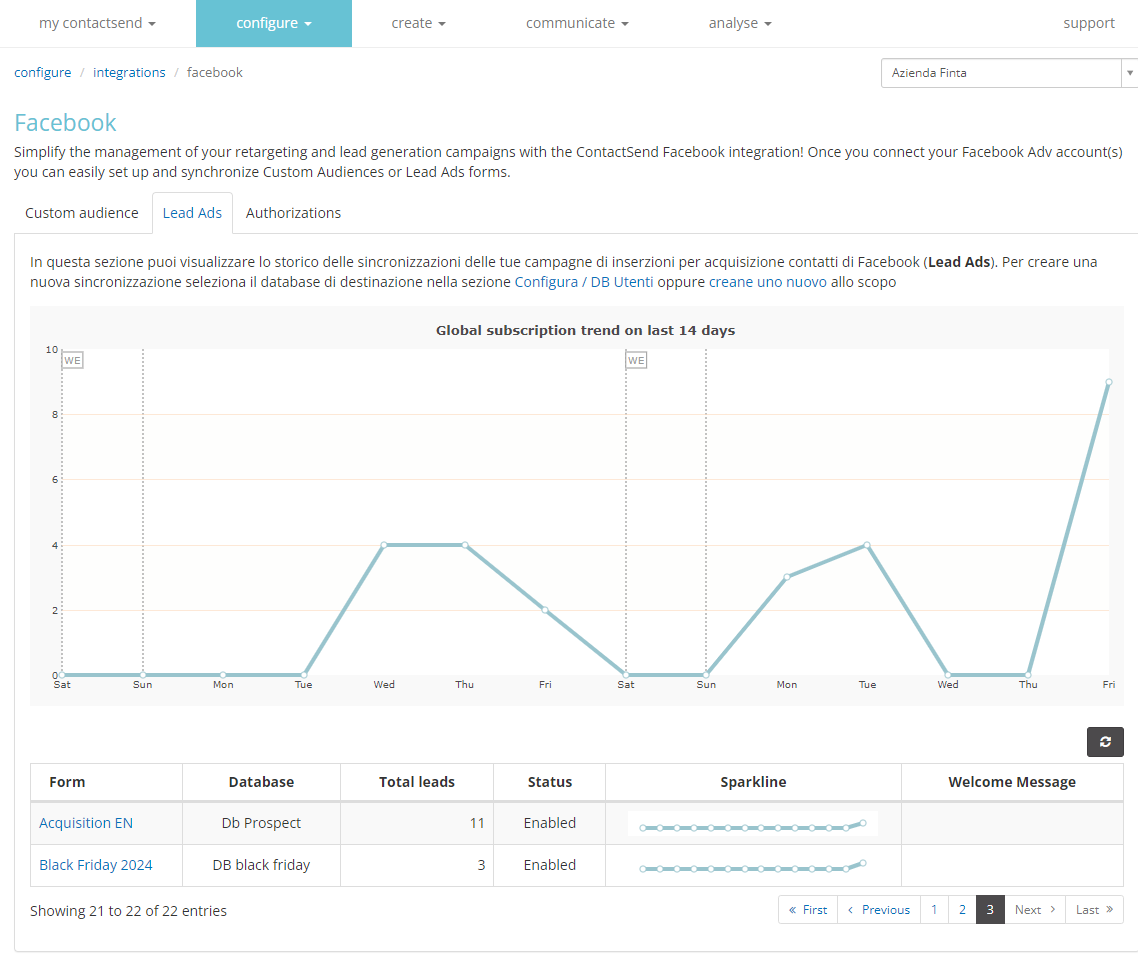
A chart showing the overall progress of registrations in the last 14 days will always be visible.
Welcome message for Facebook Lead Ads
Once a database is connected to a form, you can also set up an automatic welcome message for each new contact (managed through Contactsend's “ImmediateMessage” system). Here's how:
-
Access the area Configure > Integrations > Facebook > Lead Ads, where all active integrations with your Facebook accounts will be available.
-
Choose the integration on which to activate the Welcome Message and click on its name.
-
Enable the message sending function by clicking on the welcome message tab, select the immediate message delivery from the drop-down menu (which must already be created, see on-demand delivery section).
-
A test delivery can be sent by selecting the related filter.
-
Finally, click save.
