Platform tools
In Send and Plan, there are several tools that help maintain a clean list and good deliverability.
Send
Configure > User DB > Tools
In the database management dashboard, there are several tools to help keep the list clean:

- Remove duplicates: This tool removes any duplicate email addresses from the database, i.e., different records containing the same email address.
- Quality control: This function checks that the email addresses entered into the database are correct, first by verifying that the syntax is valid (username@domain.com) and then by checking that the domain actually exists and is reachable.
- Clean data: This allows for the physical removal of addresses that are blacklisted or have unsubscribed via the Contactsend link. If you choose to remove unsubscribed addresses, the system will delete any address that has unsubscribed (from any unsubscription system, across any email group).
Detailed instructions can be found on this page of the guide.
The system cannot intercept potential spamtraps, as they are syntactically correct and often belong to real, existing domains. Therefore, it is important to follow best practices to avoid adding them to the database.
Create > Email Campaign
During the creation of the delivery, the platform displays the active DKIM on the specific workspace, so you can verify that an authenticated sender is being used:

This is only a non-blocking alert. If a domain without DKIM configuration is entered, the platform will not block the continuation of the creation process. Therefore, it's important to pay attention.
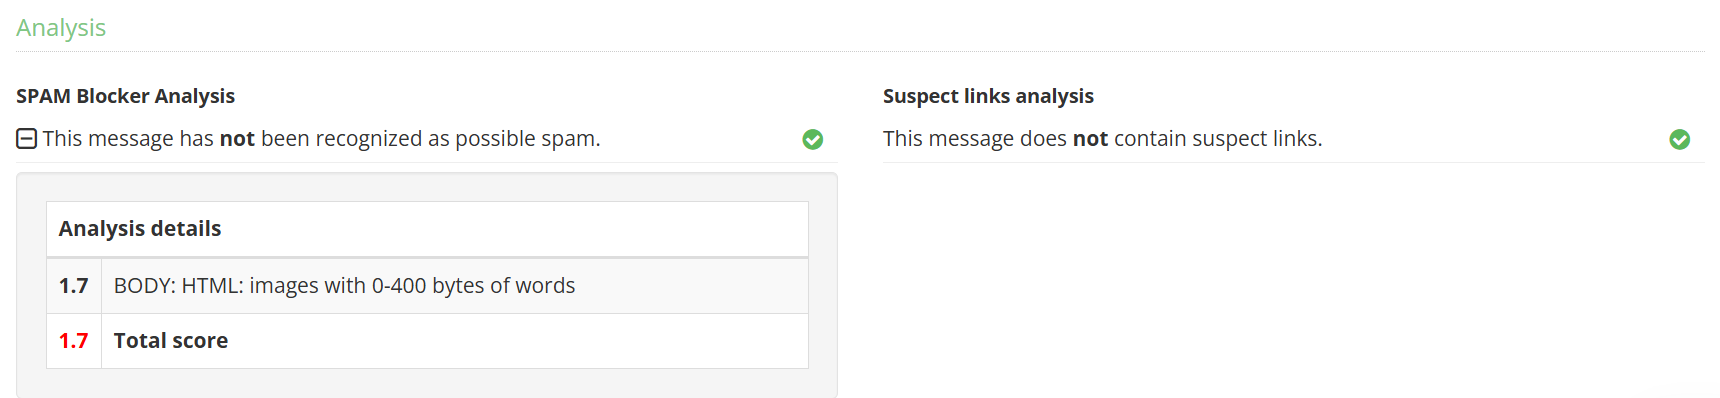
At the final step of creating an email, there are two useful tools for checking the content and the domains used in the links:
-
Spam blocker analysis: In this section, a score is assigned to the message based on its content. If the score is greater than 5, a spam warning will be triggered. The box will show individual scores for each detected issue, so you can take corrective action (e.g., too many images in relation to text, missing or incorrect alt text, etc.). However, this is a non-blocking alert.
-
Suspect links analysis: This step checks for any links pointing to domains listed on some of the main public blocklists (especially SURBL and Spamhaus, of which Contactsend is a client for real-time data feeds), a private Contactsend blacklist, or links containing the IP address instead of the textual URL. The check on links to domains listed on Spamhaus or Surbl is blocking (so if not corrected, you won’t be able to proceed).
Analyse > Blacklist
In this section, you can view and download all the addresses added to the blacklist, along with their insertion date and reason:
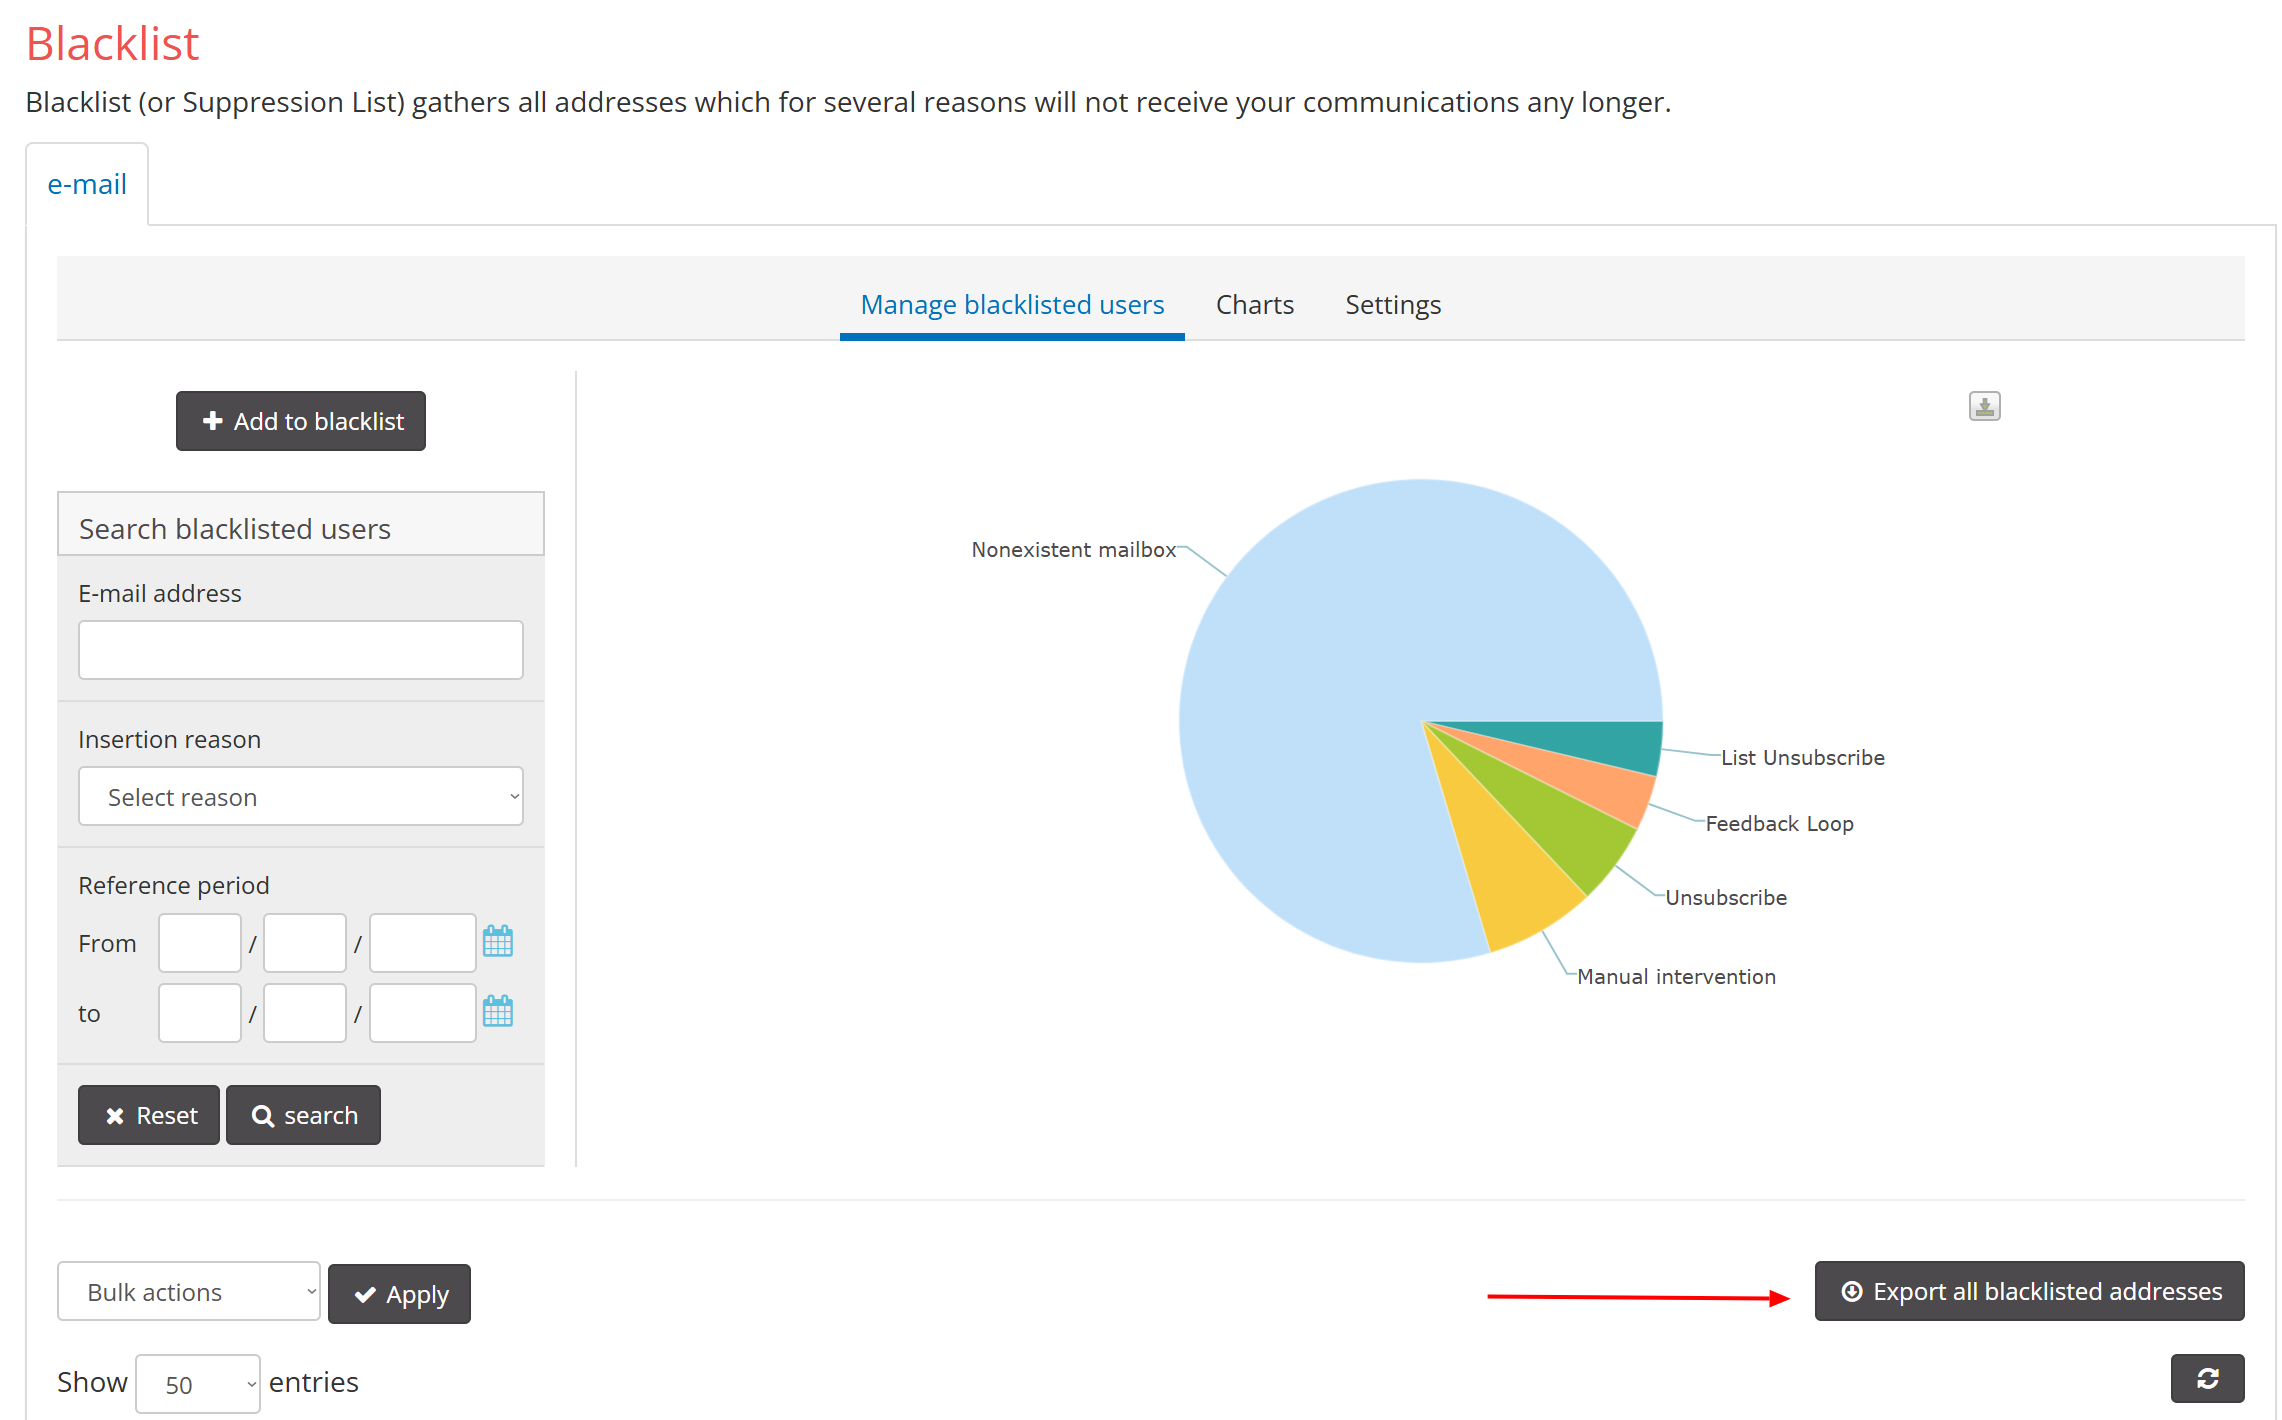
For more details on how the blacklist works and the reasons for inclusion, refer to this page in the guide.
Analyse > Trend for recipient domains
This page allows you to track the overall performance of deliveries to individual domains.
The graphs display trends for events such as bounces and opens on individual or all domains, allowing you to spot sudden drops in open rates (which may indicate an increase in delivery to Spam) or any increases in bounces.

For more details on the table entries, refer to this page in the guide.
CDP
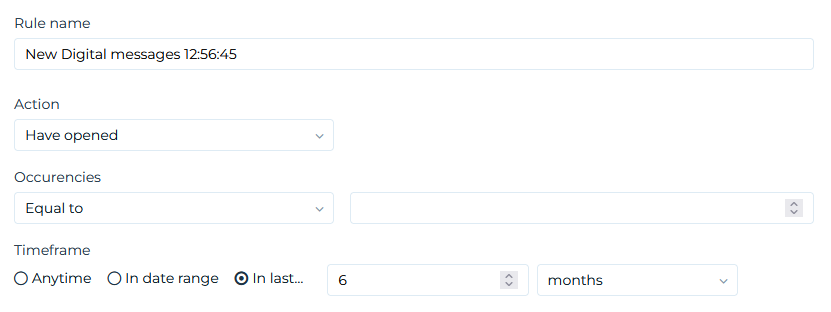
Plan > Segments
As we’ve seen, a high engagement rate indicates an active and interested list, while a low engagement rate can lead to deliverability issues and messages being classified as spam.
To improve it, it’s best to send emails only to active users.
In Plan, you can segment users based on opens and clicks within a specific time period:
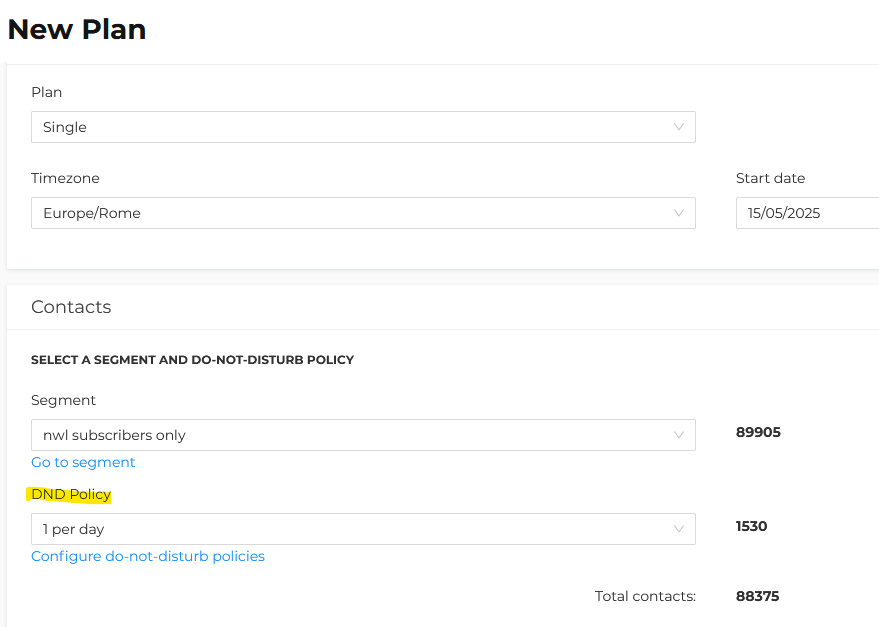
Plan > DND policy
As we’ve seen, the Do Not Disturb policy is a strategy that limits the frequency of emails sent to a user to avoid spam reports and reduce the risk of unsubscribes. It is based on one or more rules that manage the quantity and timing of the sends.
In the CDP, when creating a Plan, it is possible to set a Do Not Disturb policy to prevent sending to contacts already booked for other schedules within the same time frame:
To access the DND policy management page and view all currently available policies, go to Settings > Segments > DND Policy.
The page displays a table listing the DND policies in descending order by creation date:
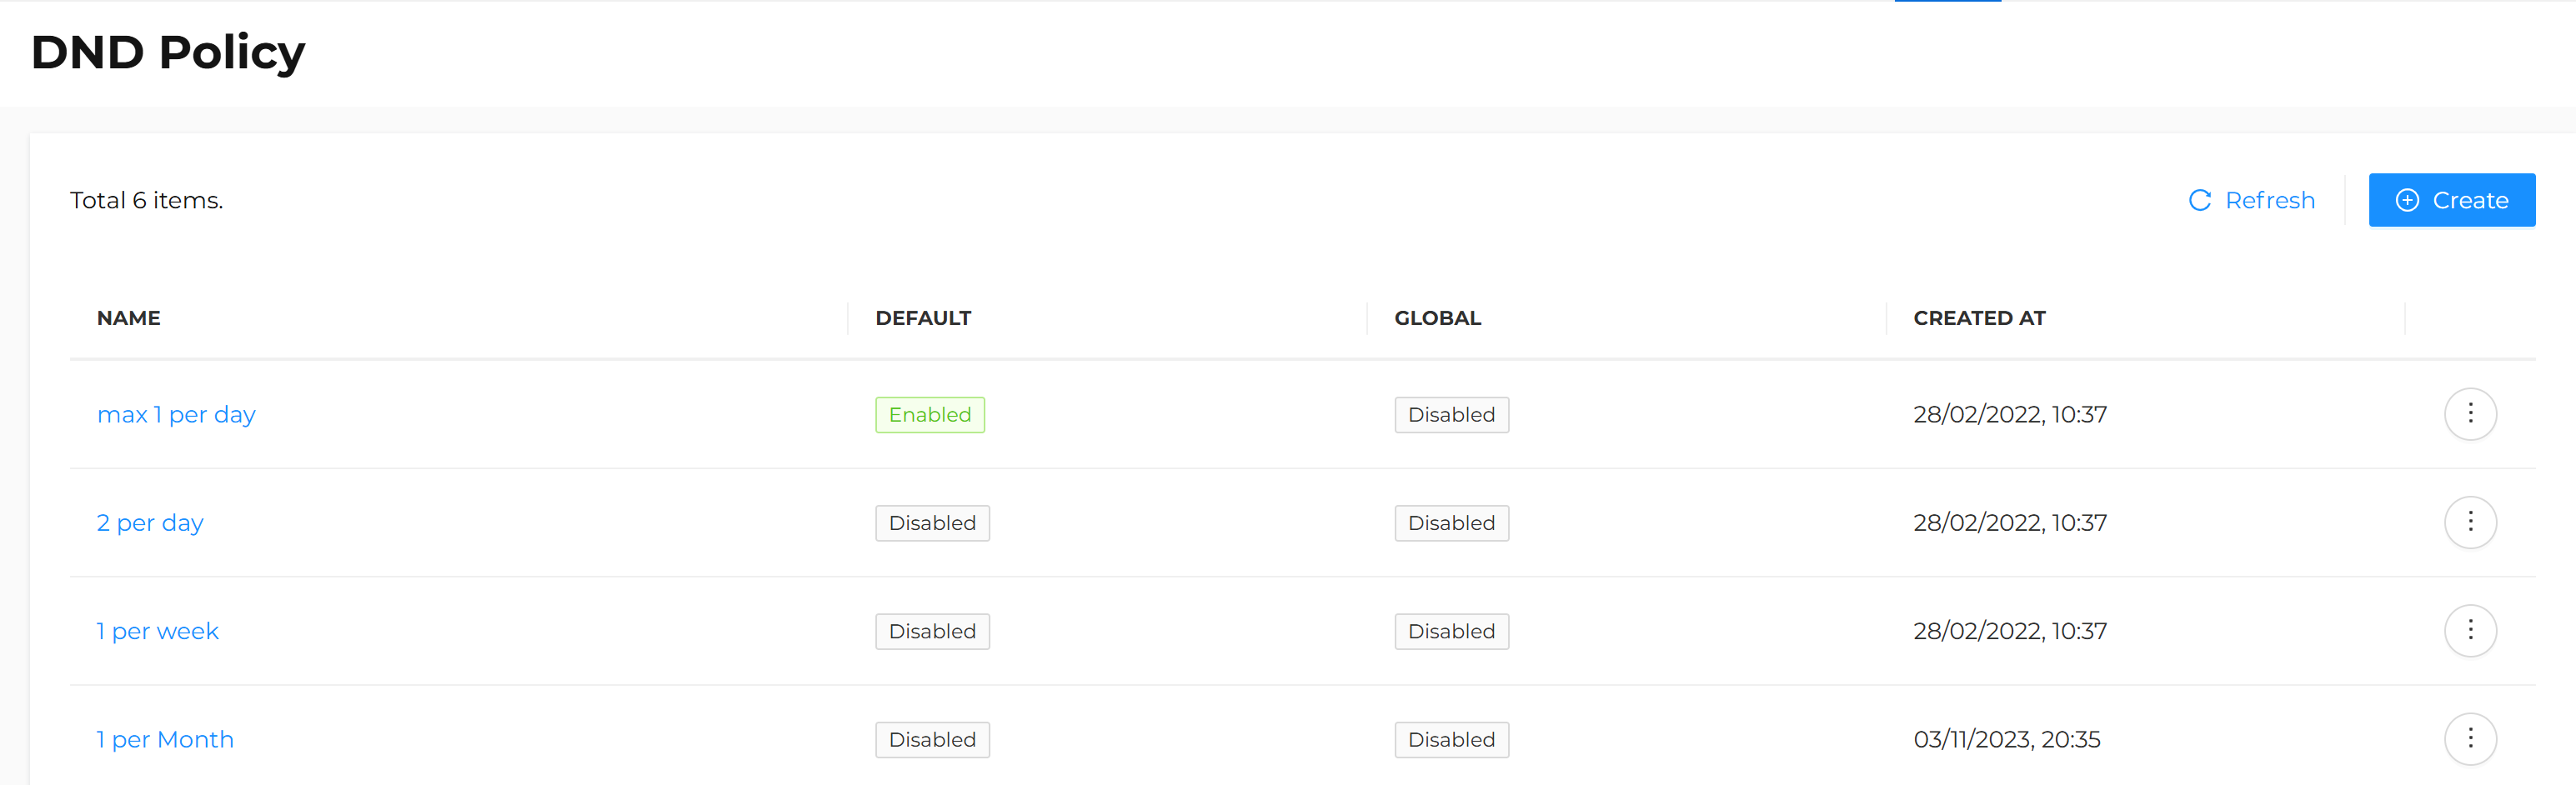
For more details on how to create and manage DND policies, see this page of the guide.