New plan with mail delivery action
In the Plans List > Create section, after filling in the various parameters as indicated in the previous chapters, select the Mail Delivery action and then Configure to create and send a campaign.

The wizard will then be displayed to configure the various steps.
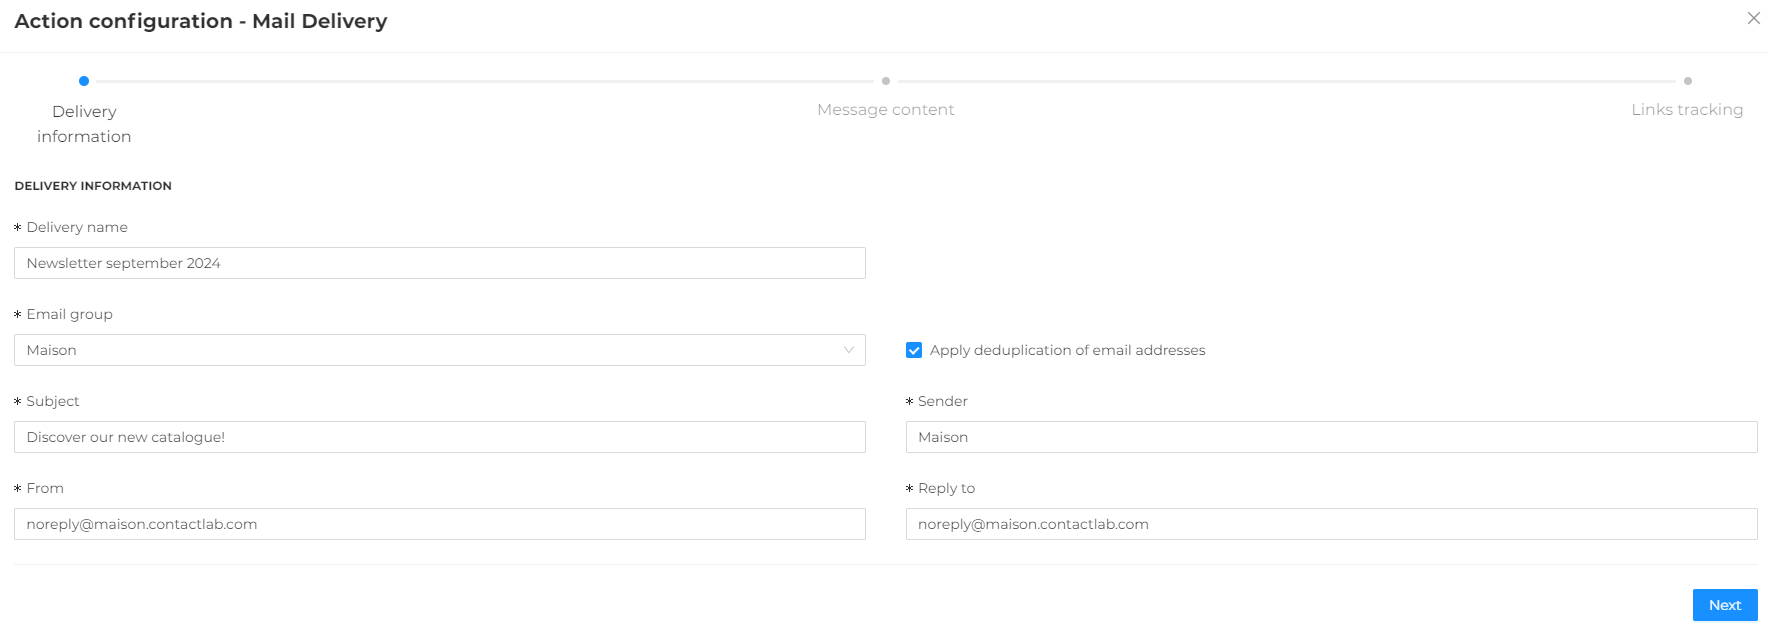
Delivery information
Complete this first step with the information related to the delivery you are creating, such as:
-
Enter a name for the delivery that will be visible only within the platform but not to the end-user.
-
Select the Email Group from the dropdown menu that has been previously configured with the default sender details. Ensure that the Sender (alias), From (mail from), and Reply to fields are correctly filled out and make any necessary adjustments.
-
Enter the Email Subject that will be visible to the recipients of the send.
warningBy default, the option Apply deduplication of email addresses is selected to prevent the same user, if present multiple times in the selected segment, from receiving the same email more than once.
-
Finally, click Next to proceed to the next step.

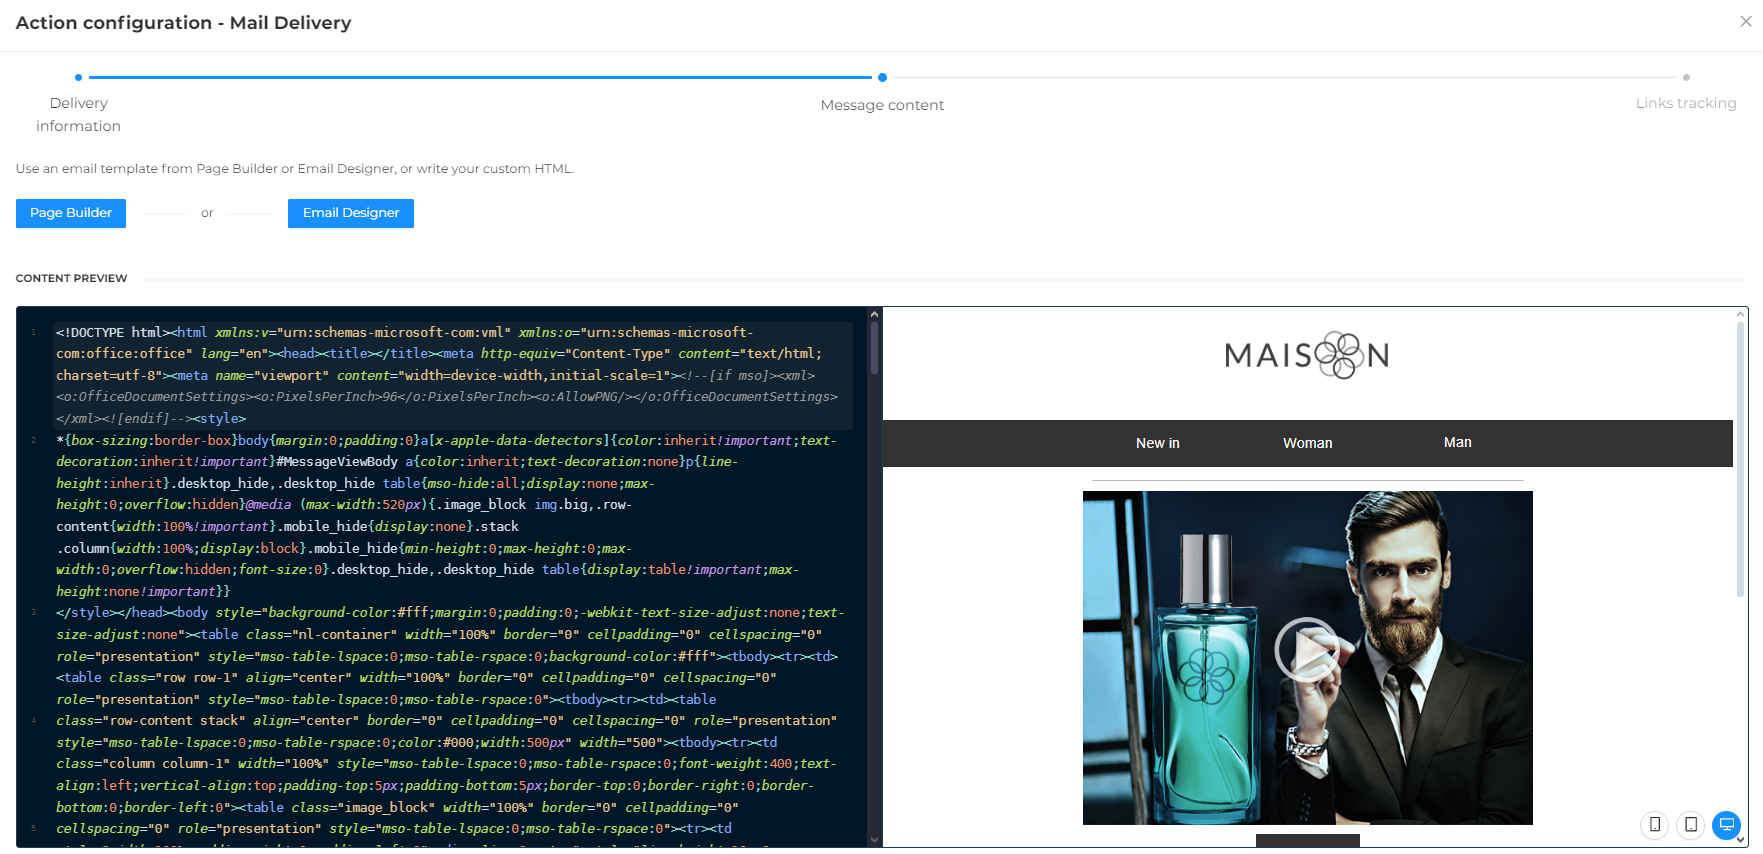
Message content
In this step, it is necessary to:
-
Insert a template from the integrated editors in the platform (Page Builder or Email Designer), or copy and paste your custom HTML.

-
Within the message content, you can include dynamic fields to personalize the email for each individual user. A dynamic field is a code that retrieves the content of a specific field from the database. For example, the dynamic field
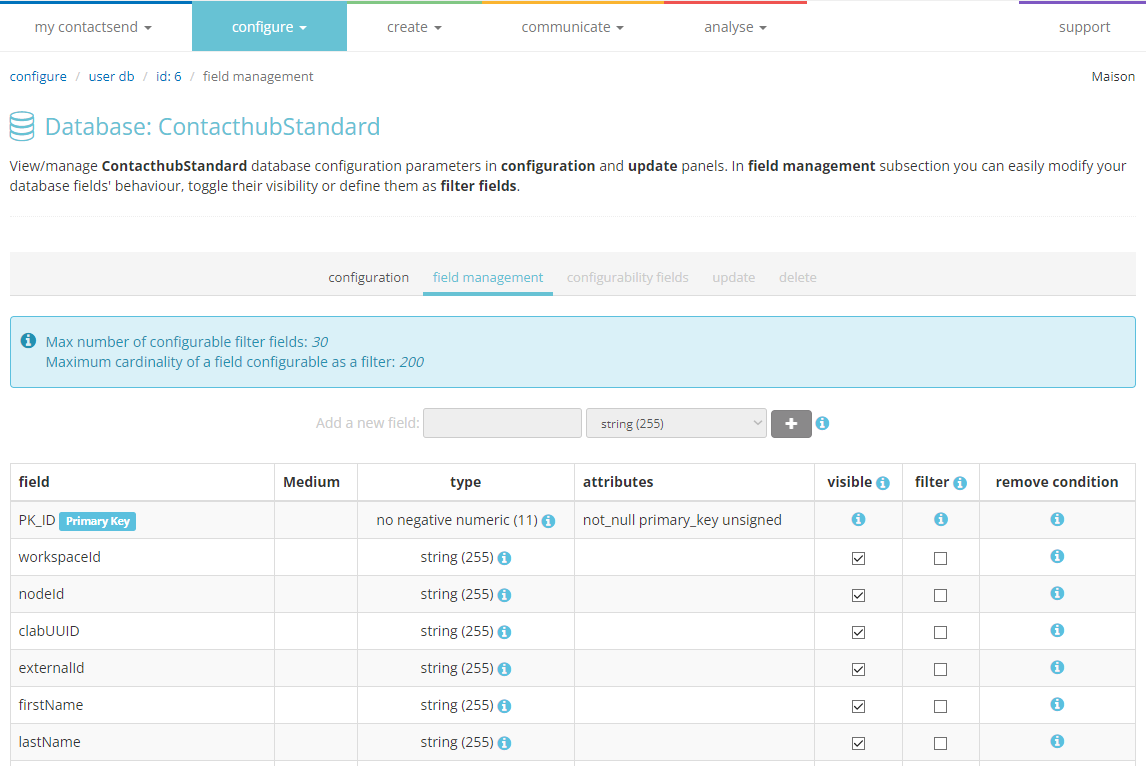
${firstName}$retrieves the value from the user’s "fistName" field in the database. If the user "Ann" is present in the database, inserting the code${firstName}$in the HTML will replace the variable with the user's name, displaying "Dear Ann," for instance.
The correct syntax for each dynamic field can be found in the Send module under Configure > user db > select relevant db > Configuration > Field Management.

The field name must be written exactly as it appears in the database (including uppercase and lowercase letters); in case of discrepancies, it will not be populated.
-
Enter the Alternative Text that will be displayed if the receiving email system does not support HTML. It is advisable to include this text for message deliverability. You can automatically retrieve it from the HTML by clicking the corresponding button.
-
Add any Labels (Key, Value pairs) to identify the current send.
-
Finally, click Next to proceed to the next step.

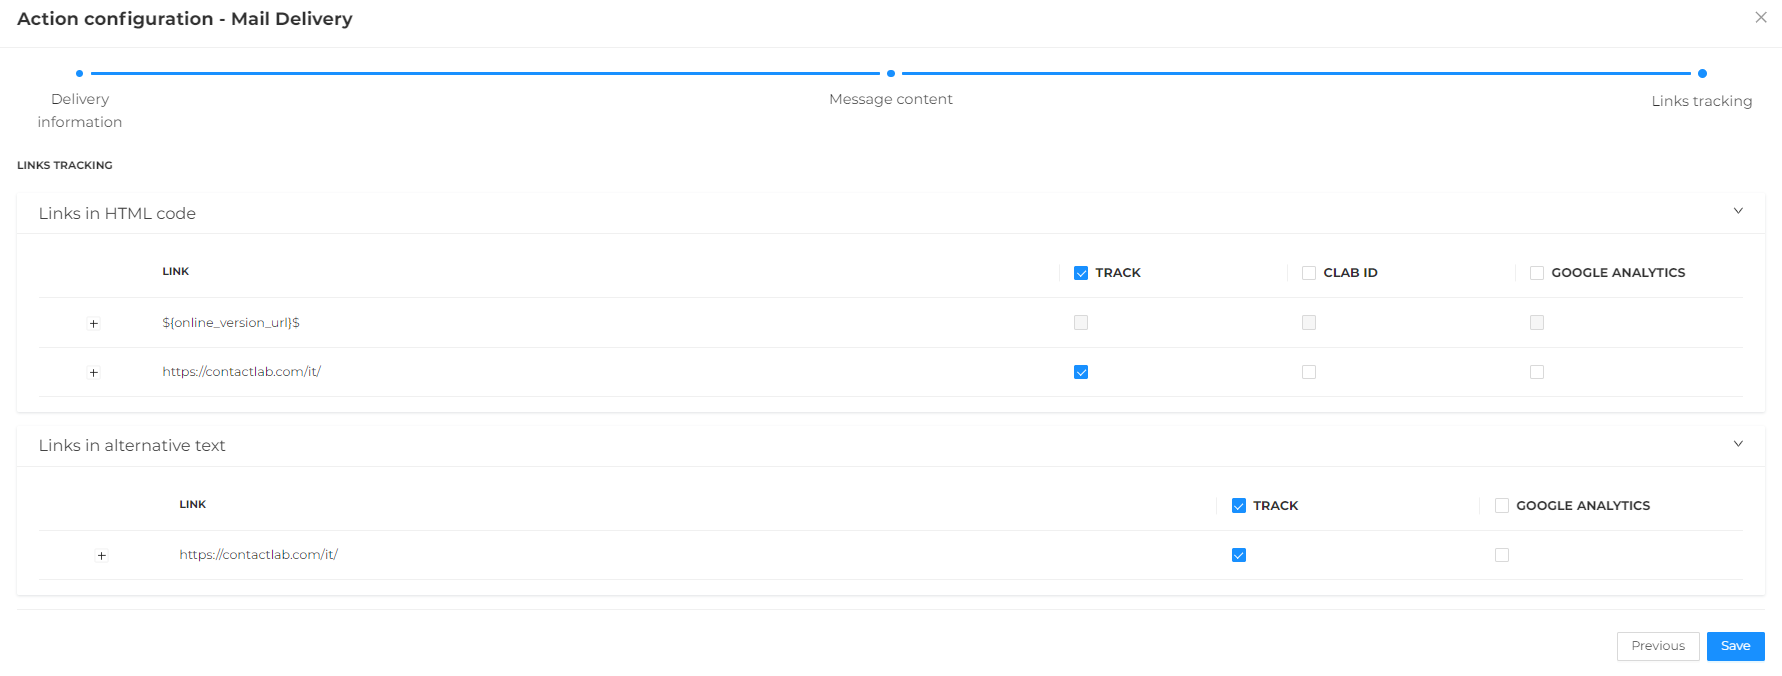
Link tracking
In this step, it is necessary to:
-
Verify that all the links in the template are correctly tracked by the platform.
-
Optionally apply automatic tracking with Google Analytics (if enabled).
-
Click Save.

You will then be taken back to the New Plan main screen where the created delivery will be displayed.
Click the "three dots" icon to delete and/or edit the delivery or click Send Test to send a test email.

Send test
Clicking on the Send test option will bring you to the dedicated screen where you can:
-
Select a previously configured test filter and click Send test.

-
Click Create to create a new test filter.
Enter a name for the filter, one or more email addresses in the Recipients field, and save the filter.
Email addresses entered in the Recipients field must be separated by commas and must already exist in the database in order to send the test.
Once the test is sent and verified to be correct, close the Send Test window and decide whether to save to send the email at the scheduled date/time or save as draft to continue working on the email send later.