Create new segment
To create a new segment, go to the Segments > Segment List section.
By clicking on Create Simple, the system automatically assigns a name to the segment: choose a new one, ensuring it is unique and easily recognizable in the future.
It is also possible to create a segment by combining existing segments. In this case, within the Segments area, choose Create Combined. Refer to the dedicated section for more details.

A segment can include two or more rules belonging to the same data category or different categories. Each rule is displayed in a panel.
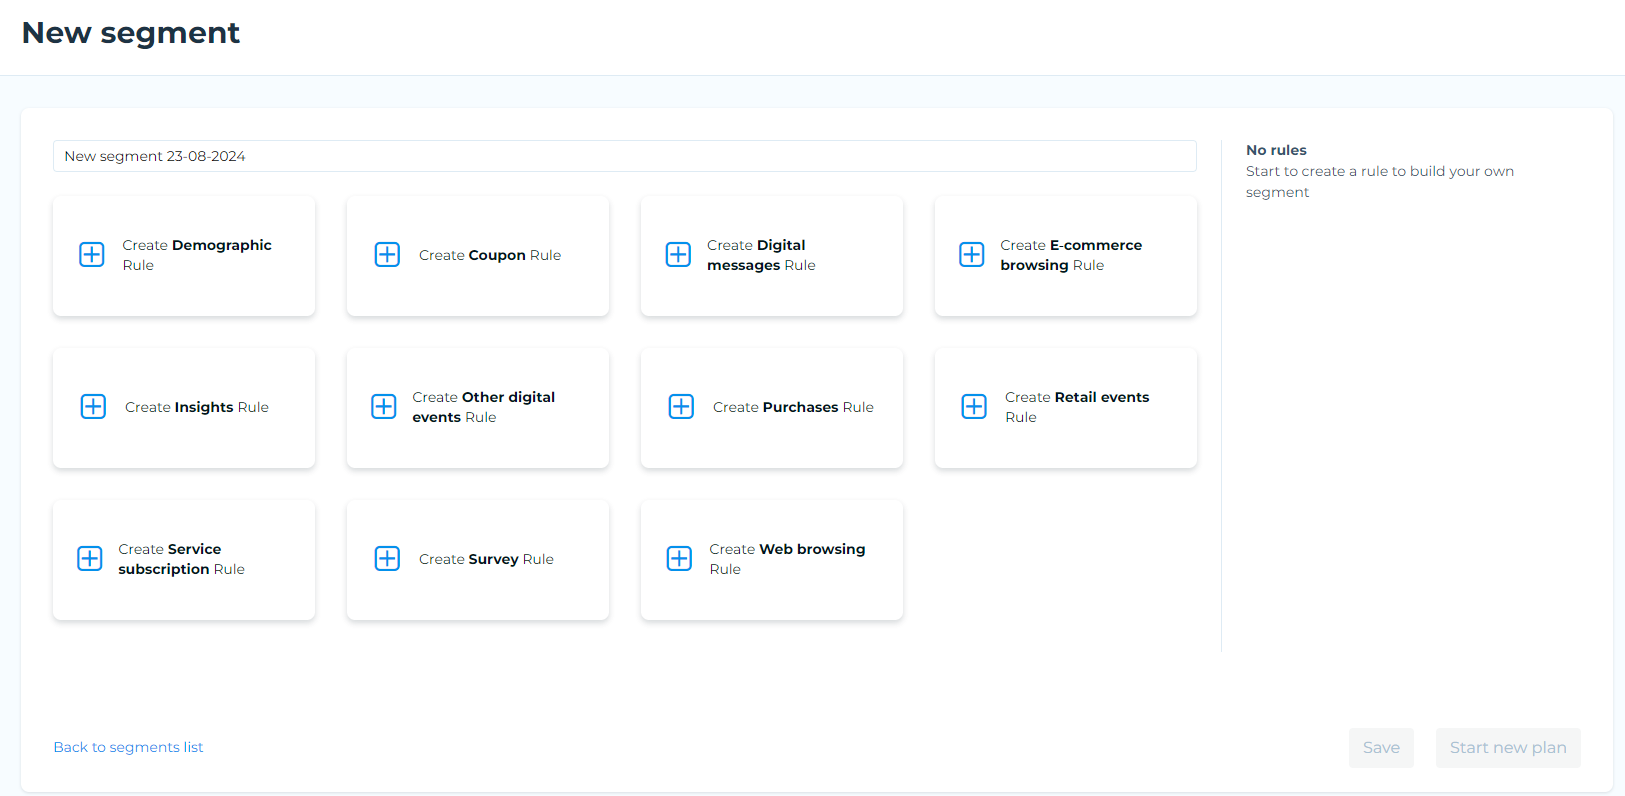
To start building a segment, choose the rule type of interest:
- Demographic rules such as age, address, gender.
- Coupon rules that recognize, for example, when a coupon is used or the type of coupon.
- Digital messages rules that detect when a link is clicked, an email is opened, and so on.
- E-commerce browsing rules that highlight the presence of an abandoned cart or interaction with the site, including details of categories or product names visited.
- Insights rules based on standard or customizable algorithms developed by the Data Science team and requested separately.
- Other digital events rules for considering feedback from push campaigns executed with external systems.
- Purchases rules that recognize when purchases are made in a specific location, exceed a certain value, or fall within a defined timeframe.
- Retail events rules such as a cocktail or new collection launch presentation with details of participation, event city, etc.
- Service subscription rules such as subscribing to a program with service information, type, date, etc.
- Survey rules to segment based on data obtained from surveys administered to contacts, whether customers or prospects.
- Web browsing rules that include logins/logouts, page views, URLs, etc.
The type of rules displayed depends on the type of data integrated into the platform.
Once the type of data to query is identified, the platform offers several options for creating a rule:
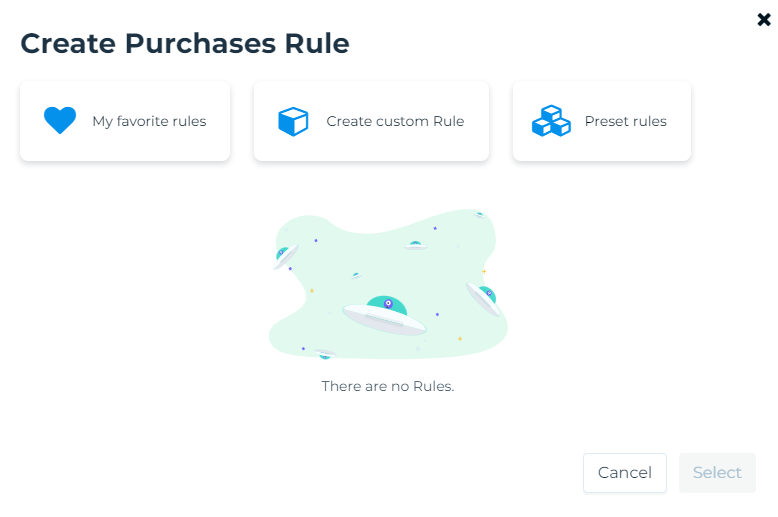
- Use a predefined rule without modifying it.
- Use a predefined rule and customize it as desired.
- Select a favorite rule, which is a predefined rule saved as a favorite by clicking the heart icon, which can be deselected at any time.
- Select a preset rule and customize it as desired.
- Create a custom rule.
Depending on the target audience, click one of the proposed options and follow the instructions.
When all conditions are entered, click Add, and the new rule will be added to the list of rules in the Summary Panel shown on the right side of the page.
It is possible to delete a rule at any time, but this action is irreversible.
If the desired segment results from the application of several rules, specify how they interact by setting logical operators and, or, except.
Refer to the dedicated chapter](01-segments-rules-conditions.md) for more details on operators.
It should be noted that if more than two rules are used to define a segment, the system applies the conditions sequentially. The platform calculates the result of the combination of the first and second rule. The result is then combined with the third rule, based on the interaction condition between the second and third rule, and so on.
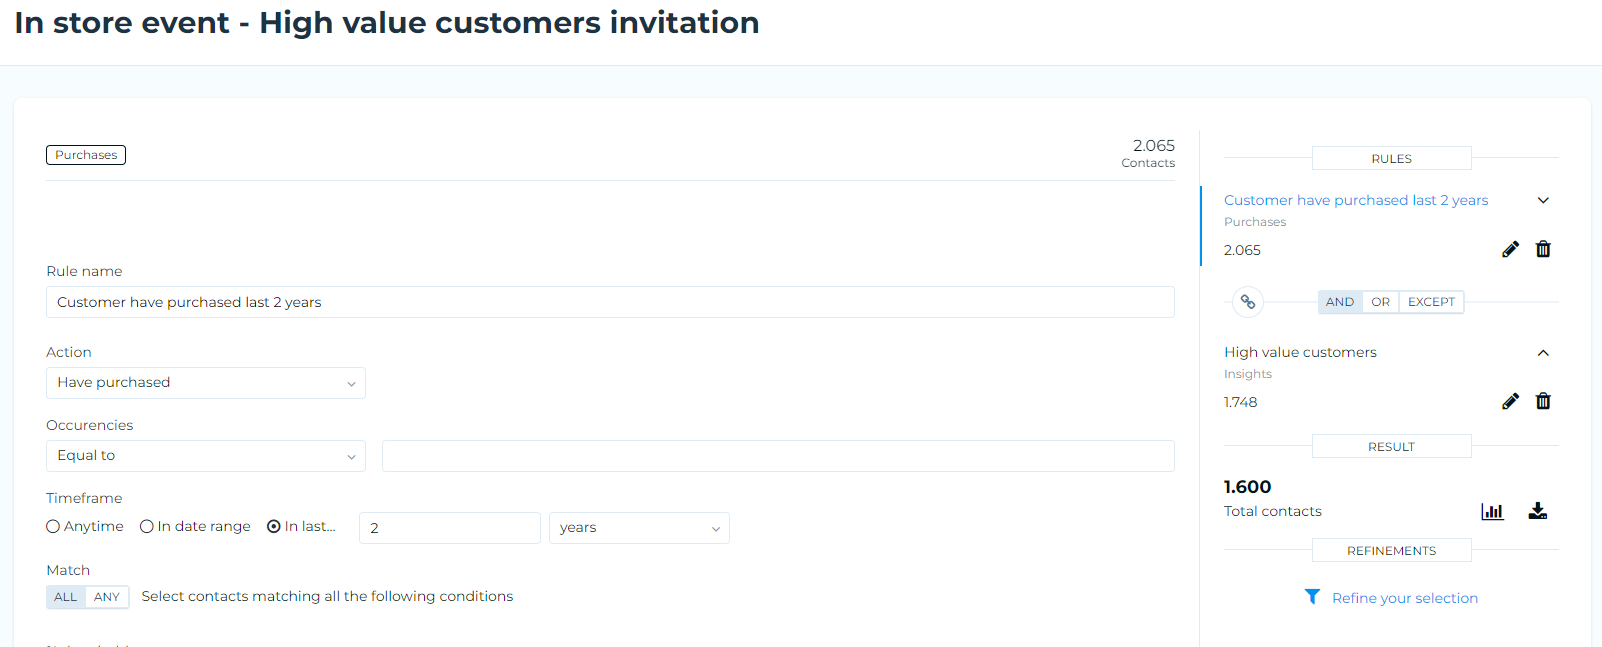
Once the rules and their interactions are defined, click on Save. The full list of segments will appear, including the newly added segment.
Each time a segment rule is created or revised, a notification will inform about the change.
A new segment can also be created by cloning an existing one and then modifying it as desired.
To create a new scheduling directly from the segment, click the Use in Scheduling button.
Clicking on Use in Scheduling will automatically save the segment to ensure that any changes made are preserved.
Special query types
When defining an audience, the platform supports the following special query types:
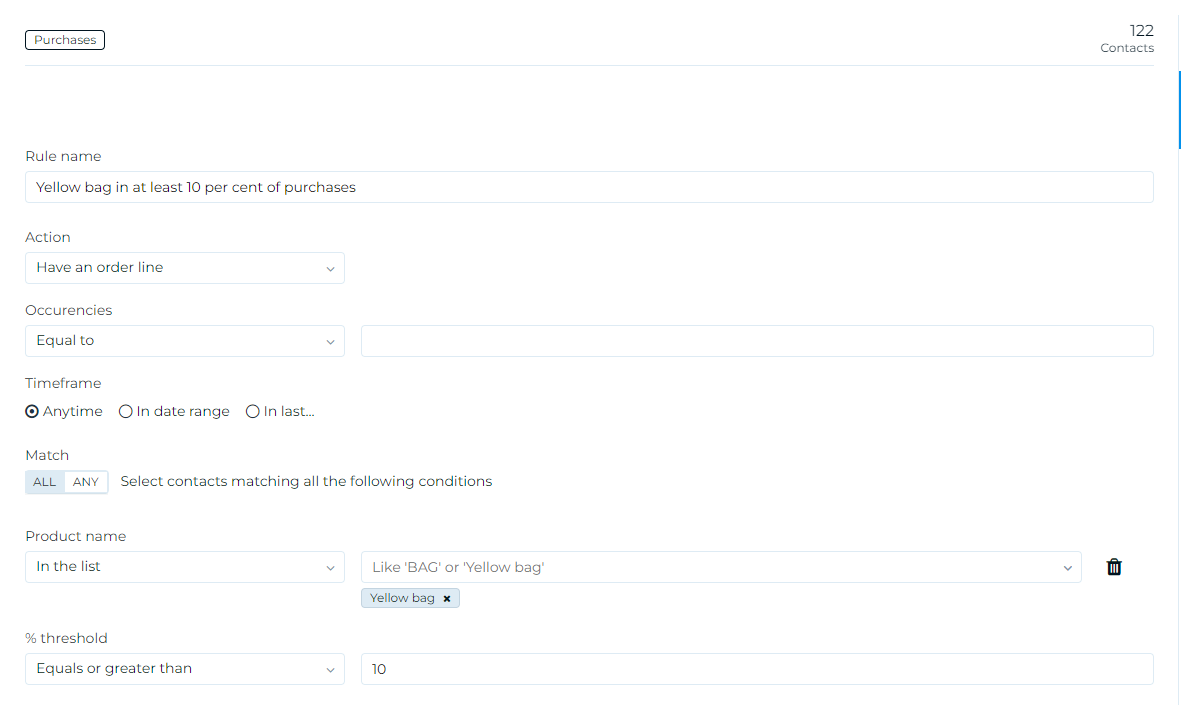
- Analytical Queries: These allow comparison between how often an event occurs and all events of the same type. For example:
- All contacts who have bought a yellow bag in at least 10% of their purchases. Or
- All contacts who have spent more than 200 euros in less than 5% of their spending occasions.
In this case, when creating a segment, e.g., using the Purchase rule, it is necessary to select the Percentage Threshold field, as shown below, in addition to the condition of interest:
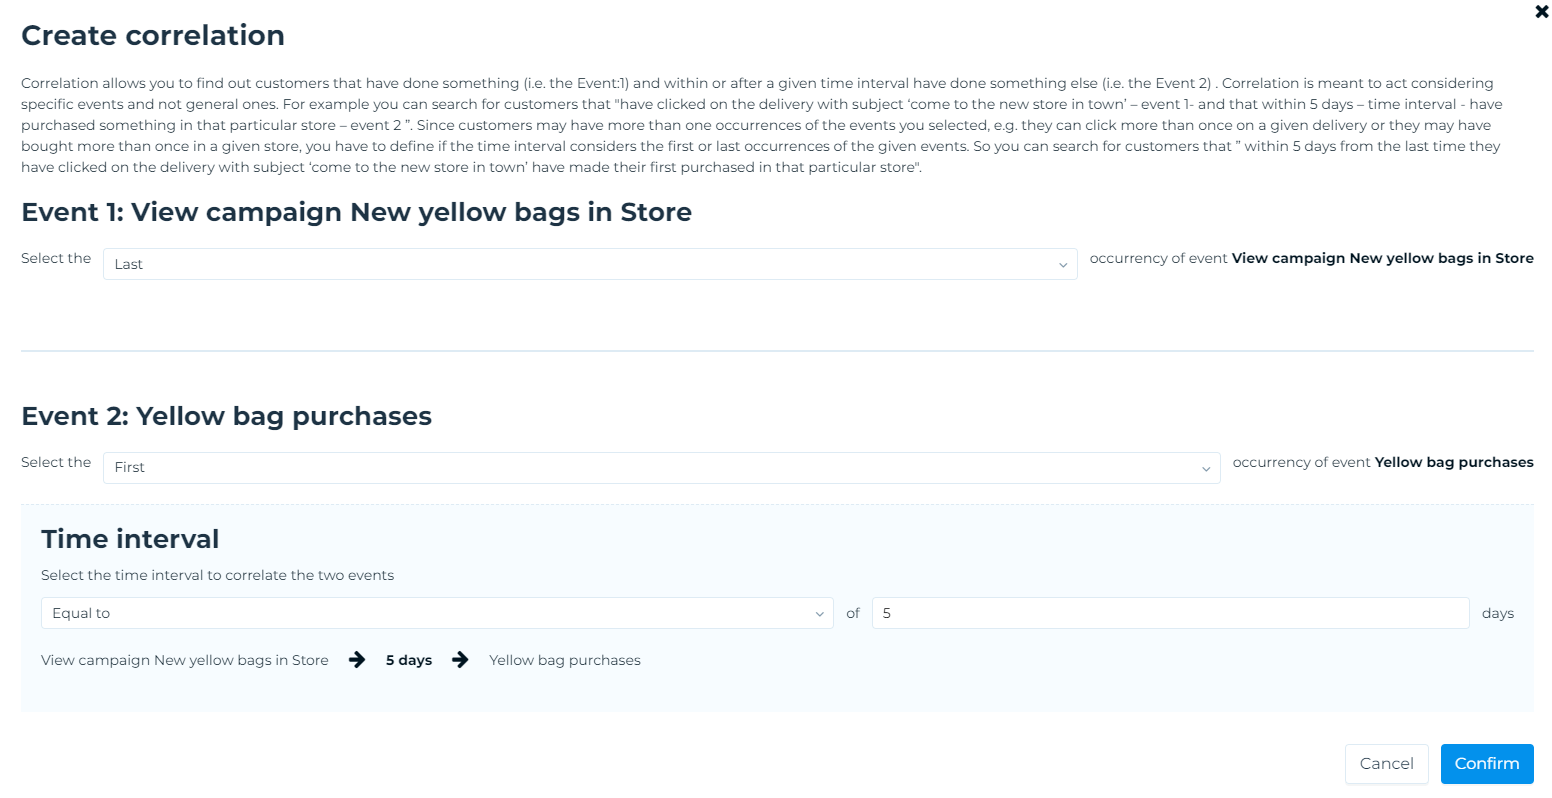
- Correlation Queries: These allow establishing a relationship between two different events occurring within a specific time period. For example:
- All contacts who buy a yellow bag within 5 days after opening the newsletter "New Yellow Bags in Store". Or
- All contacts who placed an order more than 30 days after clicking the newsletter link.
To proceed, select the correlation icon in the Summary Panel on the right, as shown below:
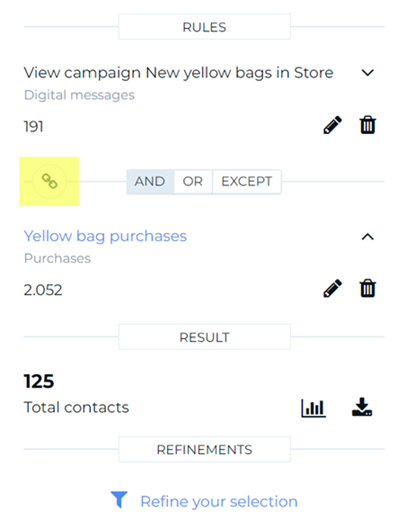
In the next screen, set the desired configurations, such as the time range. Below is an example screen:
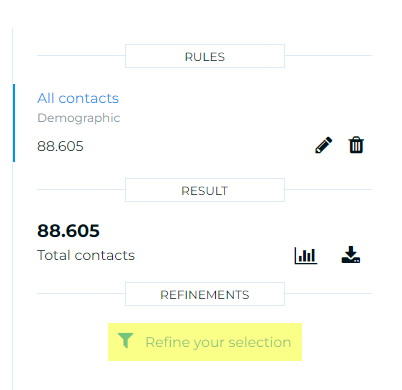
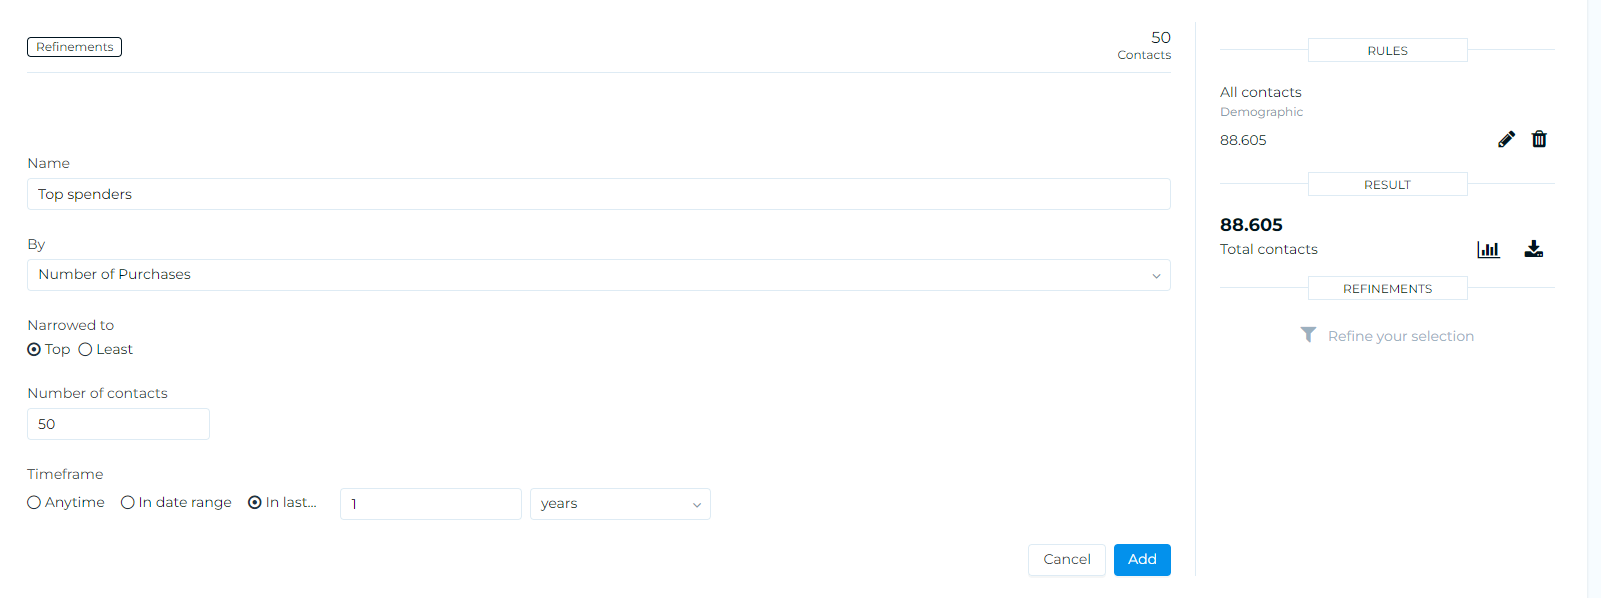
Additionally, a Refinement Query can be applied by clicking Refine your selection in the Summary Panel to select the top or bottom ‘N’ contacts over a specified time period. For example:
- The 10 contacts with the lowest spend in the last 30 days. Or
- The 50 contacts with the highest spend in the past year.
Below are two example screens showing how to proceed from the UI:
New combined segment
It is possible to create a segment by combining existing segments.
In the Segments > Segment List section, select Create Combined.
The system automatically generates a segment name and the current date: select the generated name and enter a unique, descriptive name that will be easily recognizable in the future.
Then, choose the segments and the interaction condition (AND, OR, EXCEPT).
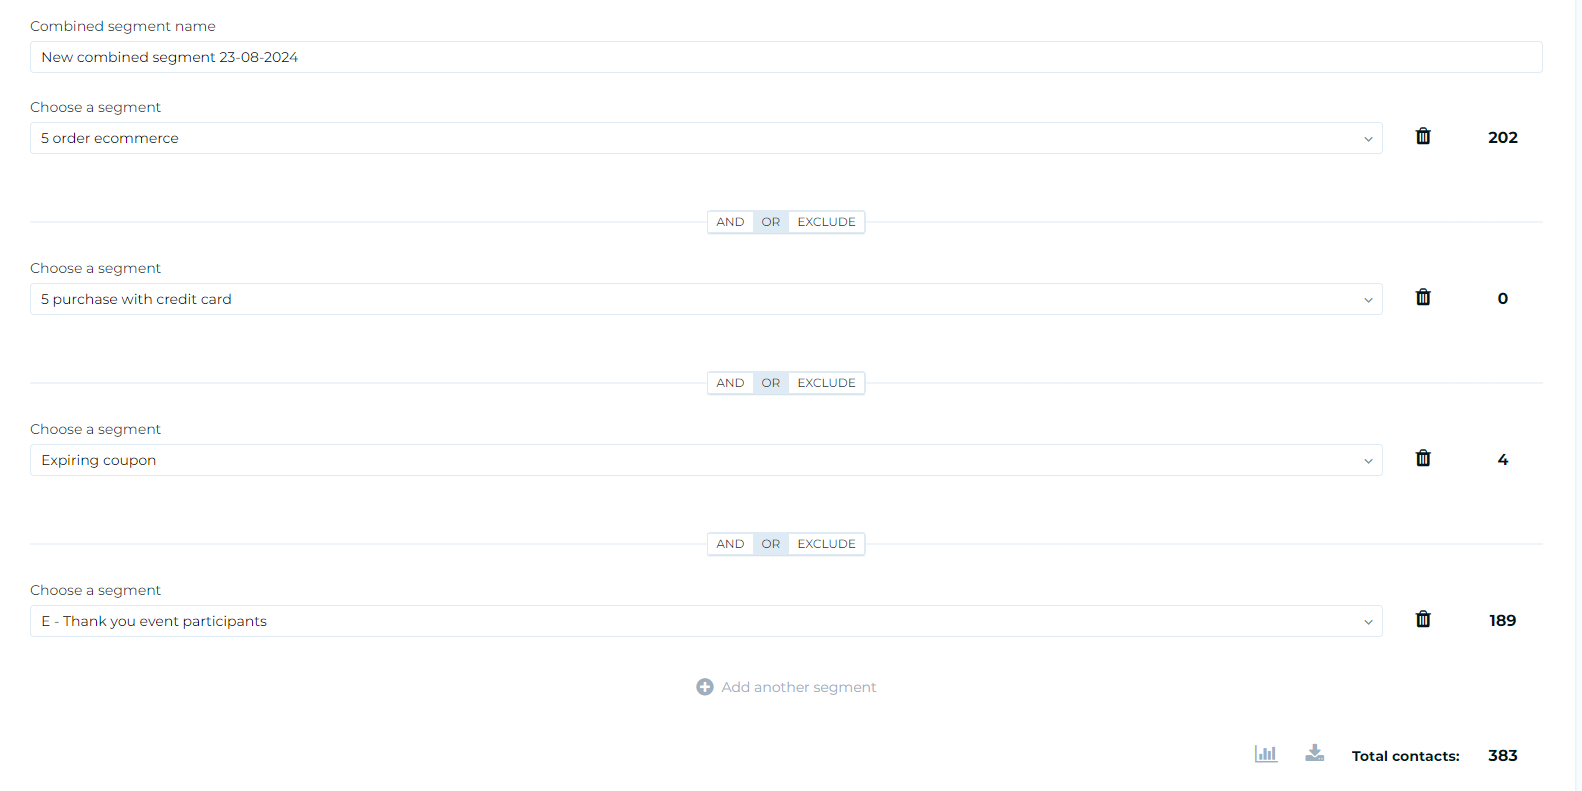
Up to a maximum of 4 segments can be combined.