Create a new single plan
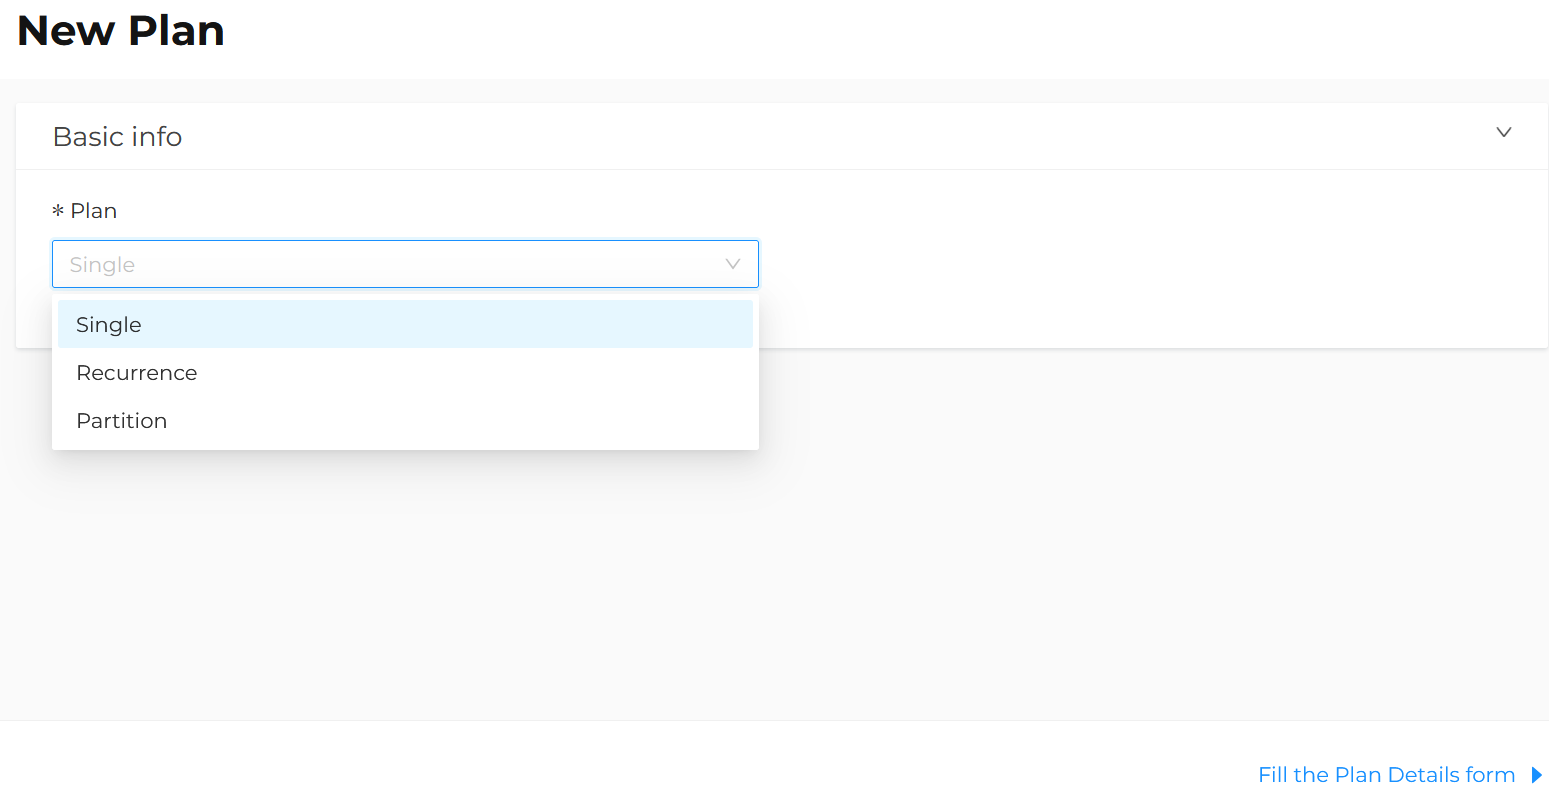
In Plans list it is possible to create 3 different types of plans:
- Single: a one-time delivery to be sent in a single batch to the selected target. Example: sending a newsletter.
- Recurring: a delivery to be sent on a daily, weekly, or monthly recurrence to a specific selected target. Example: sending a birthday email.
- Partitioned: a delivery to be sent in several parts (up to a maximum of 10) to a specific target, on a daily, weekly or monthly frequency.
This chapter explains how to create a Single Plan.
First, click the Create button.
Base info
Select the type of plan to create, i.e. Single, and click Fill the Plan Details form.
Base properties
Enter the Name of the plan being created.
It is recommended to enter a meaningful name that makes it easy to identify the plan later.
The assigned name will only be used within the platform and will not be visible to the contacts included in the target segment.

Special characters are not allowed in the plan name.
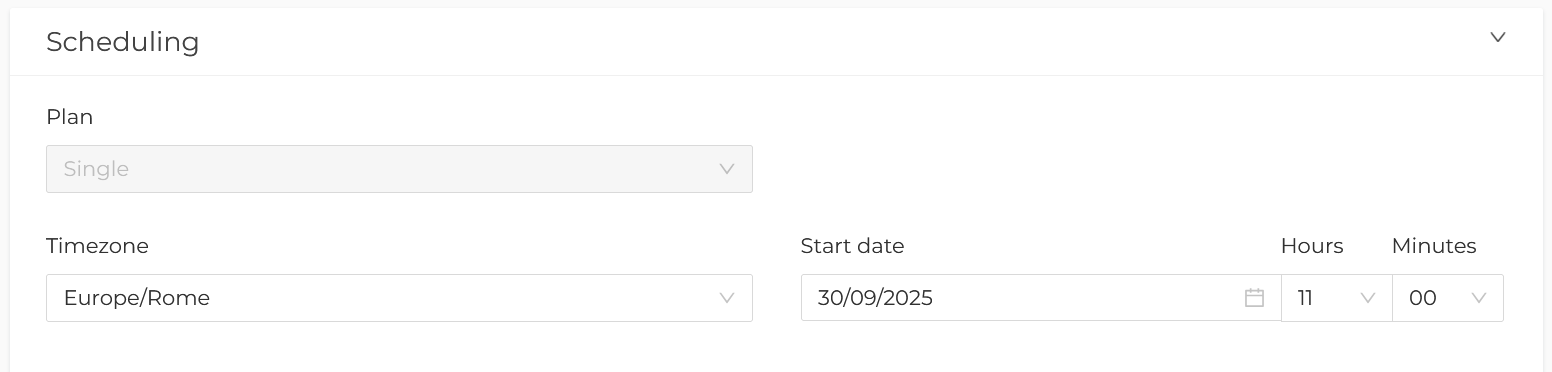
Scheduling
In this section, it is possible to define:
-
Timezone.
-
Start date.
-
Hours and Minutes when the plan should be processed.
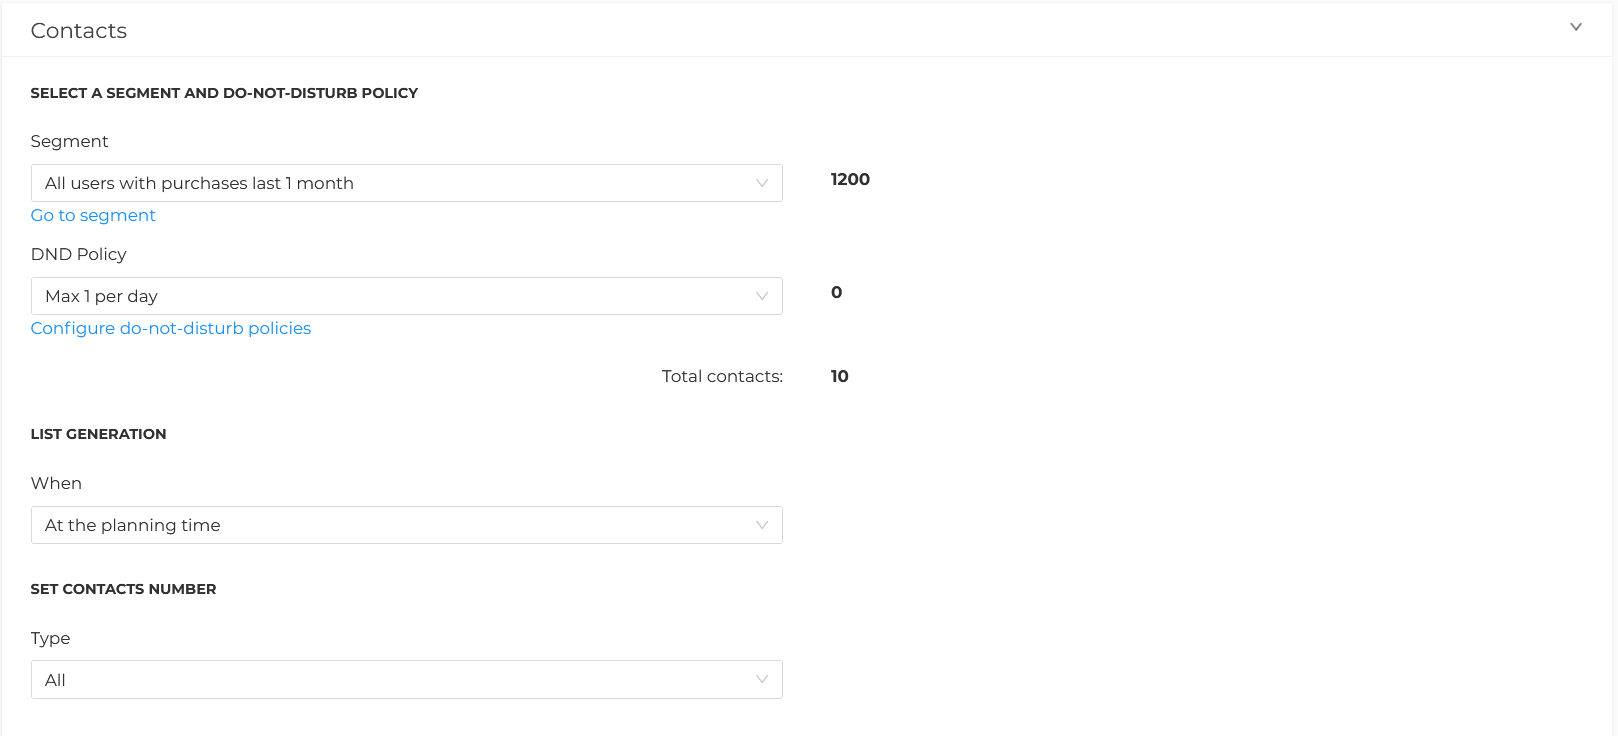
Contacts
In this section, it is possible to define all the options related to:
-
Segment: target audience. Select the desired segment previously created from the drop-down menu.
-
DND policy: choose whether or not to apply a Do Not Disturb policy to prevent the same contact from being reached by multiple plans within a given time frame. More details about the DND policy are available in the dedicated chapter.
-
List generation: define when to generate the list:
- At the planning time, which means the list will be extracted at the date/time set in the previous step (recommended choice);
- Right Now, which means the list will be extracted immediately, i.e., at the time of saving the plan;
- Customized, which means the list will be extracted X days prior to the date/time set in the previous step.
-
Set contacts number, choose whether to plan on:
- All users included in the segment (recommended choice);
- Exact, meaning plan on an exact number of contacts;
- Range, meaning plan between a minimum and maximum number of contacts.
If Exact or Range is selected, it is possibile to decide what to do if the number of contacts is not reached (send anyway or end the plan with an error).
Actions
In this section, it is possible to select the type of action to use in the plan, such as:
-
Mail Delivery, to create a new campaign to be sent to the previously selected target.
-
Send Contacts to an Automation, to send the previously selected target to a Marketing Automation flow.
-
SMS Delivery, to create a new SMS delivery.
-
Send Filter, to create a filter in Send.
-
Export to SFTP, to save the contact list to an external space, from which it can be retrieved manually or automatically by another system.
The next chapters will go into more detail about each action.
Finally, click Save to save the changes or Save as draft to continue later.
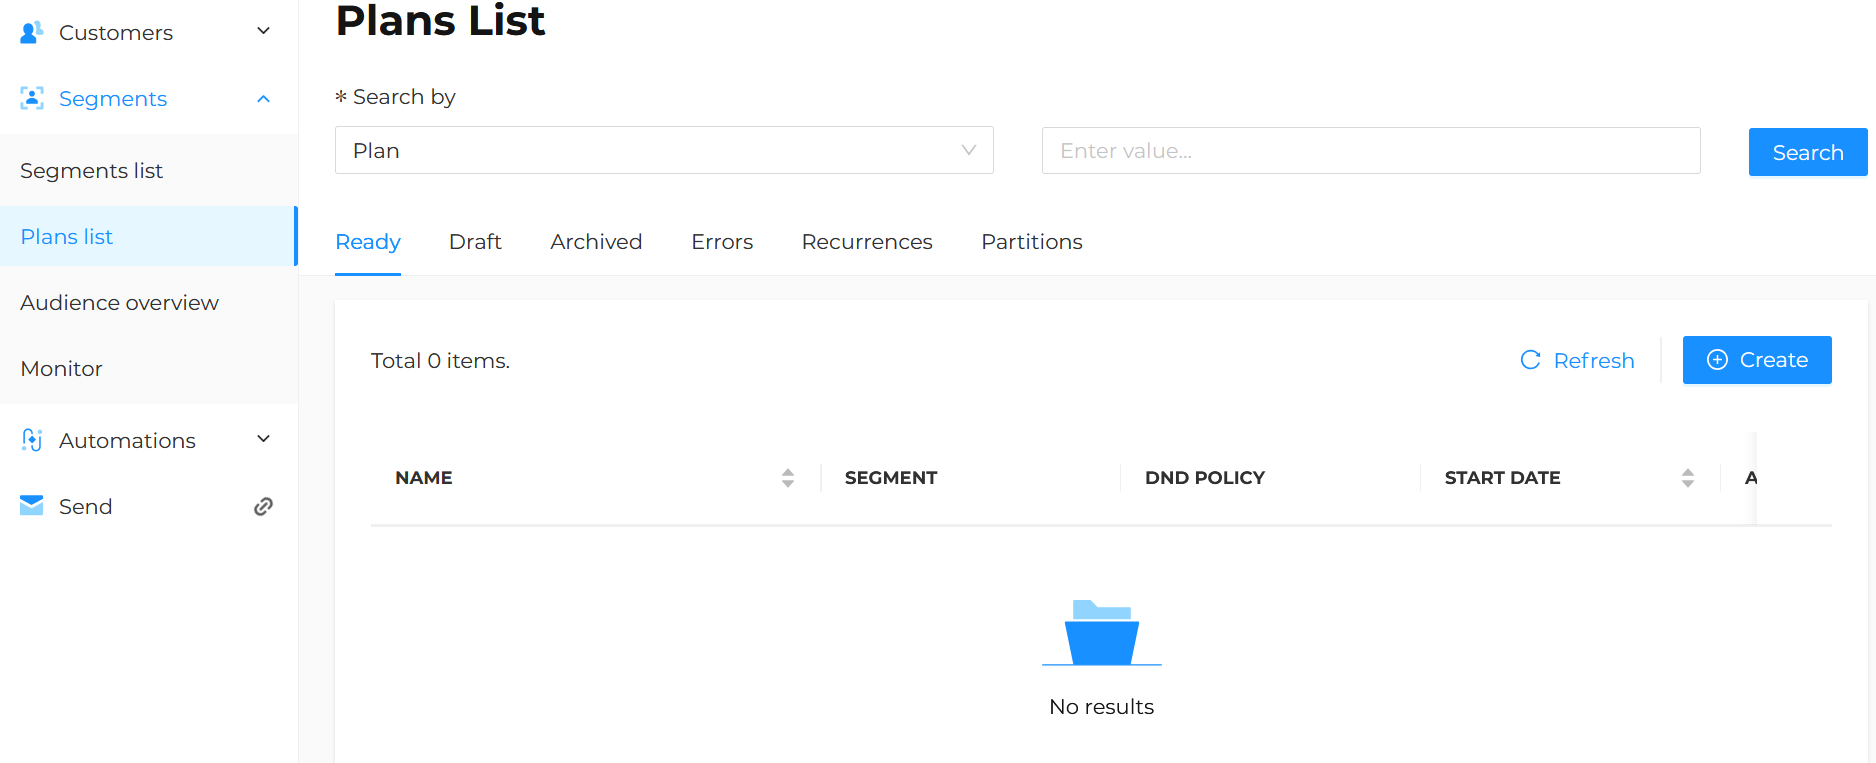
The saved plan will then be visible under the Plan list > Ready or Plan list > Draft tab, depending on the selection made.