How to manage an existing database
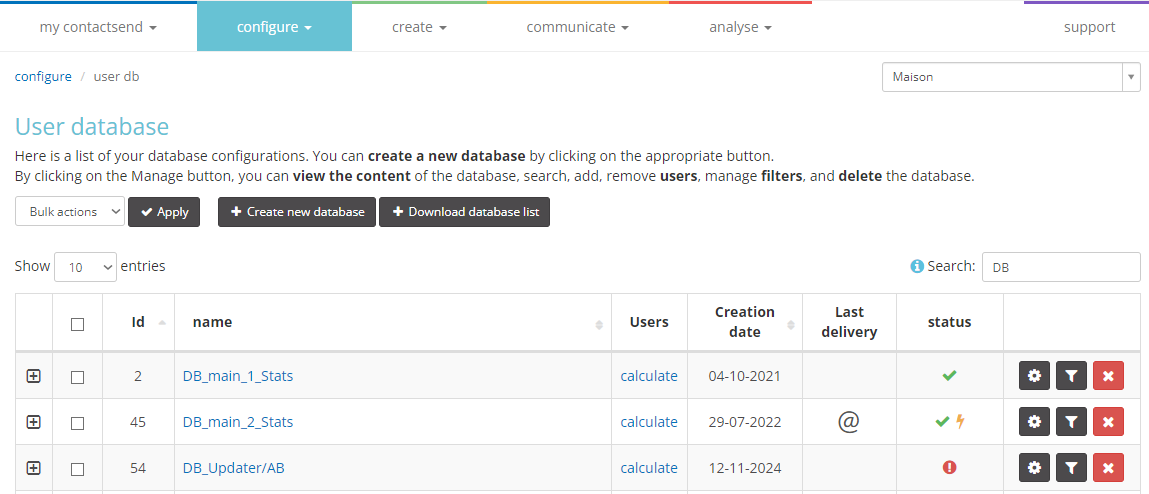
In the Configure > user DB section, it is possible to manage databases containing user data, the recipients of deliveries. In this section, you can view a list of existing databases.
A database can be associated with one or more email groups or can be isolated, meaning it is not linked to any group (in which case it cannot be used for sending). Users in the database can be divided into segments by applying filters.
This chapter details how to manage a database and all the operations that can be performed on it.
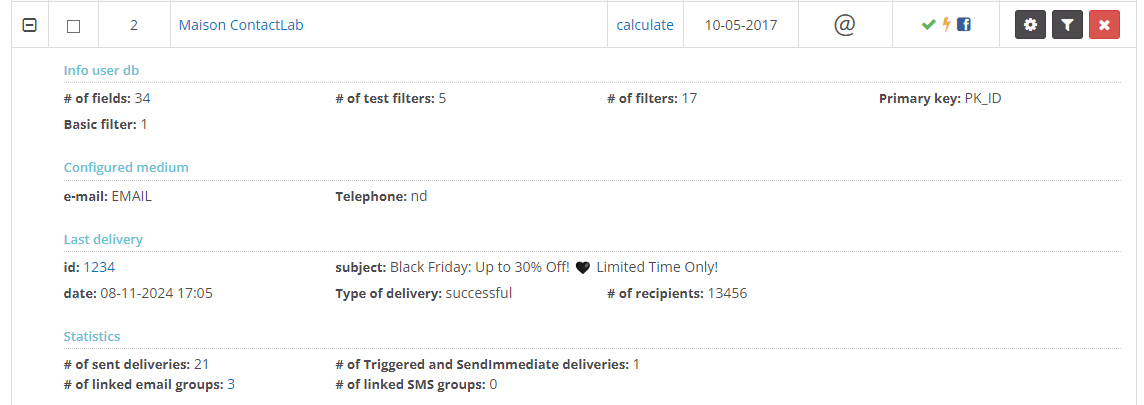
By clicking on the + icon to the left of the user database ID, you can view a series of detailed information about the DB, such as: number of fields, number of filters (test and effective), the field set as the primary key, configured channel (email and/or SMS), last delivery, and statistics.

In the Last delivery column, the last delivery (email or SMS) sent to that DB is displayed. By hovering the mouse over the at symbol (for emails) or the phone icon (for SMS), the date of the last delivery is shown. If nothing is displayed, it means no deliveries have ever been made to that DB.
The Status column indicates whether the DB is currently editable (green checkmark) or read-only (red access forbidden symbol).

The database is automatically set to read-only by the system when:
- There is a delivery associated with that DB paused in "Communicate > email deliveries > ready", with the queue already extracted;
- There is a delivery associated with that DB in "Communicate > email deliveries > scheduled", with the queue already extracted;
- There is an ongoing delivery associated with that DB.
This is done to avoid serious system errors being generated as a result of modifying data in the relevant database, for example, email addresses, while a campaign is being deployed or has been scheduled. This safety system puts a database in read-only mode, until the associated delivery processes have been terminated.
To avoid the DB being locked due to deliveries in communicate and/or scheduled, simply check the option "extract addresses from the database only when sending" during the creation of the shipment. For more info, see the "Create" section.
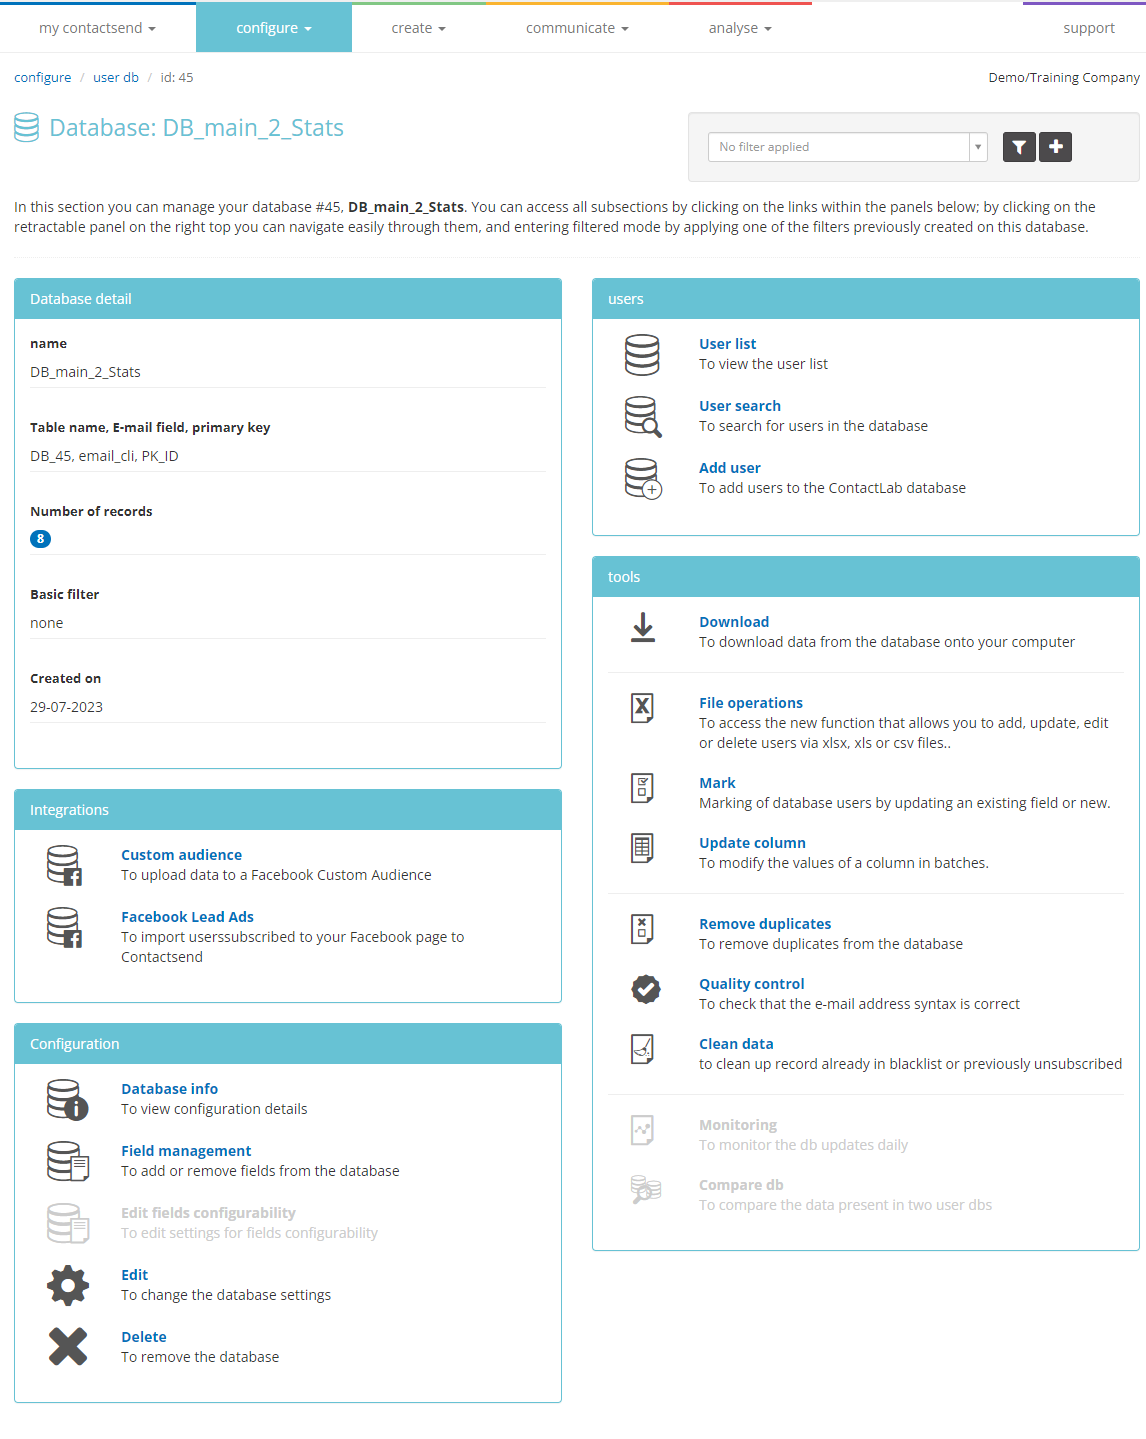
To manage a database, click on the manage icon corresponding to it or on the name of the database. The screen that appears allows you to manage every aspect of the database through four sections:

Additionally, you can access the various filters configured in the user DB via the dropdown menu in the top right corner. By default, all users are shown. From here, you can also create new filters by clicking on the corresponding + icon.
