How to create a new database
To create a new database, click the "create new database" button. A dedicated wizard will open to guide you through each step. Once you have entered the required information on a screen, move to the next one using the "Next" button.
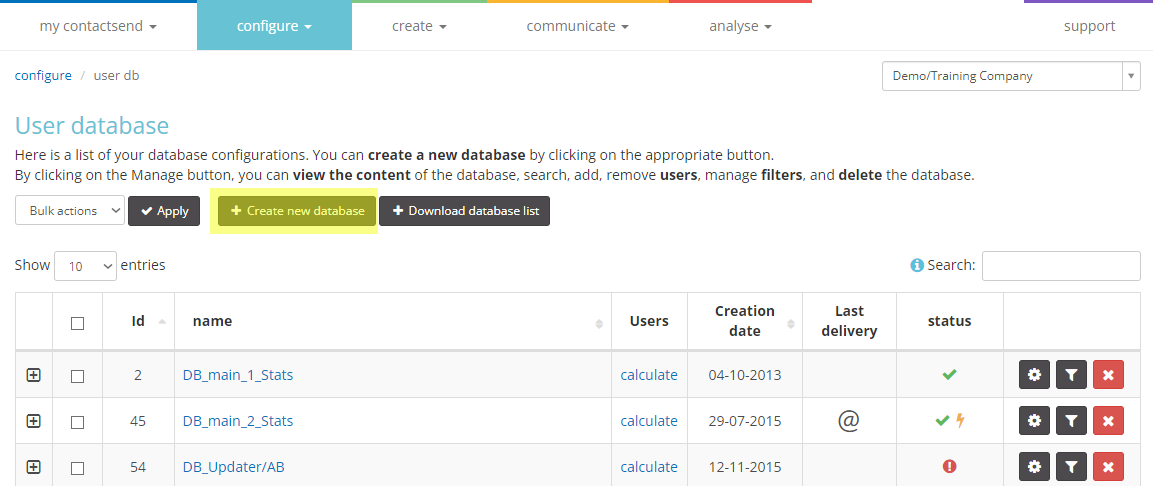
The first screen allows you to chose whether the database values can be modified or whether the database is read-only. In the last case, you will be able to view and download the DB data, but not modify it. Click "Next" to proceed.
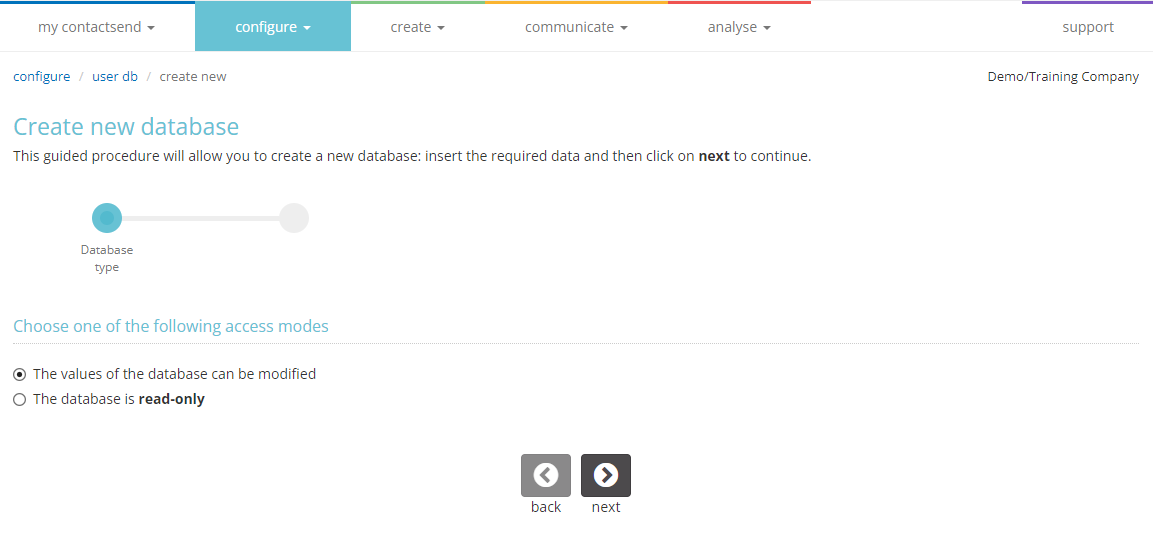
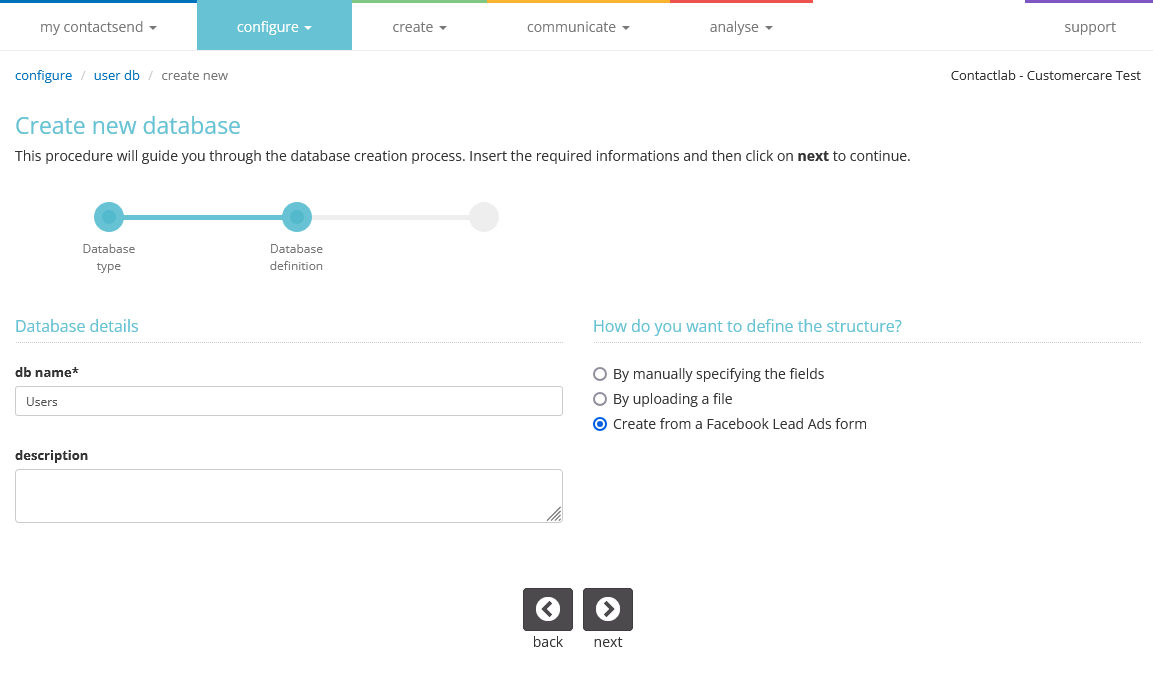
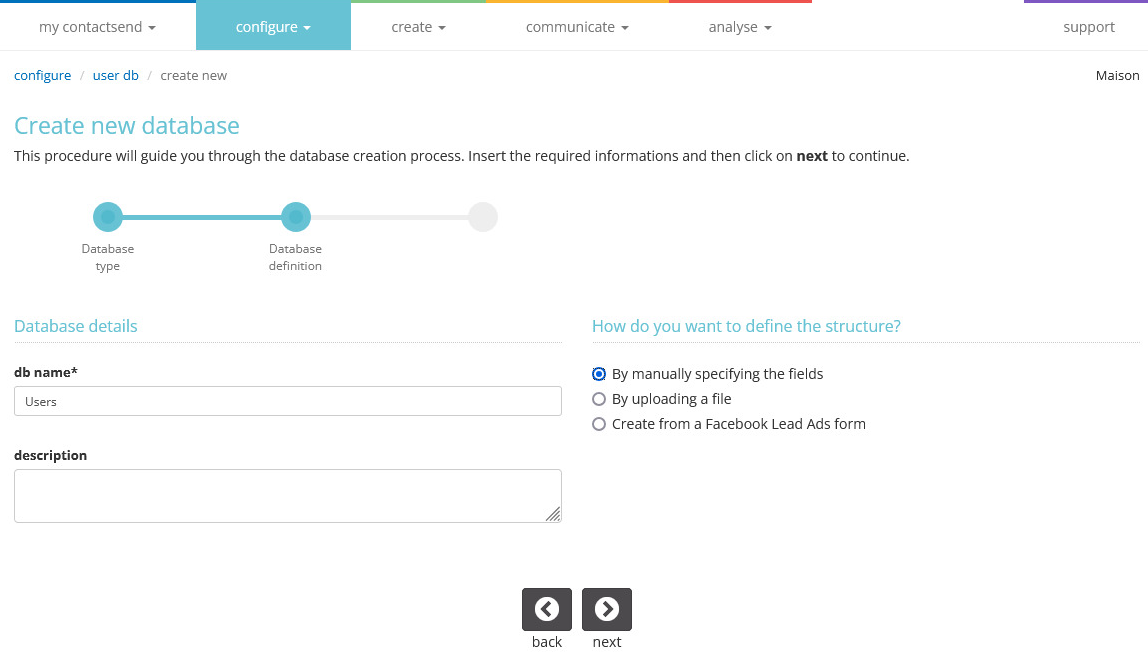
Enter the name and description of the new database. Define how to create the database structure, choosing whether to:
- Import the user list from an external file (e.g., Excel or CSV file);
- Import users via Facebook Lead Ads;
- Enter users directly through Contactsend by defining the DB structure and fields.
The maximum number of databases per company is 200. Once this limit is reached, you cannot create additional databases and must delete obsolete ones.
1) Import the database from an external file
If you already have an Excel (.xls) or CSV file containing your users, you can use it to create the new database.
Select "By uploading a file" in "How do you want to define the structure?" First, specify if the file is in CSV or Excel format. If using an Excel file, ensure all data is entered in the first worksheet (data in other sheets will not be loaded by Contactsend).
The first row of the file should contain the column headers.
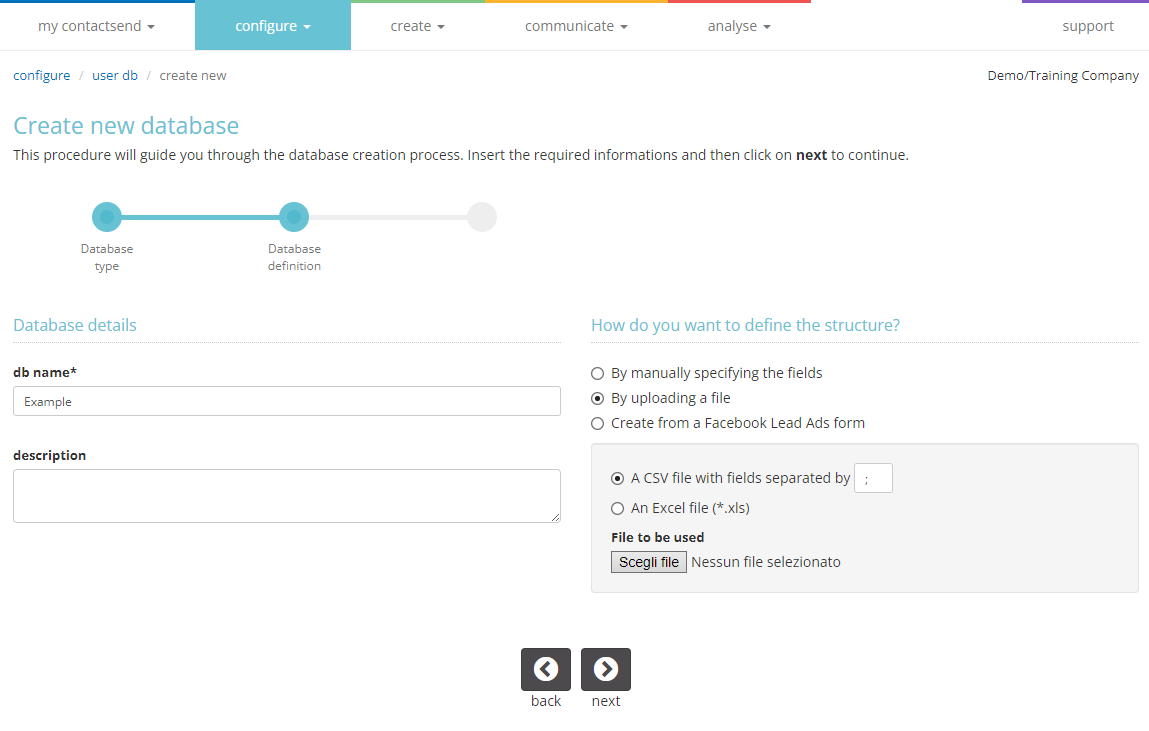
In the next step, a preview of the first 10 rows of the file will be shown. Ensure all data is displayed correctly.
In the field definition box, the number of columns and rows in the file will be summarized.
-
The Primary Key option allows you to define whether the database's primary key will be managed by the customer or by Contactsend.
- If selected, the key will be customer-managed and must be a non-negative numeric value.
- If not selected, the primary key will be managed directly by Contactsend, and a PK_ID column will be added to the database.
-
The Do not insert the first row option allows you to skip loading the first row (which typically contains headers) into Contactsend as a record (i.e., as if it were a user). It's recommended to check this box if the first row contains column headers.
-
In the box below, insert the column names. By default, the names of the cells in the file’s first row will be suggested.
- Column names in Contactsend MUST NOT contain spaces, hyphens, or special characters. Only a-z and A-Z (excluding accented letters), numbers, and the underscore (_) are allowed.
- Certain names are reserved and cannot be used: an alert will appear if you try to use a reserved name.
You can also define the field type. Below is a brief description of available field types:
- Character (1): Field with a fixed length of 1 character.
- Character (2): Field with a fixed length of 2 characters.
- Text: Field that can contain characters up to 64 K in size.
- String (255): Text field with variable length, up to 255 characters.
- Numeric (1): Numeric field with 1 digit.
- Numeric (11): Numeric field with a maximum of 11 digits.
- Non-negative numeric: Numeric field that cannot be negative.
- Date: Field expressing a MySQL date in “yyyy-MM-dd” format.
- Date and time: Field expressing a MySQL date in “yyyy-MM-dd hh.mm.ss” format.
- For date and/or date-time fields, the system will ask you to specify the format for conversion to MySQL format “yyyy-MM-dd.”
- For numeric values, entering them in a numeric field allows the creation of filters with conditions such as “greater than/less than.”
The next step requires specifying which column of the file contains the email addresses: click on the field corresponding to the email addresses. You can ignore the “SMS” column if it is not active in your contract. If this channel is active, indicate the corresponding field containing the phone number.
Phone numbers must include the international dialing code (e.g., 0039 or +39 for Italy).
Now, by clicking “Next,” the system will present a summary screen. In the “User Activities”, you can enable monitor user activities for this user DB, and/or recalculate historical data over a selected time period (if possible).
Confirm the creation of the database and click “Finish.”
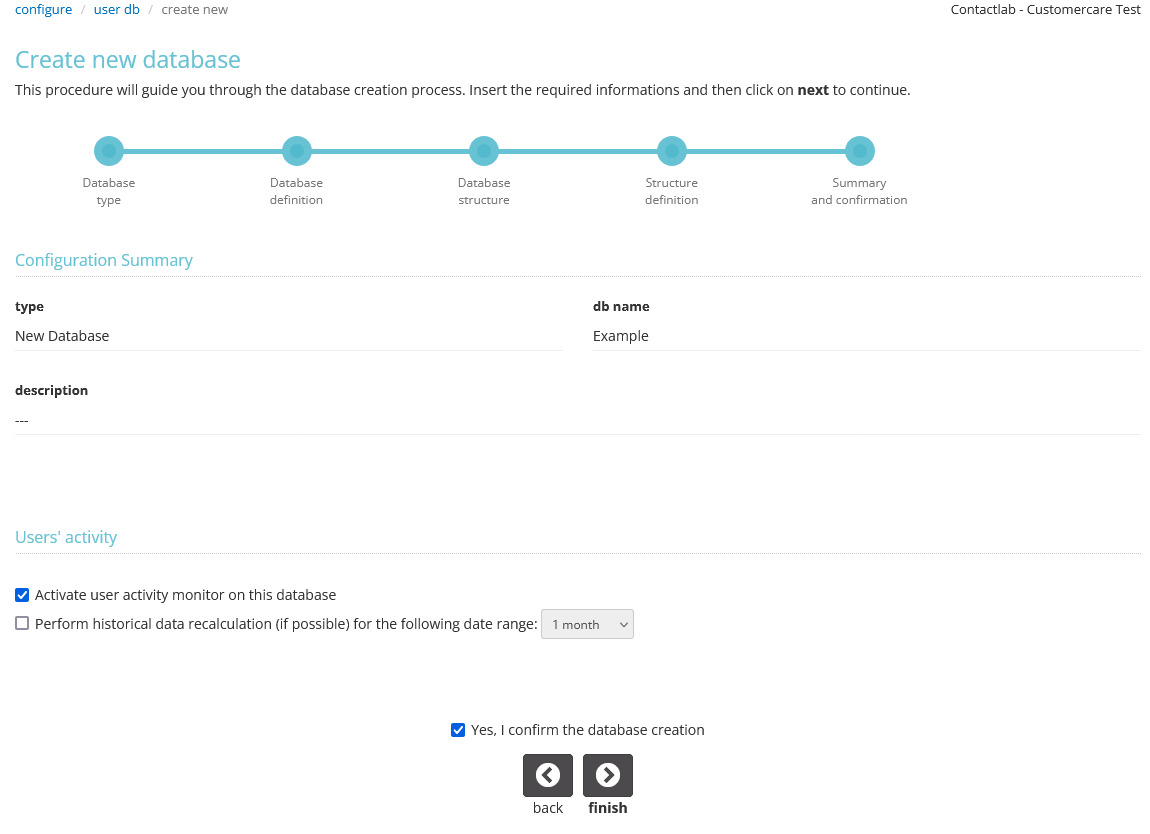
A confirmation message will notify you that the database has been created. You can now manage it (see the next section “How to manage an existing database”).
2) If in "How do you want to define the structure?" you chose the “Create via Facebook Lead Ads” option, follow the steps below:
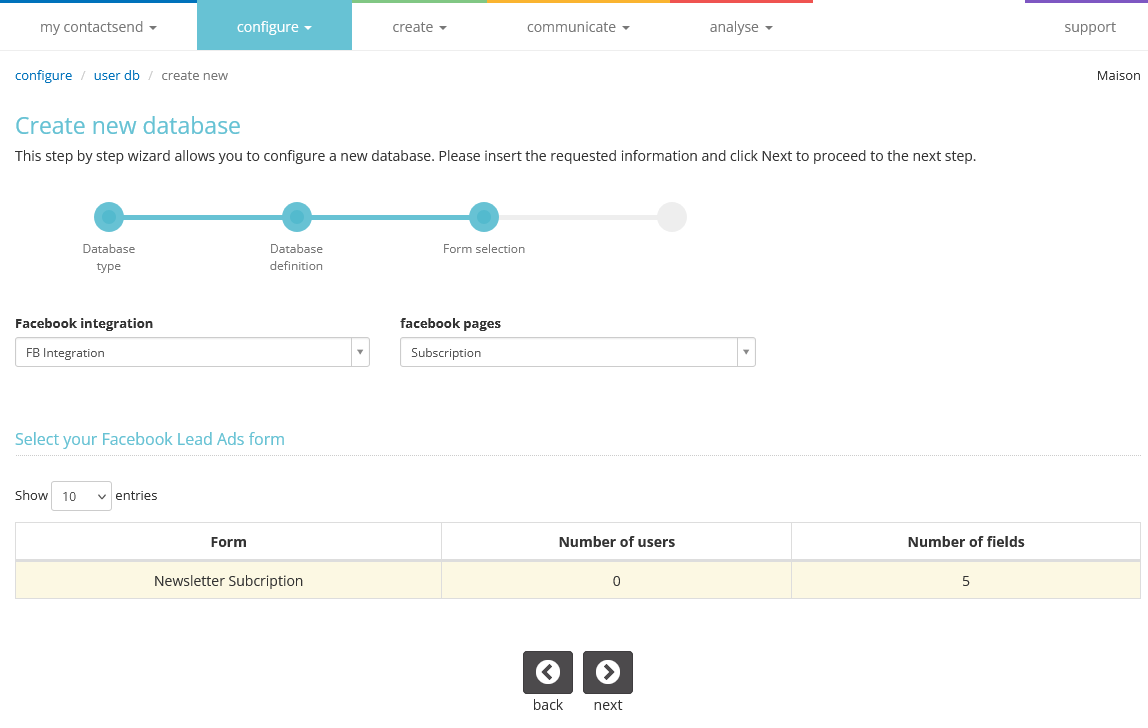
At the Form Selection step, choose the integration, page, and Facebook form to use for creating the user database, then click "Next."
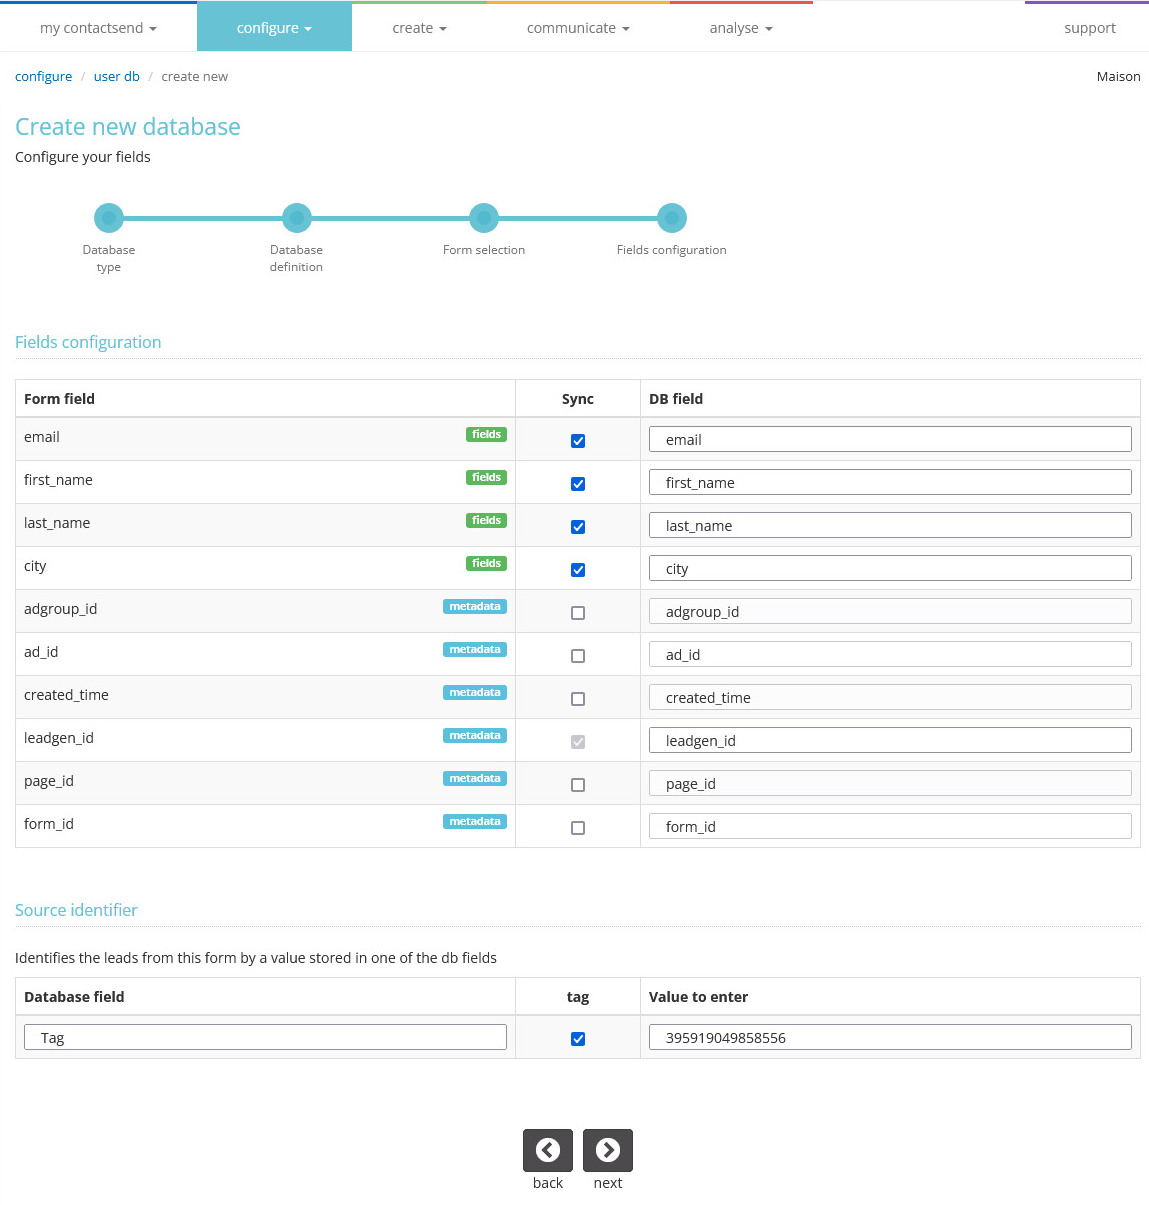
In Field Configuration, select the Facebook form fields you want to include in the user DB, as well as any metadata (adgroup_id, ad_id, created_time, leadgen_id, page_id, form_id).
You can also tag every registration from a particular form with a constant value, which will be added to a specific field in the database (Tag). By default, the form ID will be added.
The next step, Structure Definition, requires indicating which column of the file contains the email addresses: click on the corresponding field for email addresses.
Ignore “SMS” if not active in your contract. Proceed with the database creation as described in the procedure above.
3) If in "How do you want to define the structure?" you chose the “By manually specifying the fields” option, follow the steps below:
First, choose between the "Only email" and "VCard" structures. In the first case, the initial structure of the database will include only the email field, with the possibility of adding optional fields (e.g., firstname, lastname, address, etc.); in the second case, you can import a predefined structure (e.g., ADDRESS; CITY; EMAIL; FIRSTNAME; etc.) from a VCard, a format used in the address books of many email clients (e.g., Outlook).
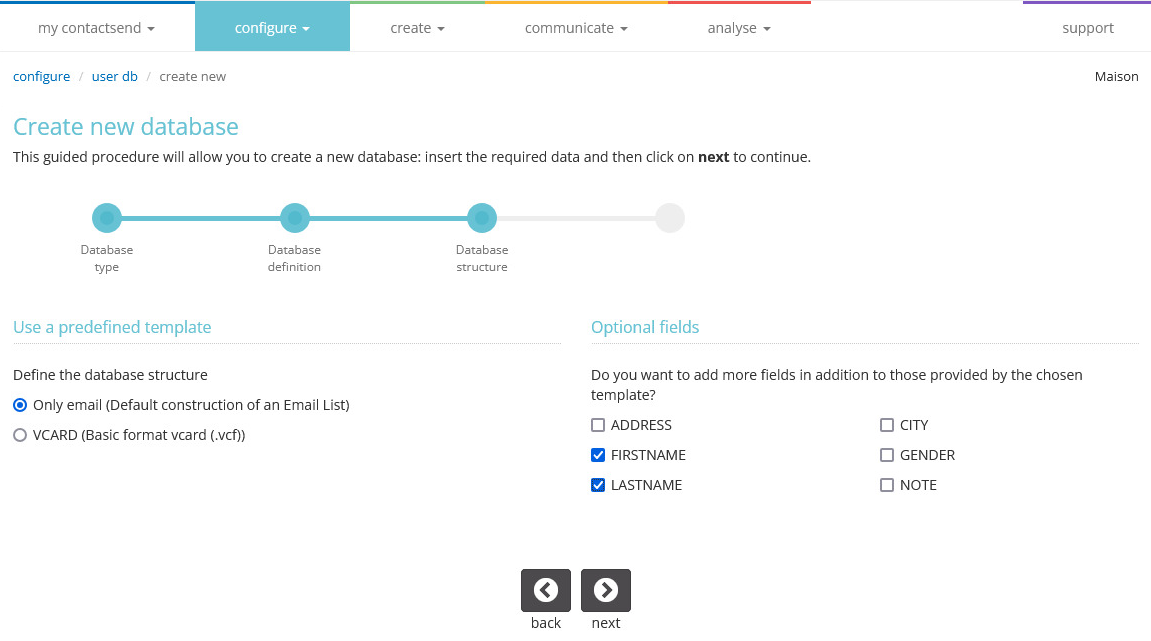
In any case, you can add more fields later.
Click “Next” to complete the wizard and confirm the creation of the new database.