Classic mode
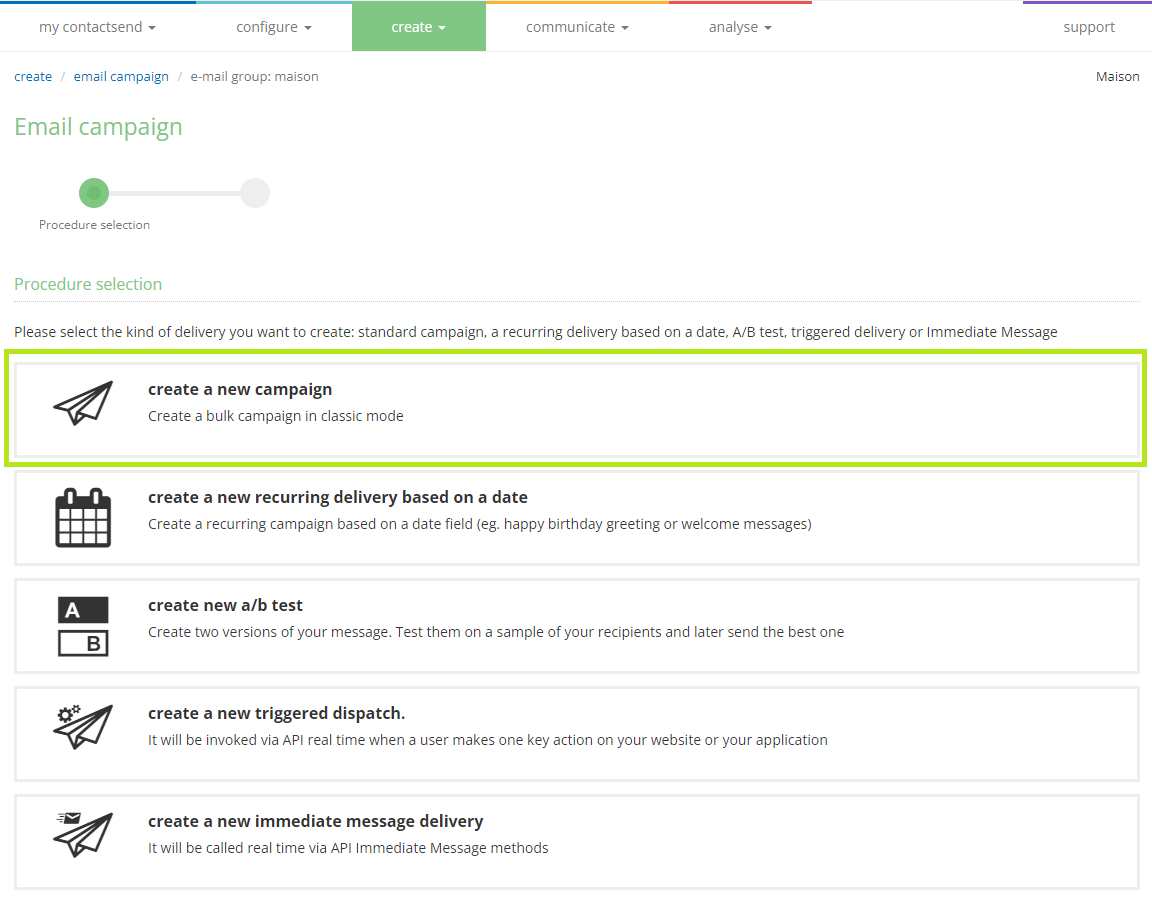
By selecting create a new campaign, you'll be guided step by step in creating a send from scratch.
Do not perform actions in the Create area from multiple windows or tabs simultaneously, as session issues or problems with the correct functioning of generated emails may occur.
Delivery Parameters
On the first screen, you need to set the delivery parameters:
Delivery title
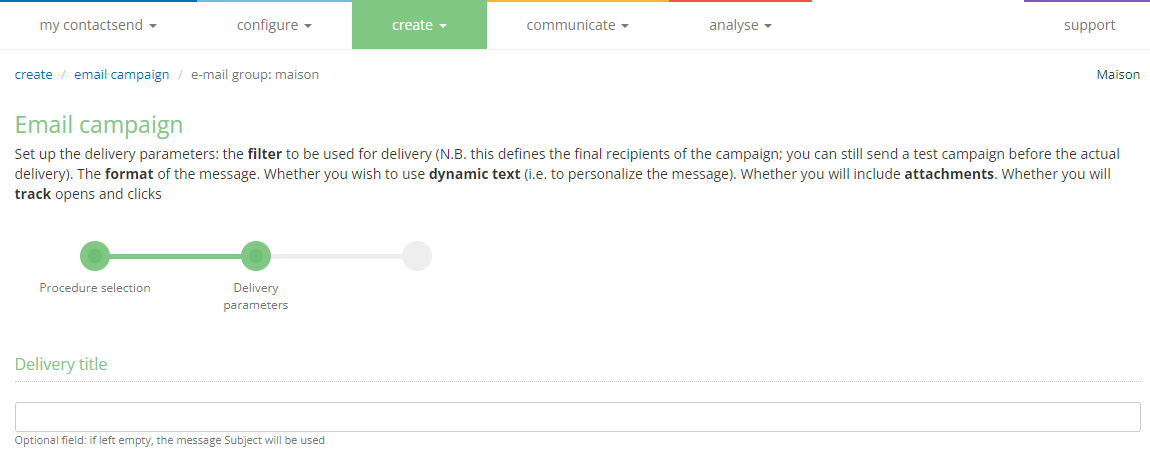
You can optionally assign a title to the send to better recognize it at a statistical level (the title will not be visible to the email recipient). If set during creation, you can modify the title later in the Summary tab available in the Analyse > Campaign Archive section. If you decide not to insert it during creation, the default title will be the email subject (you can change the title after sending, still in the Analyse > Campaign Archive section).
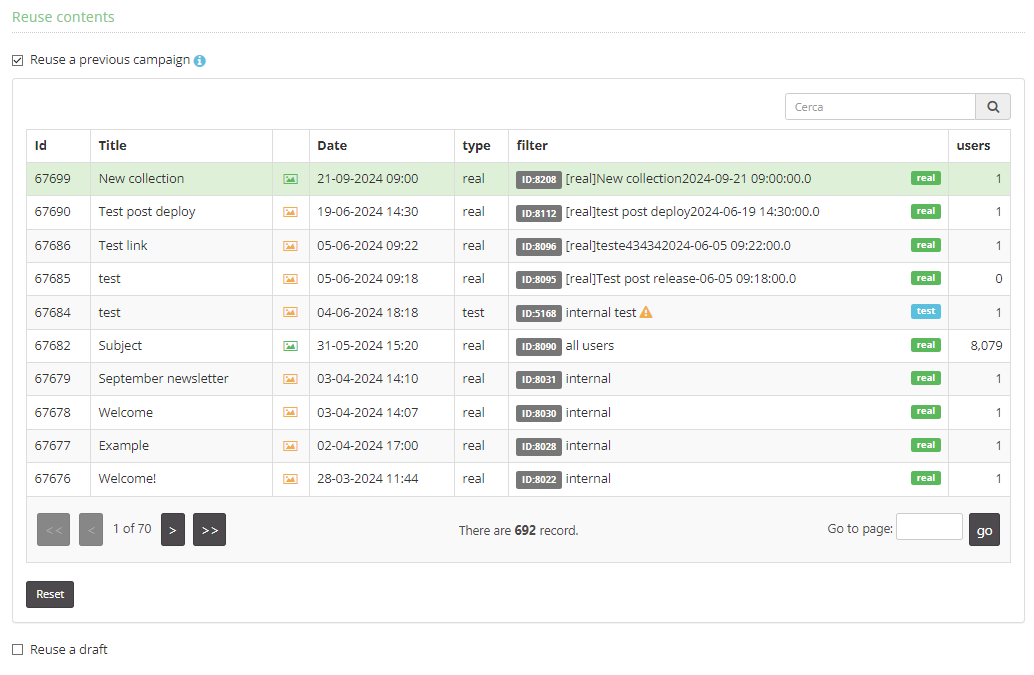
Reuse contents
You can choose whether to retrieve the content and settings of a previously sent email (Reuse a previous campagin) or reuse a previously saved draft (Reuse a draft). Select the corresponding box, then choose the campaign or draft you want to recover.
Campaign filter
Here you define the target users for the campaign, i.e., whether to send:
- to all users in the database associated with the group.
- only to users of a certain filter (for more details, see the dedicated chapter). You can search for the desired filter using the specific search engine.
- create a combined filter, i.e., use two previously created simple filters. You cannot create a combined filter using filters that were already combined filters. These will not appear in the dropdown menu.

You can modify the selected filter by clicking on the pencil icon, which will bring up the edit filter panel that allows you to add new conditions and/or modify existing ones. Clicking create new filter lets you create one from scratch, again showing the filter creation panel found in the configure section.
Here, you choose the actual list of users to whom we will send the email, regardless of the selection made. In the subsequent steps, you will be able to send test emails on the test filters already created.
Message format
You can choose to send:
- HTML only: only the message in HTML format will be created.
- HTML and plain text: allows sending a plain text alternative (txt format) within the message, which will be displayed if the recipient's inbox or mail program cannot receive HTML emails. This is the recommended choice for better deliverability.
- Plain text only: a plain text message will be created.
Select a charset: by default, the charset of the database (depending on the uploaded file) will always be used. Generally, for correct display of Western characters and potential emojis, UTF-8 should be selected.
Options
Use dynamic text
If selected, this option enables the use of dynamic text. Dynamic text is a code inserted into the message that retrieves content from a specific field within the database.
For example, the dynamic text ${Name}$ retrieves the content of the "Name" field from the database. If the database contains the user "Jonh", inserting ${Name}$ in the HTML code will replace the variable with the content of the field when the email is sent, so the user will see "Good morning Jonh!". This allows personalizing parts of the email for each individual user.
Other parts of the message, such as the subject, sender name, or email address (Mail from), can also be personalized.
The field name must be written exactly as it appears in the database (case-sensitive), or it will not be populated.
Include attachments
Enabling attachments in the send will show a dropdown menu that allows you to select how many files to attach to the message. The file upload will be done later.
Using attachments is discouraged: it increases the email size and the likelihood of it being marked as spam upon delivery. It's better to upload the desired document online (e.g., on an FTP space) and link it within the email text.
Statistics
You can enable/disable statistics on Track opens and Track clicks, which track how many times and by whom the email is opened, as well as which links are clicked and how often.
Click Next to proceed to the next step.
Message content
In this section, you need to set the sender, subject, and HTML message content.
Sender details
By default, the sender (Alias, Mailfrom, and reply-to) set for the Email Group used will be displayed. If the sender is set as editable within the group, you will be able to change it and/or retrieve previously used sender addresses configured in other email groups from the appropriate dropdown menu.
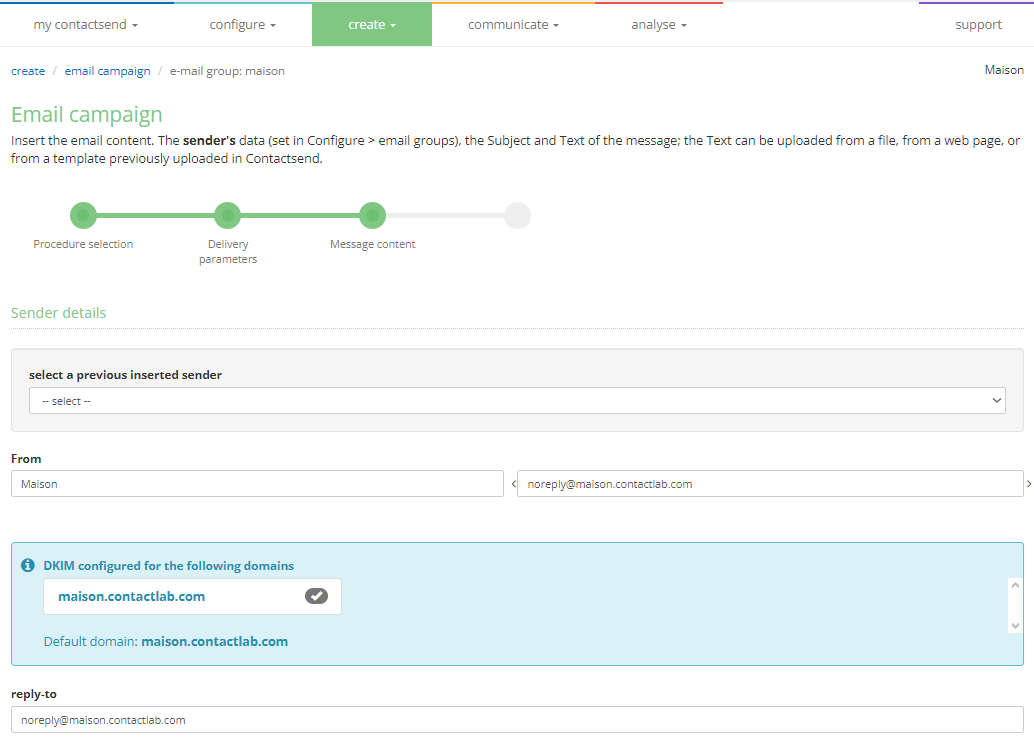
When selecting the sender, any customer domains that have a DKIM signature associated will be displayed, allowing verification of the sender's address compatibility with the DKIM signature that will be applied to the emails sent using the email group.
You can freely set the reference domain for the sender. However, if the specified domain is not compatible with any of the ones that have an associated DKIM signature, or if there are no customer domains with an associated DKIM signature, a non-blocking alert will be issued to inform the user about the DKIM signature applied and its potential deliverability impact. For more details, see the dedicated chapter.
Email subject
Set the email subject; from the dropdown menu, you can select a database field to insert a dynamic data. After selecting the field, click on the + icon.
The system will automatically add the dynamic syntax of the selected field.
HTML version
In this box, insert the actual content of your message in HTML format. The HTML code can be loaded from:
-
Email designer: A free editor with modern design, responsive compliance, allowing you to create email content and reusable templates through simple drag-and-drop technology. No HTML knowledge is required. For more details, see the Email Designer page.
warningYou cannot use Email Designer to reopen and edit a message if it was previously modified with other editors or manually.
-
HTML editor: A free editor allowing you to modify your HTML.
-
Pagebuilder: A tool enabling content editing of templates created specifically for the client by our agency, without the risk of damaging the HTML code and thus avoiding display errors for recipients. This tool is accessible only to customers who have activated it by contract; to activate it, contact your sales manager.
-
A file on your computer: allows uploading an externally created HTML.
-
A web page: allows inserting a URL.
-
A template: allows selecting a previously created template from the create > templates section.
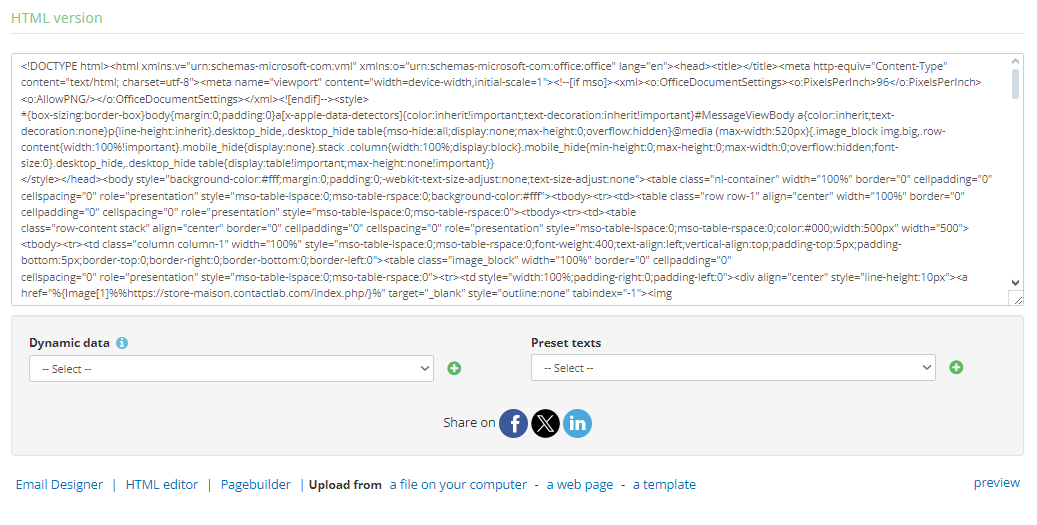
As with the subject, you can select dynamic fields from the dropdown menu to add.
At this stage, you can also insert links for sharing on Facebook, X (ex Twitter), and LinkedIn by clicking the respective icons.
Plain tex version
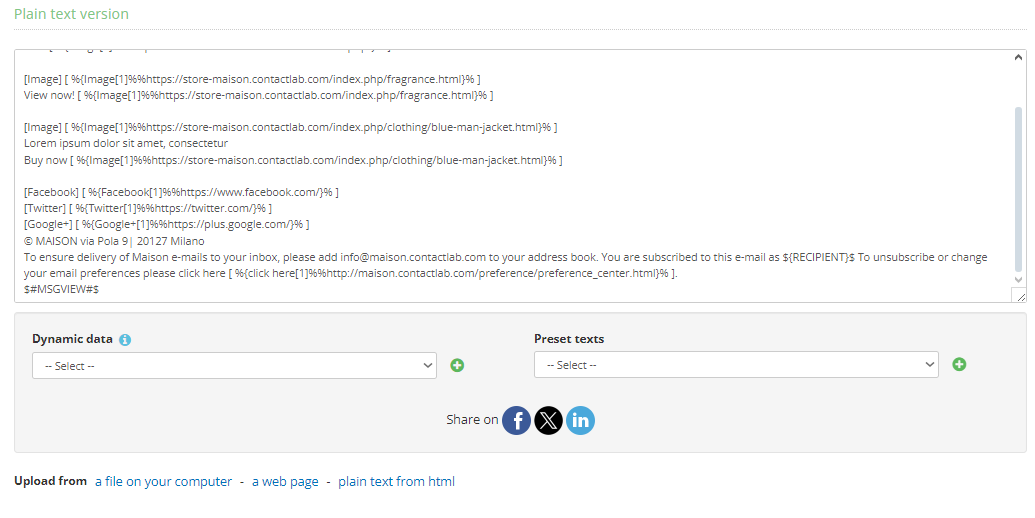
In this box, insert the plain-text alternative for the message, which will be displayed by email clients that do not support HTML. It can be uploaded from:
- a file on your computer: allows uploading an externally created text file.
- a web page: allows inserting a URL.
- plain text from html: clicking this option generates the text version of the email from the HTML automatically.
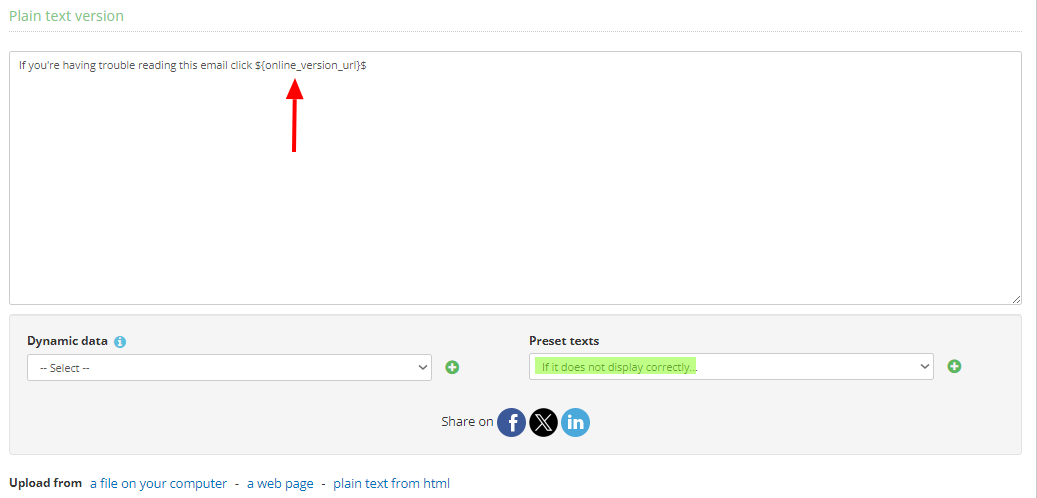
Alternatively, you can select Preset texts from the dropdown menu, including the online version URL.
Preview on different clients
With this feature, you can preview the message as it will appear on different email clients, whether desktop, mobile, or webmail, without needing to send a test mailing.
The instant preview service is available by subscribing to a plan, which can be requested from your sales representative. The cost is calculated based on the number of previews generated. Companies that have not subscribed to the service can still try it using 10 free previews. A counter shows the number of free previews remaining or, if the service is active, the number of previews already used in the current year.
To generate a new preview, click the Generate preview button. A window will open showing the preview screens on the different clients. Generating thumbnails usually takes a few seconds but may vary depending on the size of the HTML code and other variables.
At any time, you can check the progress of the available thumbnails through a horizontal bar showing the percentage of those already available, compared to those requested.
- Devices allows you to decide whether to display only previews for mobile devices, desktops, web clients, or any type. By selecting the "specific" box and typing the name of a device or operating system, you can choose to display one or more specific devices/clients.
- Status: you can choose to hide screens that are not yet ready by selecting "completed only" at the top right.
By clicking on one of the thumbnails, you can view the details of that specific client.
Depending on the client, one or more icons may appear in the top right corner:
- Shows the message in the vertical orientation of the device
- Shows the message in the horizontal orientation of the device (e.g., a smartphone rotated horizontally)
- Shows the message without images, as in a client that blocks image downloads
If you close the preview window without making any changes to the HTML, you can recover it by clicking the Open preview button. The displayed preview will be the one previously requested, so the number of previews used will not be changed.
The Force a new preview button generates a new preview of the message. In this case, it counts as a new preview and will be added to those used. Forcing a new preview is useful, for example, if changes have been made to the message, and you want to immediately see the result on different clients.
Once the content is entered, click Next.
The system may display warnings indicating some issue in the HTML content of the message. Specifically, warnings may be:
This means that unsubscribe links created by the platform were not inserted in the template. This is just a non-blocking warning, as you can use your own external link. By clicking next again, you will proceed to the next screen.
This means that an unsubscribe link associated with a different email group than the one from which the mailing is being created is being used. Retrieve the correct link from Configure > email groups > subscriptions. In this case, you cannot proceed until the error is corrected.
Inserting links with the http protocol instead of https could cause deliverability issues. However, this is just a warning. By clicking next again, you will proceed to the next step.
Link tracking
In this step, the list of links present in the HTML and the alternative text appears. You have the option to select the links that should be tracked for statistics (by default, they will all be pre-selected), enable Google Analytics integration (if available), and associate a Link Category with them.
Users who have a Marketing Cloud associated with the database will see the MC Id checkbox. If selected, this adds the unique customer identifier from Marketing Cloud to the link.
If the same link (identical URL) is present in both the HTML format and the alternative text, the system will consider the category and description entered in the HTML format.
![]()
Click Next to proceed.
The system may display this warning:
This means that not all links have been selected for tracking or that there are non-trackable links. By clicking next again, you will still proceed to the next page.
If you chose to attach files to the message, you will be prompted to upload them at this point; otherwise, you will proceed directly to "Summary and Preview."
Summary
In this step, all the settings for the campaign are summarized: subject, recipients, format, options, etc.
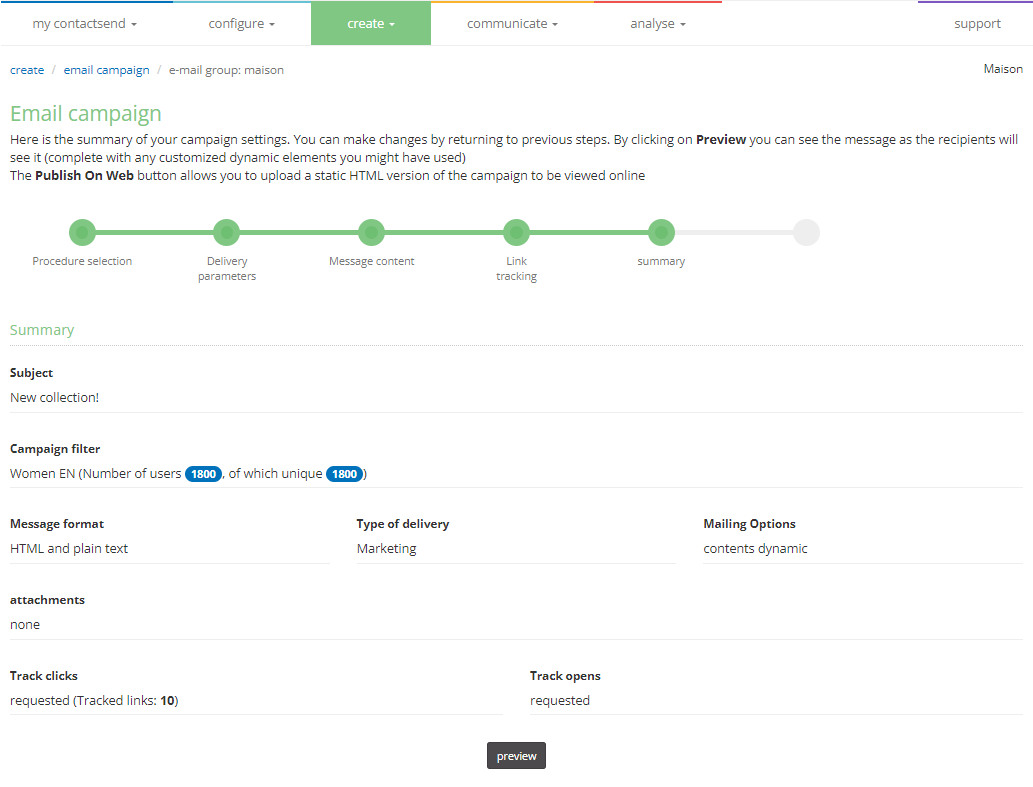
By clicking on Preview, a real preview of the email will be shown, just as the end user will see it, for the first 100 users of the filter. This means that any dynamic fields will be populated with the data present in the database. It’s also possible to adjust the page width to check the behavior of responsive emails.
This "user view" is still a visualization done through a browser. An email client may display the email differently.
Analysis

-
SPAM Blocker analysis: In this section, the message is given a score based on its content. If the score is higher than 5, a spam risk warning will be indicated. The box will display the individual scores for each detected issue so that corrections can be made (e.g., too many images in relation to text, alternative text does not match, etc.). However, this is a non-blocking warning.
-
Suspect link analysis: At this stage, any presence of links to listed domains on some of the major public blacklists (specifically SURBL and Spamhaus, for which Contactsend is a real-time datafeed customer), a private blacklist by Contactsend, or links containing an IP address instead of a textual URL will be flagged. Currently, only links to domains listed in Spamhaus or Surbl are blocking (so if not corrected, it will not be possible to proceed).
Labels
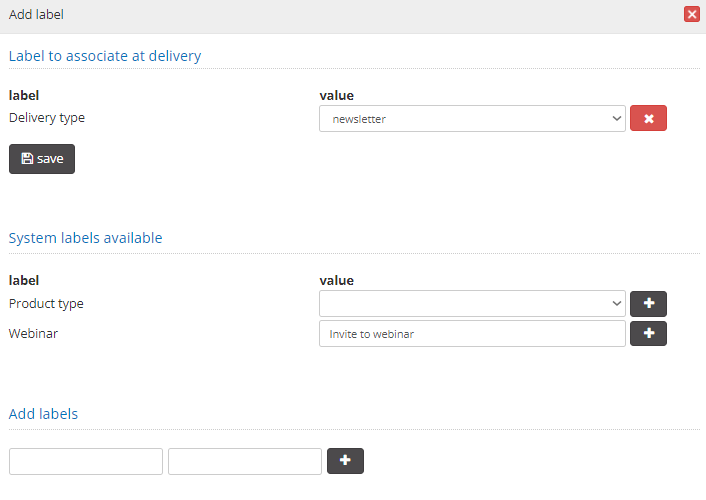
In this step, you can assign labels to the campaign. Simply click on Label management, insert the label of interest, and save the changes.
You can choose from the System labels available, previously created in Configure > Classifications > Labels, or create a new one from Add Labels.
Publish on web
The "Publish on web" box is used to publish a static version of the message content. This step is mandatory only if inserting a social network sharing link.
To create the static version, check the publish on the web box and give the file a name. The URL where the file will be published will be shown, and you will be able to preview the page. Alternatively, by clicking choose file, you can upload an alternative template from your computer.

To modify any settings or content, go back by clicking on the timeline to the desired point and make the changes.
When satisfied with all the settings, click Next.
Delivery
In this section, you can proceed with the test delivery before concluding the creation process and setting up the actual shipment.
Send test delivery
It is always advisable to send one or more test deliveries before proceeding with the actual one, in order to thoroughly check how the message is displayed and make any necessary corrections or modifications.
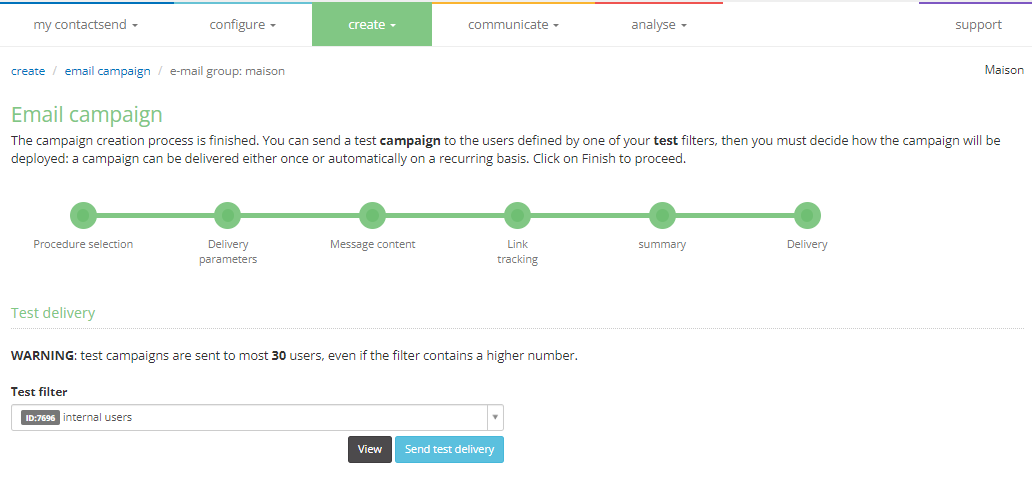
Select the filter of users enabled to receive the test in the Test filter field. By clicking View, the list of users in the filter will be displayed. Then simply press Send test delivery to proceed with the send. The test delivery has been sent. Verify it to make any necessary adjustments.
Once the test is satisfactory, you can proceed with the actual delivery.
Bulk delivery: deploy method
Deduplicates removal
The Automatically remove duplicates option, if enabled, blocks repeated email addresses from being sent without physically deleting them from the database (thus performing logical, not physical, deduplication). The first address entered in the database is automatically kept, and subsequent ones are blocked. This prevents the same email from being sent multiple times to the same user.
Sending method: Unique
To send the delivery in one go, you can choose between:
- Confirm your campaign deployment from the communicate section: if you want to perform a single send;
- Set as recurring: to schedule recurring deliveries with frequencies greater than a day (e.g., hourly) or only on specific days of the week or months of the year, as well as define a start and end date for the recurrence. You can also set the time zone. The default time zone is the user's. Recurring deliveries must be activated in the section Communicate > email deliveries > recurring.
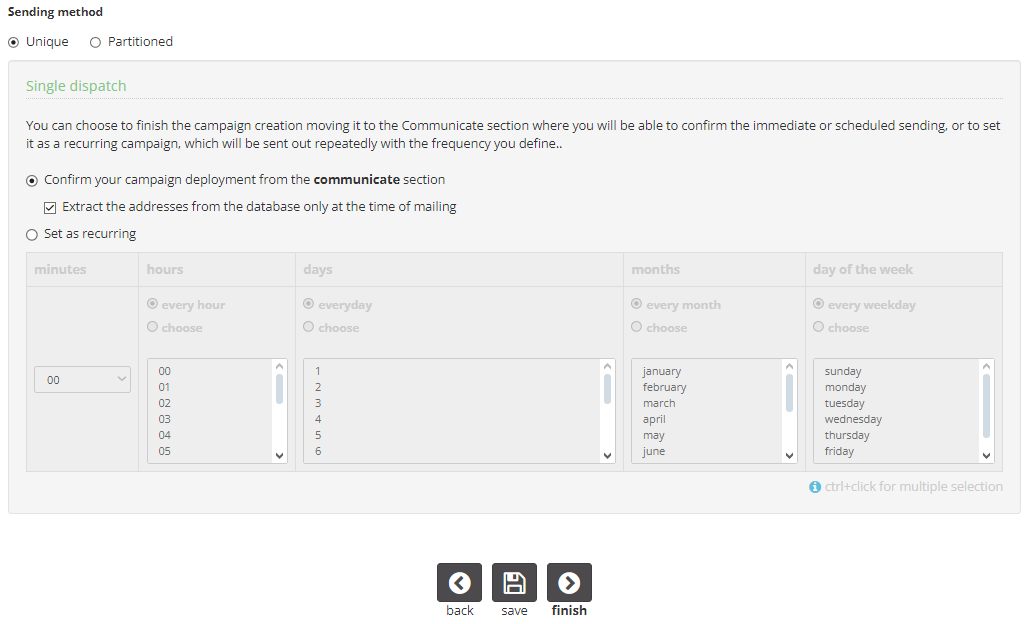
Extract the addresses from the database only at the time of mailing: if this checkbox is unchecked, the system saves the database as it is when you click the "Finish" button. If the option is active, the addresses will be extracted only when the email actually leaves the server (so they will be updated).
If the Extract the addresses from the database only at the time of mailing box is unchecked, the database will remain locked until the dellivery is sent. During this time, no changes can be made to the DB.
Sending method: Partitioned
Only users with this option enabled at the permission level will see the button active. Clicking it opens a mask that allows you to divide the delivery into different segments.
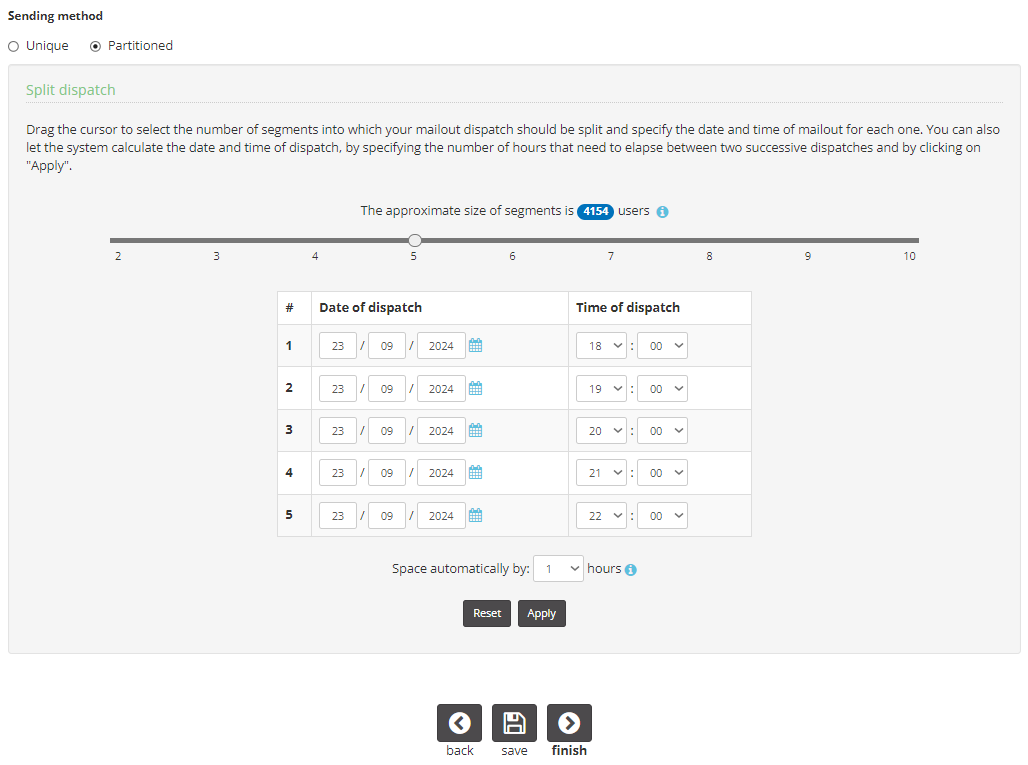
The goal is to send out a single delivery one segment at a time. This can be useful in case of a large send, to avoid having all visits to your website (or calls to your call center, etc.) come in at once. The delivery will remain a single entity with one send. At the statistics level, you can analyze the data globally or by individual segment.
You can decide how many segments to partition the delivery into (currently up to 10) and at what time intervals: The time interval can be automatically set with the auto-spaced function or manually.
Complete the creation
To complete the creation, click Finish, a confirmation message will appear, and you can assign a primary and multiple secondary commercial categories to the delivery.
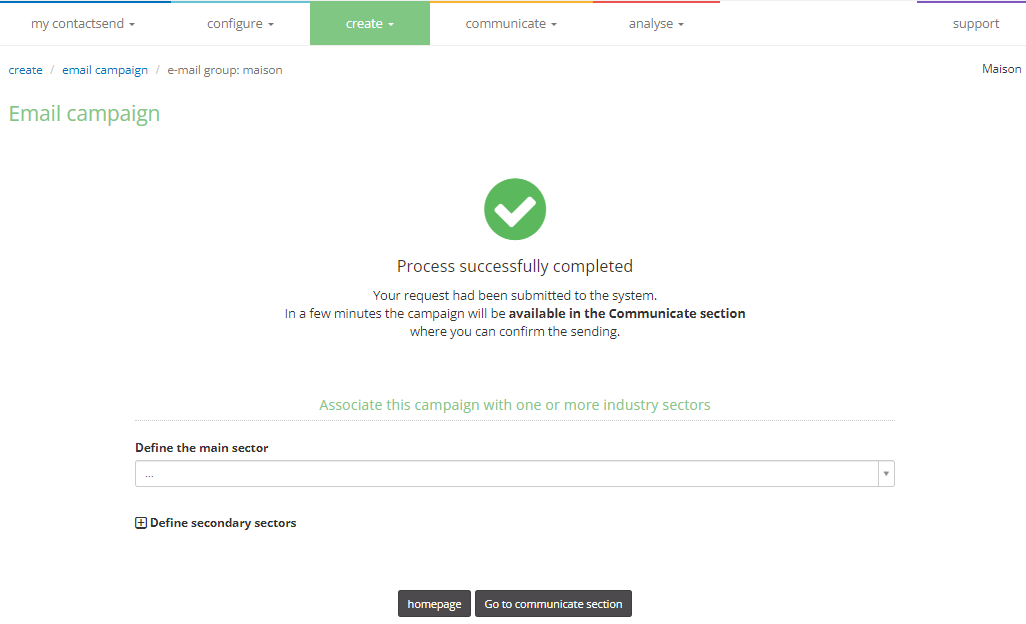
Clicking Finish does not send the delivery; it will be placed in the sending queue. Proceed to the Communicate > email deliveries section to actually send the delivery.