Adding branches to the check step
Once the Check step is configured, you need to define the paths a contact may follow depending on whether the selected triggering event occurs or if certain customer profile properties exist at the time of the check:
- A default branch.
This is the path automatically followed by a contact if the defined check event does not occur within the selected time period, or if the customer profile properties do not match any of the rules selected for the alternate positive path.
The first path added is always the default path. - At least one positive branch.
One or more paths that a contact can follow if the defined check event occurs within the chosen time period, or if the customer profile properties match the set rules. The actual path the contact is directed to is determined by the event and/or the demographic rules applied to the path.
Configuring the branches
After selecting the desired check step (Wait then check or Wait for trigger), click on the branching icon and select the appropriate step (e.g., Send mail action).
The first step added is always the default branch.
For example:
-
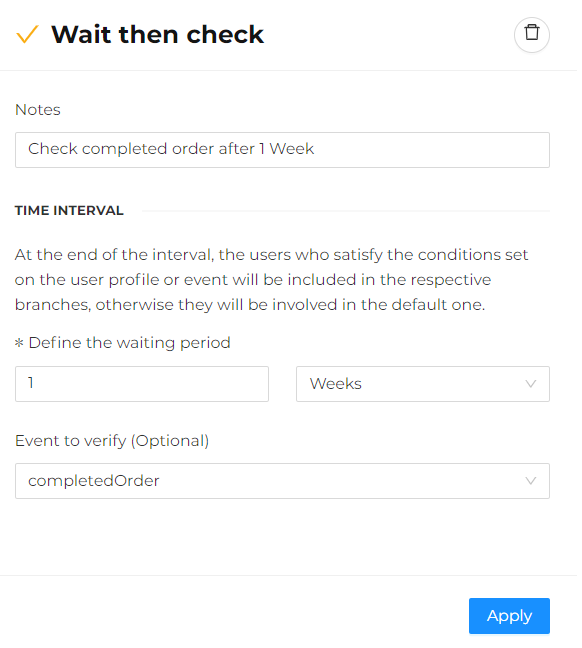
Select the Wait then check step with the condition to wait one week and then check if a completed order event has occurred, and click Apply.
-
Select the branching icon and add the default branch with the Send SMS action, setting up a reminder SMS to encourage the user to complete the purchase.
-
Select the branching icon again and add a positive branch with the Send mail action to thank the user for the purchase and send a discount coupon email.
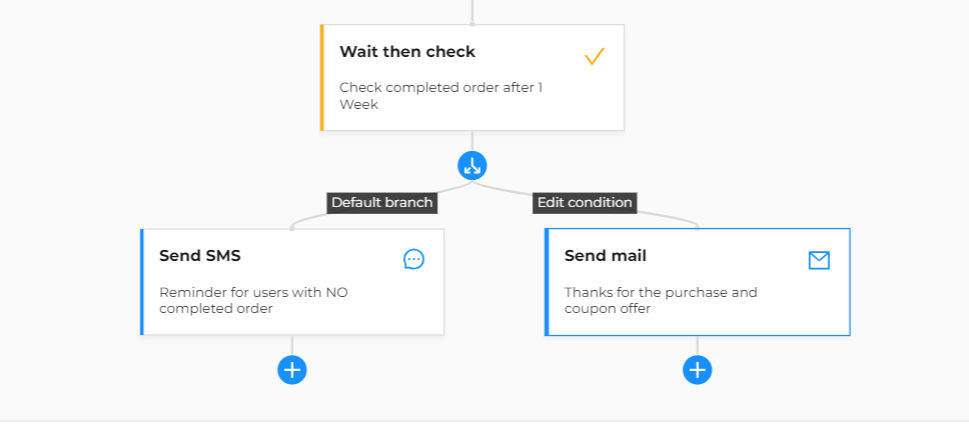
This is a simple branching.
You could complicate the path by adding a third positive branch and creating branching as follows:
- Send a thank you email to those who purchased and spent less than 100 euros;
- Send a thank you email with a discount coupon to those who purchased and spent 100 euros or more;
- Send an SMS to those who did not purchase.
Given this new scenario, you can modify the previously created branching as follows:
-
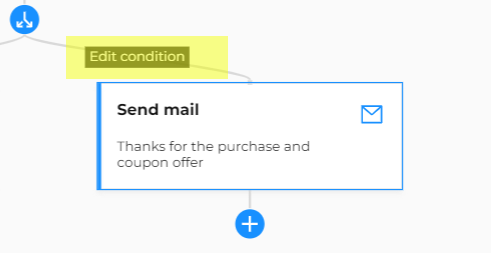
In the previously added positive branch, click Edit condition.
-
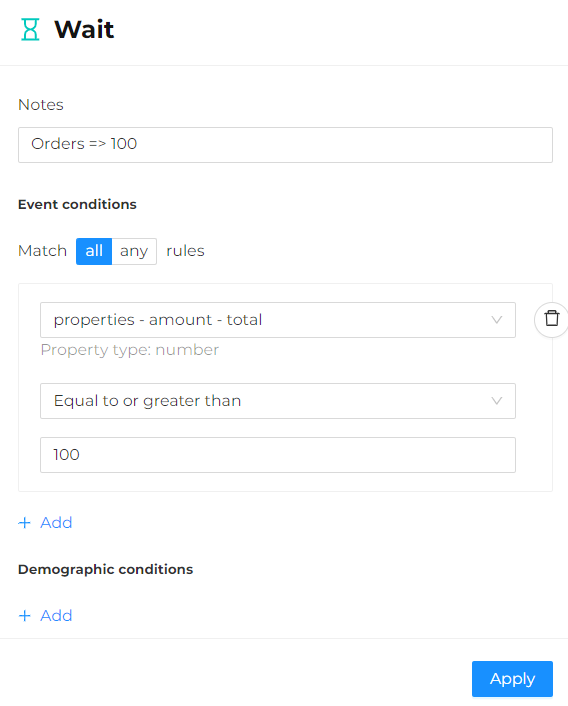
Set a condition on the event like "properties - amount - total" equal to or greater than "100".
-
Click on the branching icon again and add another Send mail action.
-
Modify the condition of this third added positive branch by setting a condition on the event like "properties - amount - total" less than "100".
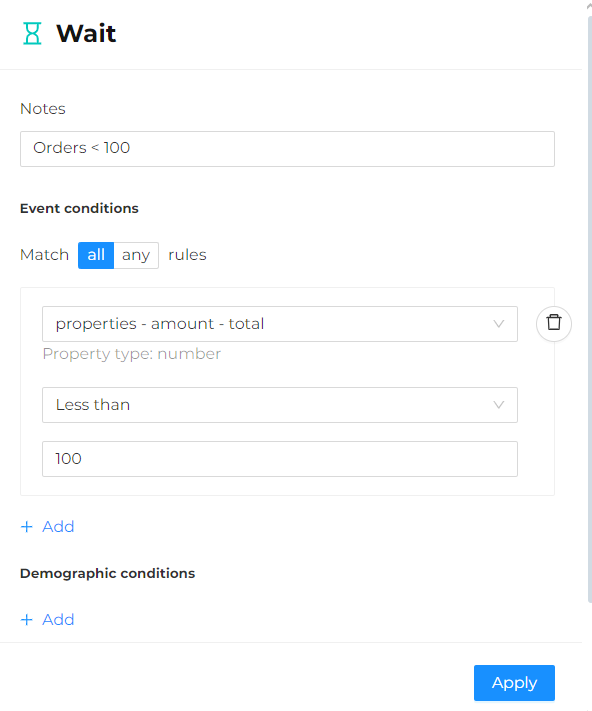
The result will be as follows:

Similarly, you could create branches to send emails in different languages, defining English as the default language.
In this case, you can add a Wait then check step by selecting a dummy time interval (e.g., 1 second) and no event.
Remember that verifying an event is an optional choice.
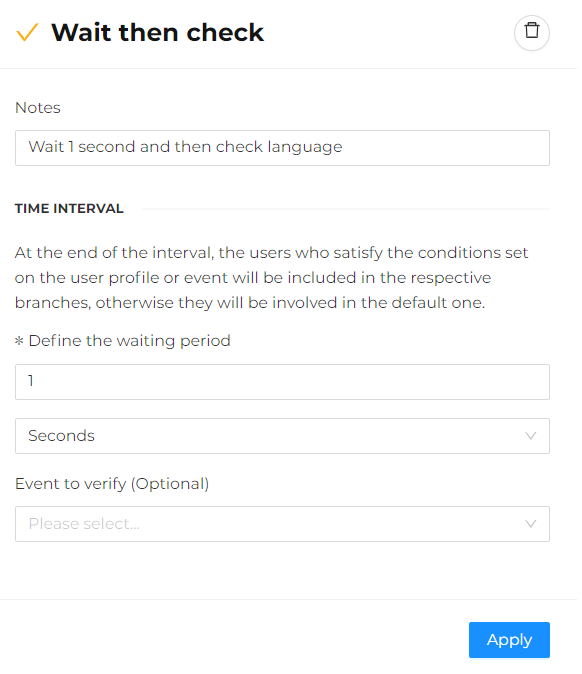
Then set up as many branches as there are email languages, setting demographic conditions for each branch like:
-
Basic or extended customer profile property containing the language equal to the language value. For example, "extend - language" equal to "IT".
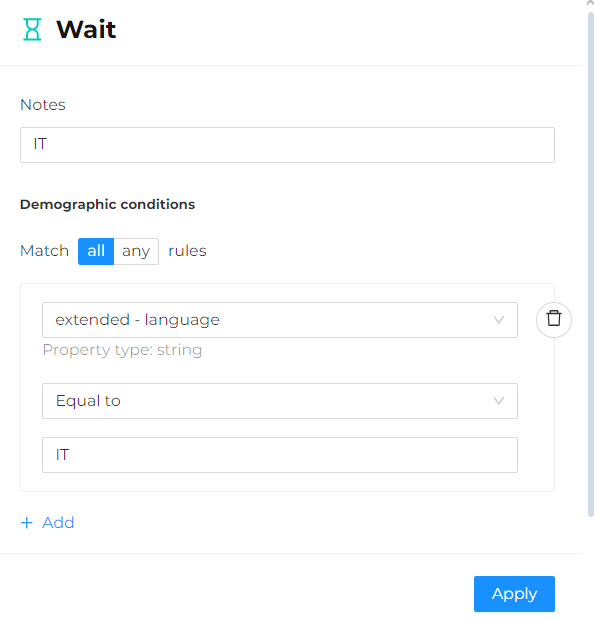
-
Replicate the demographic conditions for each branch.
-
In the end, the result will look like this:
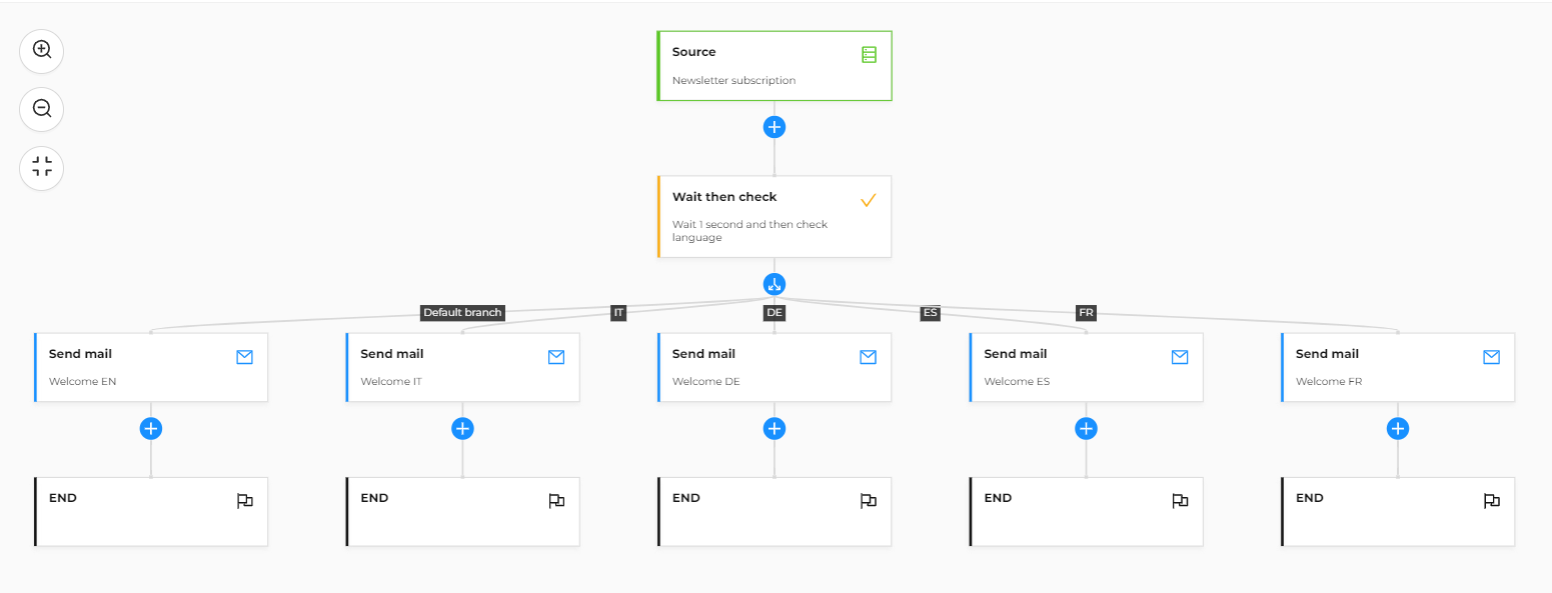
You will need to complete each action step with the appropriate content.