Adding an action step
An action is used to configure and initiate an activity that is sent to an external system, such as the Send module for sending emails and/or SMS messages.
Every automation must have at least one action.
Multiple actions can be used, for example, to send different emails and/or SMS messages to the same contact list, with an appropriate time interval for each send.
The available actions are Send mail, Send SMS, Tag and Webhook.
Send mail
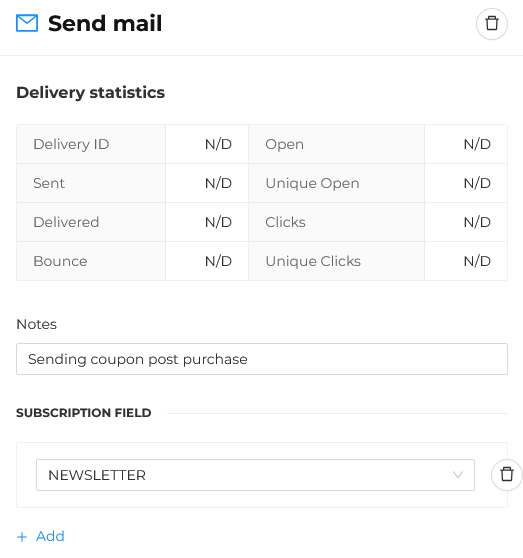
When selecting the Send mail action, the automation will proceed with sending an email via the Send module.
Click on the box and enter the following fields:
- Notes: details about the email sending action, for internal use only. It is advisable to provide a brief and descriptive note to quickly and clearly understand the type of email that has been configured.
- Subscription field: if the email should only be sent to subscribed users, click on Add and select the subscription field configured on the platform.

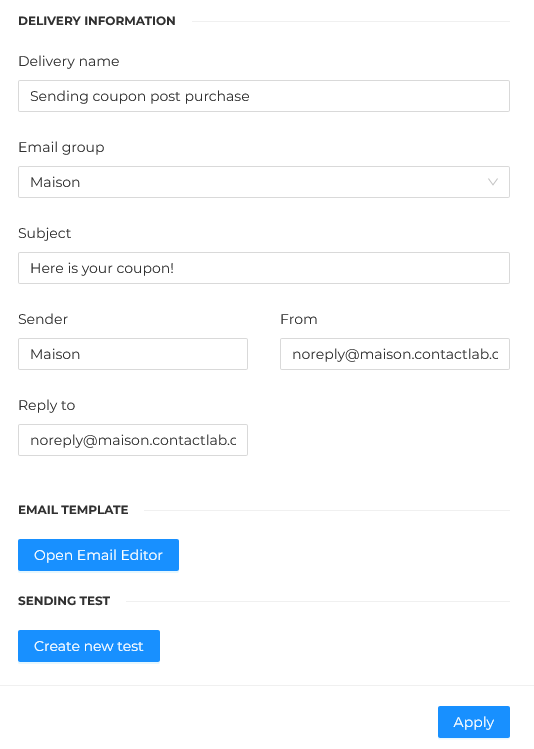
Next, add the DELIVERY INFORMATION, such as:
- Delivery name: the name of the email campaign that will be sent, for internal use only.
- Email group: select the previously configured email group in Send from the dropdown menu.
- Subject: enter the subject of the email that will be sent.
- Sender: the sender's name, which will be automatically retrieved from the email group selected above.
- From: the sender's email address, which will be automatically retrieved from the email group selected above.
- Reply-To: the email address for replies, which will be automatically retrieved from the email group selected above.

-
EMAIL TEMPLATE: click on Open Email Editor and either paste your HTML content into the designated box or retrieve the template from internal editors like Pagebuilder/Email Designer.
-
SENDING TEST: click on Create new test and enter the email address to which the test email will be sent, along with any Attributes for Personalization (dynamic fields).
warningThe test email can only be sent to one user at a time, and it is not necessary for this user to be present on the platform.
Finally, remember to click Apply to save the changes made.
Send SMS
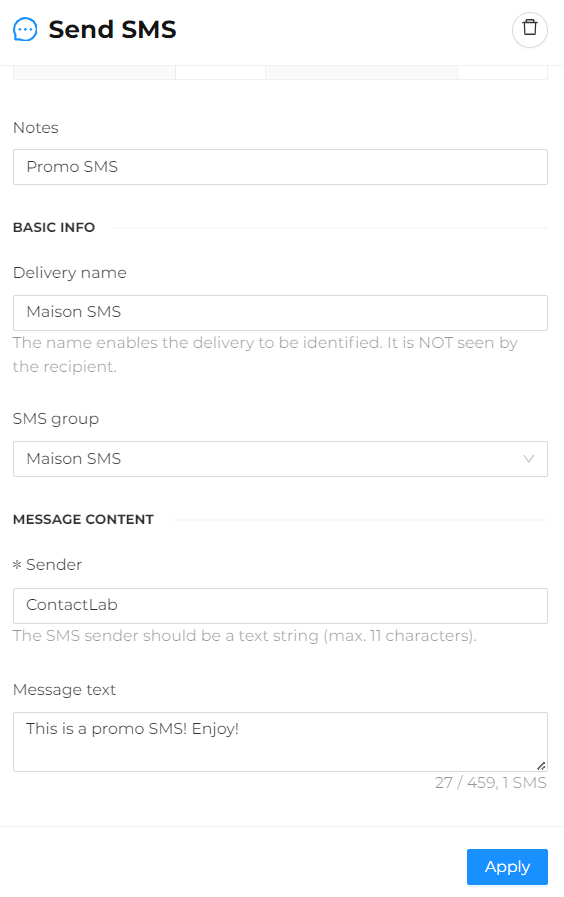
By selecting the Send SMS action, the automation will proceed with sending an SMS through the Send module.
Click on the box and fill in the following fields:
-
Notes: details about the SMS sending action, for internal use only. It's advisable to include a brief and descriptive note to quickly and clearly understand the type of SMS that has been configured.
-
Delivery name: the name of the SMS delivery, for internal use only.
-
SMS group: select the previously configured SMS group from the dropdown menu in Send.
-
Sender: enter the SMS alias. Note that the SMS sender must be a text string (max 11 characters) and that for sending in Italy, it must be registered with Agcom before use. Contact Customer Service for more details on registration.
-
Message text: enter the content of the message here. By default, a 160-character message will be sent. To send longer messages, contact Customer Service and request the activation of concatenated SMS (ability to send up to a maximum of 7 messages).
infoIf tracking options are enabled for the reference SMS group, any links included in the message text will be automatically tracked and shortened by the platform.
The tracked and shortened link received in the message will look like:https://clab.to/XXXXXX.
Finally, remember to click Apply to save the changes made.
Tag
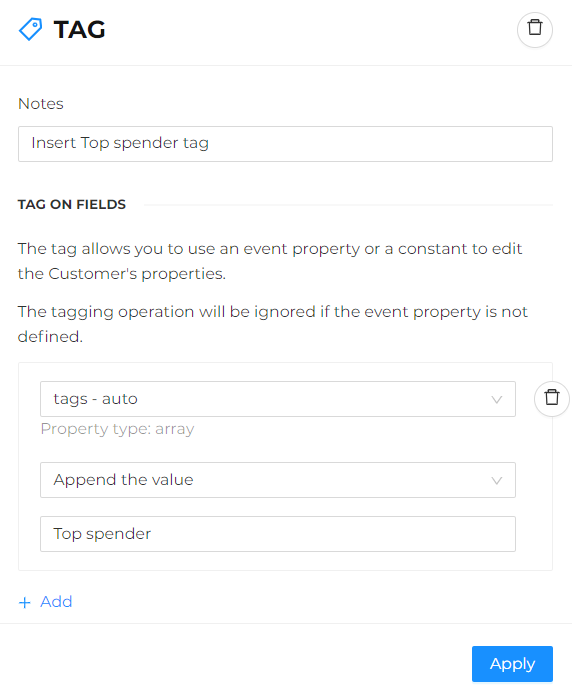
A Tag action allows you to add information to a customer's property or replace the existing value with a new one. It is possible to tag the same customer property in more than one automation.
Add the action and enter the following information:
- Notes: enter a brief and descriptive note about the configured tag action.
After clicking Add, select the property to update, the tag action (Append the value, Append the property, Append the placeholder), and the value from the dropdown menu.

Finally, remember to click Apply to save the changes made.
Webhook
This allows you to notify a third-party system that a specific event related to the contact has occurred, through an HTTP call.
After adding the Webhook action step, enter the following fields:
- Notes: brief identifying description of the action.
- URL: the address to which the HTTP request should be sent.
- HTTP HEADERS: enter the appropriate key/value pairs here.
- JSON PROPERTIES: enter the appropriate key/value pairs here.