Creating a new real-time automation
The first step of an automation is always the Source step.
To configure the behavior of the Source step, click on the corresponding box in the diagram.
The source is enabled by default to receive contacts from the segmentation module.
To ensure that the automation is triggered in real time by a specific event, select the option Activate input event trigger.
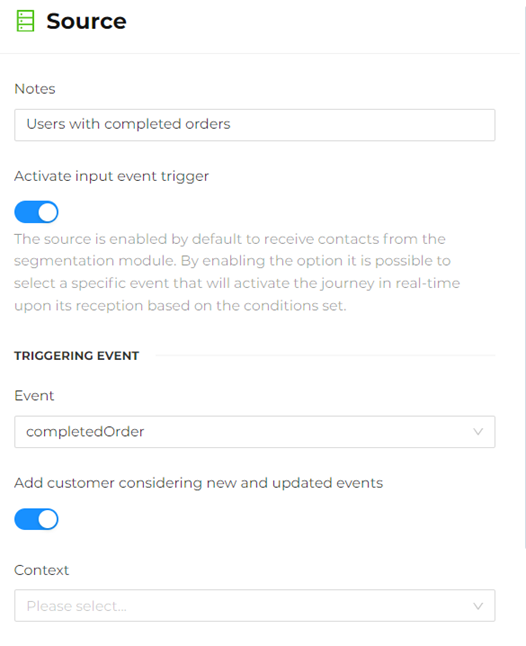
Then, enter the relevant information, such as:
- Event, selecting the event that triggers the automation (e.g., Completed order).
- Add customer considering new and updated events, enabling this option allows new contacts that meet the Input Event condition to enter the automation even during the event update phase.
- Context, specifying a precise context to which the automation should be restricted and refer to, such as eCommerce, retail, web, etc.
Also insert other useful conditions as needed, such as:
-
Event Conditions, to add other conditions that determine the contact's entry based on the previously selected event.
For example, if the selected event is Completed Order, you might choose the condition properties-amount-total to include only contacts with an order amount greater than 100.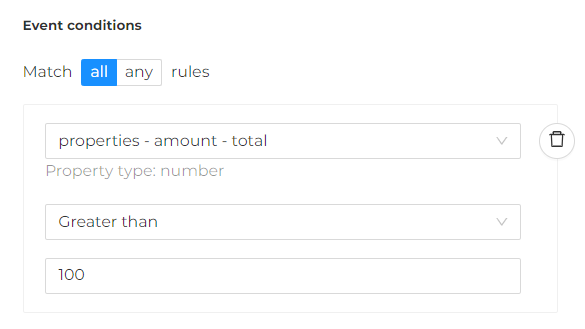
It is possible to insert one or more conditions that must all be met simultaneously (AND) or only some (OR, at least one of those set).
-
Demographic Conditions, to ensure that the contact enters the automation only if certain demographic conditions are met.
For example, base - address - country equals US.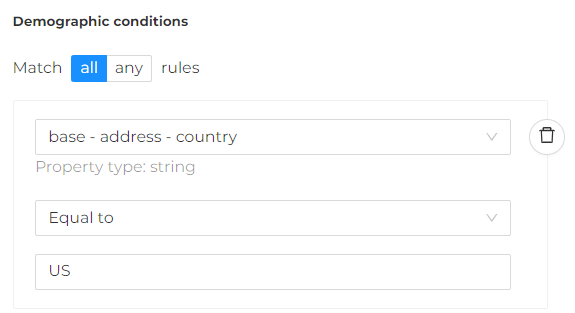
Also in this case it is possible to insert one or more conditions that must be satisfied all at the same time (AND) or only some (OR, at least one of those set).
warningEvents, event conditions, and/or demographic conditions and their values depend on the data integrated and entered into the platform.
-
Attributes for Personalization, enter any customer and/or event properties to personalize the content of the message with values retrieved from the customer's profile and/or the event.
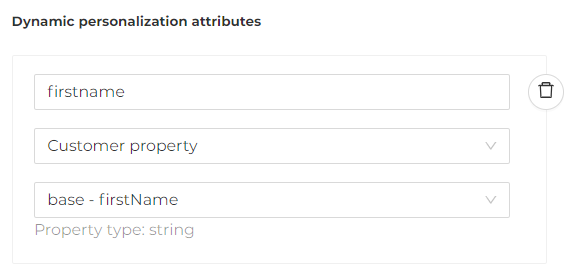
The value entered in the first line (firstname) is case-sensitive, meaning it must match the case of the dynamic field in the message content.
Considering the example above, the dynamic field in the template will be:${firstname}$
In addition, it is possible to specify:
- the REMOVING EVENT, which is the event that will remove the contact from the automation if it occurs.
- the DEMOGRAPHIC CONDITIONS FOR REMOVAL, which are one or more demographic conditions that will remove the contact from the automation if they occur.
An update to the user's profile is required to trigger the specified removal condition.
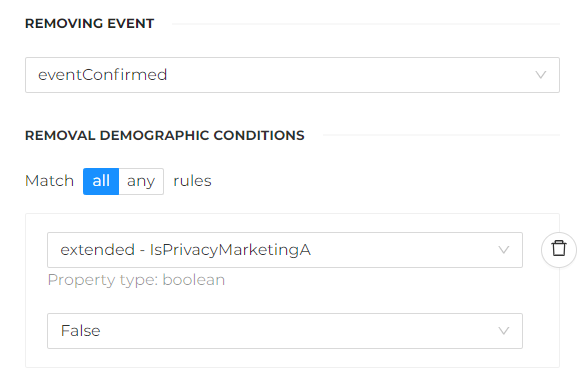
Removal conditions are in OR. If both are specified (both event and demographic condition), it is sufficient for one to occur for the contact to be removed from the automation.
At the end, click the Apply button to save the changes.