Creating a new automation
An automation consists of a combination of steps represented in a flowchart.
In the Automations > Marketing Automation > Create area, it is possible to create a new automation starting from:
- Preconfigured templates
- Scratch
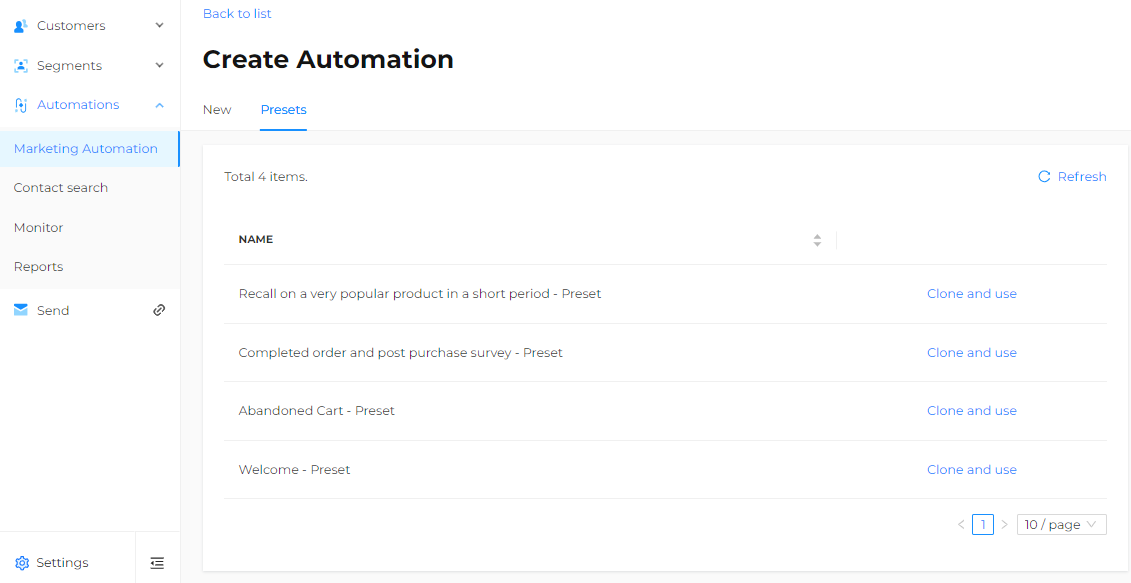
Creating an automation from a preconfigured flow
There are four templates available on the platform:
- Recall on a very popular product in a short period to target contacts who repeatedly view the same product or service on the e-commerce site but do not complete a purchase.
- Completed order and post-purchase survey to thank customers and ask for their feedback on the purchased product, their shopping experience, any specific preferences, and gather information for a personalized follow-up.
- Abandoned Cart to remind contacts of the item left in their cart and keep their interest alive.
- Welcome to greet new subscribers, possibly providing additional information or a discount code after they sign up for the newsletter.
Once a template is chosen, click Clone and Use to have a ready-to-use cloned template, which can then be personalized by editing the various steps.

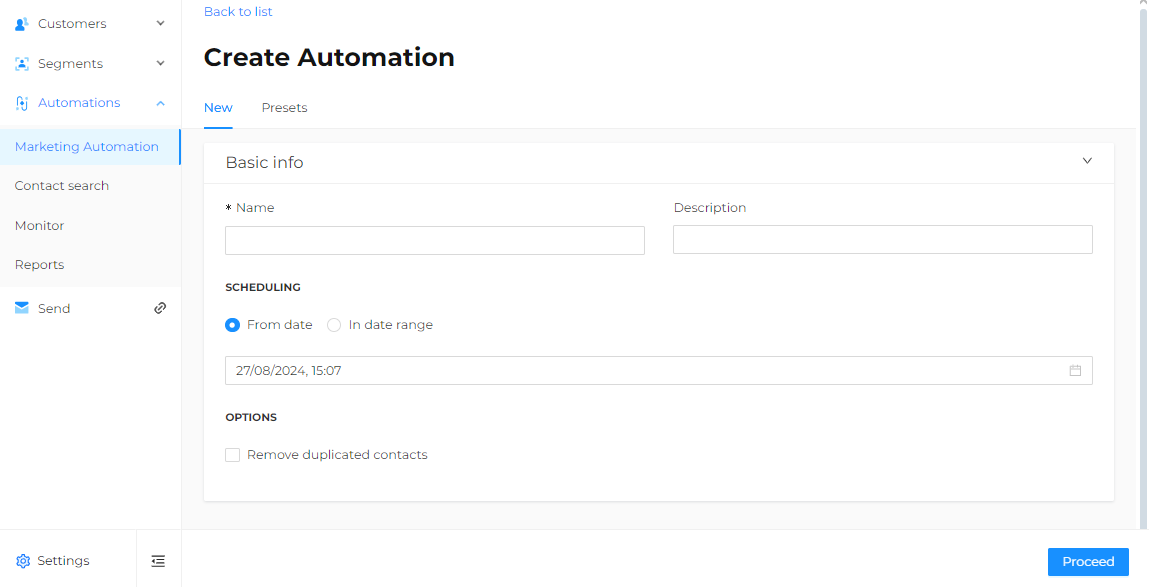
Creating an automation from scratch
When creating a new automation from a blank canvas, it is necessary to:
- Choose a name that makes it recognizable for future searches.
- Set the schedule, which can be based on a specific start time or within a date range.
- Decide whether to prevent new contacts, duplicates of already existing ones, from entering.
These settings can be modified at any point during the automation creation process by clicking the Settings button.

Click Proceed to start creating the automation.
At this point, it will be necessary to insert the various steps that will constitute the flowchart:
- Source Step: this is always the first step of an automation.
The source is enabled by default to receive contacts from the segmentation module.
To activate a real-time source, refer to the next chapter. - Action Step: this is used to configure and trigger an activity that is sent to an external system, such as the Send module for sending emails and/or SMS, a webhook, or to insert a Tag.
- Check Step: this waits for a specific time interval to pass before checking whether a certain condition has occurred or immediately reacts to a specific event.
- Delay Step: this waits for the set time period before proceeding to the next step.
- Split Step: this allows contacts to be randomly divided between two branches in configurable percentages.
- End Step: this is used to complete an automation or a path.
There are no limits to the number of steps in an automation.
It is important to always click the Apply button for each step to save changes.
While creating the automation, it is always possible to:
- Add additional steps to those configured by clicking the "+" icon.
- Delete a step by selecting it and clicking the trash can icon located at the top right of the step's panel.
- Edit an existing step by clicking on the panel of the step you wish to modify.
The automation can be saved as a Draft to resume work later or as Active if completed. In this case, it can have the status Running if the start date has already passed, or Ready if the start date is in the future.
If, during the construction of the automation, any step lacks required information (e.g., an empty tag field), it will not be possible to save and activate the automation, but it can only be saved as a draft.